How To Fix A Squeaky Floor (Without Lifting The Boards)
 By Lisa Ben
·
October 28, 2026
·
10 min read

Every old house has one. Ours lives on the landing, exactly halfway between the bed and the bathroom, and it announces every 3am trip to the whole house like a burglar alarm made of oak. For a year I stepped around it. Then I fixed it in about twenty minutes, felt slightly annoyed it had taken me a year to bother, and went hunting for the others.
A squeak is almost never the wood itself complaining. It is movement. Two surfaces that should be locked together are shifting by a hair as you step, and the noise is them rubbing. Nearly every squeak I have chased down comes back to one of three causes: a board rubbing against a nail that has worked a little loose over the years, a board flexing as you cross it because there is a small gap between the underside of the floor and the joist below, or a subfloor panel moving on its joists as a sheet. Different cause, different fix, which is why the finding-out part matters more than the tools.
The good news: all three can usually be silenced from the surface or from the room below, with the boards staying exactly where they are. Work through the list in order, least fuss first, and stop at whichever fix kills your squeak. Most floors give up at step one or two.
First, find the squeak properly
Do this when the house is quiet. Walk the floor slowly in socks, shifting your weight from heel to toe on each board, and when a spot talks back, stick a cross of painter's tape on it. Number the crosses if you find more than one, because by the third squeak you will swear they have moved. Then stand back and look at the pattern your tape is making, because the pattern is the diagnosis.
Squeaks that run in a straight line are usually sitting along a joist line, where nails or screws have loosened in a row. A single noisy spot points to one loose board or one tired nail. A broad, creaky area that murmurs rather than squeaks is more likely the subfloor sheet moving, which pushes you further down the fix list. If you have access from below and a willing helper, send them downstairs while you walk. Watching a board lift a whisper off its joist tells you more in ten seconds than an hour of guessing from above.
Fix 1: Lubricate the joint
For a squeak where one board rubs its neighbour, the simplest answer is to stop the rubbing. Sprinkle powdered graphite or plain talc along the gap between the boards, work it down into the joint with an old credit card or a stiff brush, then walk the spot over and over so your weight pumps the powder deeper. Wipe the excess off the surface, because graphite will track grey footprints across the room if you leave it sitting there.
Let me be honest about this one, because it is the fix the internet oversells. It is mild and it is often temporary. On a single board joint it can last months, sometimes longer, and it costs almost nothing and risks nothing, which makes it the right first try, renters included. But powder does not pull anything tight. If the squeak is back within the week, the board is genuinely moving, and you need a fix that holds it down rather than one that greases it. Avoid oil-based sprays here: they can stain wood, swell the fibres and attract dust into the joint.
Fix 2: Shim the gap from below
If you can get under the floor, through a basement or a crawl space, and your helper confirmed a board or subfloor lifting off a joist, shimming is the cleanest fix of the lot. Find the gap from below while someone walks above you. Smear a little wood glue on a thin wooden shim, slide it into the gap between the top of the joist and the underside of the subfloor, and tap it home gently until it is snug.
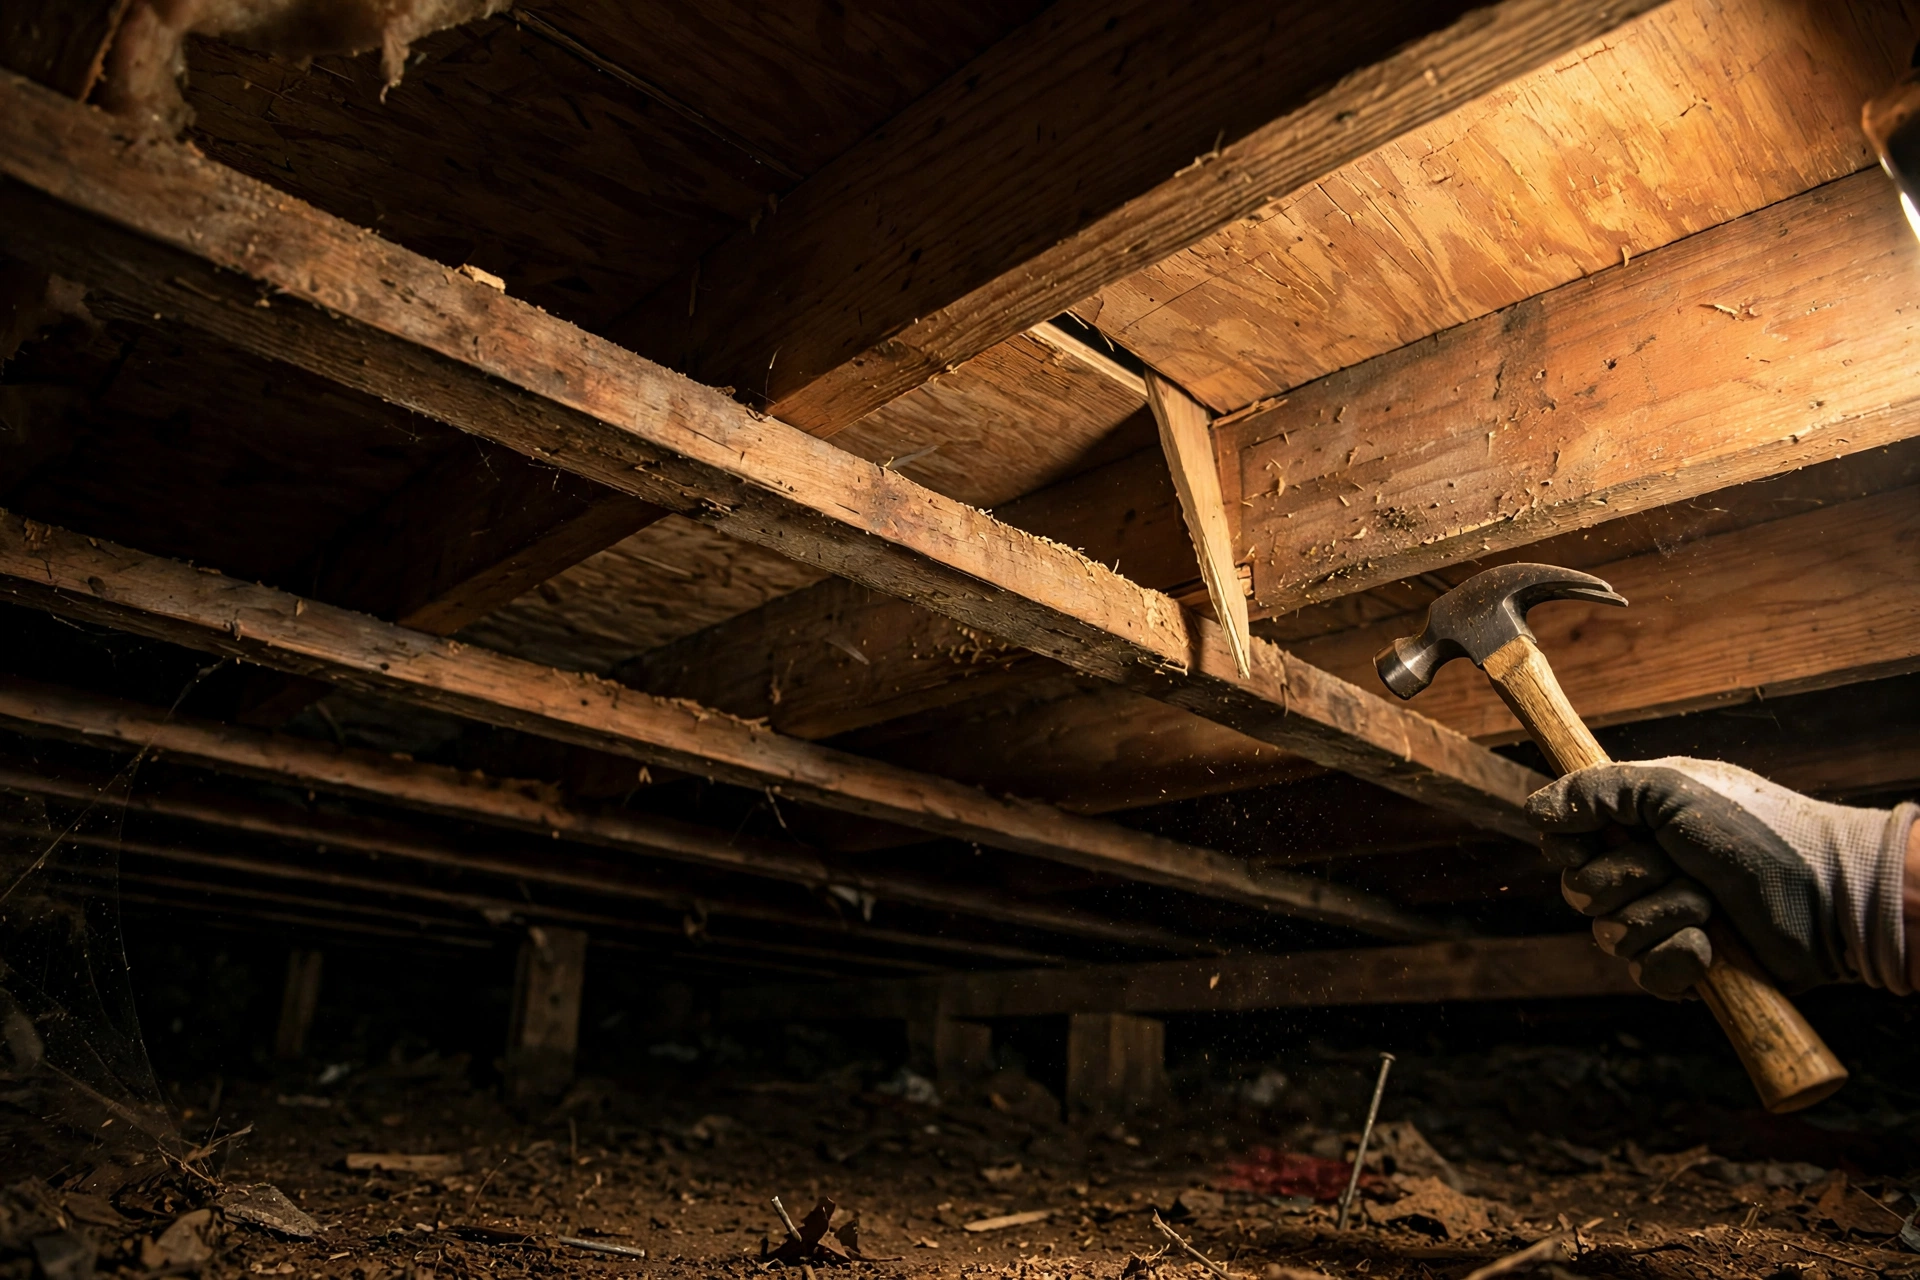
Gentle is the whole game. A shim is a wedge, and wedges are powerful. Hammer it like you mean it and you can push the floor up into a hump or crack a board. Snug, not forced. Once it is seated, trim it flush with the joist face so it does not get knocked out later, and check the floor above by ear. A run of squeak along a joist may need two or three shims spread along it rather than one heroic shim in the middle. No access below? Skip this and fix from above instead. The boards never need to come up either way.
Fix 3: Screw the floor down from above
This is the fix that ends most squeaks for good, because it does the one thing powder and shims cannot do everywhere: it pulls the floor tight against the joist and keeps it there. Start by finding the joist under your tape cross. A stud finder dragged slowly across the boards usually locates it; so does following the existing line of nail heads, or measuring from a joist you can already see in the room below. Mark the joist line with pencil or a strip of tape before any drilling happens.
On carpeted floors, this is what break-off screw kits exist for. They come with a simple depth guide that stands over the spot and keeps the screw centred and upright while you drive it, straight through the carpet, the subfloor and into the joist, without snagging the carpet pile. The screw head is made to snap off just below the surface once it bites, leaving nothing poking up through the carpet and nothing to stub a toe on. You feel the snap, fluff the pile back over the spot, and the fix vanishes. On bare boards the same idea works with ordinary screws: drill a pilot hole first so the board cannot split, countersink slightly, drive the screw snug, then fill the little well with a matching wax filler stick and rub it level. It disappears into the grain better than you would expect.

Work one screw at a time and test-walk between them. Often the first screw silences the spot and the second one you were about to add is not needed. Screws are cheap; holes in a nice floor are forever, so let each one earn its place.
What it costs in time and money: the lubricant fix is loose change and ten minutes. Shims and screws are a small bag of hardware. The break-off screw kit is the one pricier item on this list, and it covers a whole house of squeaks, not just the one spot. Reckon on under an hour per squeak, most of it spent finding and marking rather than fixing.
Fix 4: Re-nail beside the old nail
Sometimes the culprit is one visible nail that has ridden up over the years, with the board lifting around it as you step. Rather than pulling it out, which usually loosens the board further, drive a ring-shank nail at a slight angle right beside it. The rings along the shank grip the wood like threads, and the angle wedges the board down instead of letting it ride straight back up the way the old smooth nail did. Punch the head just below the surface and fill the dimple. If the old nail is standing properly proud of the board, punch that one down below the surface too, but leave it in place. It is still holding something.
Fix 5: Support it from below with blocking or a brace
The last resort is for the stubborn cases: a squeak under tile or laminate you cannot reach from above, or a subfloor that flexes in the span between two joists rather than on one. From below, fit a short length of timber as blocking between the two joists directly under the noisy spot, glued along its top edge and screwed into both joists, so the subfloor gains a firm edge to rest on. A metal joist brace does a similar job with less carpentry: it spans between joists and pulls the subfloor down snugly against them. A bead of construction adhesive along the joist top, where you can reach a gap, also helps, because half of these noises are just wood kissing wood. This is the most involved fix here and it is still an afternoon's work at worst. The boards stay down throughout.
When to stop and call a professional
Everything above is about noise. The moment your floor stops being a noise problem and starts being a structure problem, put the drill down. Call someone in if the floor sags or feels spongy across a whole area, if the whole room bounces when you cross it rather than one board dipping, or if you find water staining, soft or crumbly wood, a musty smell from below, or joists with cracks or insect damage. Those point at leaks, rot or worse, and silencing the squeak would only hide the symptom.
One caution applies to every screw in this guide. Floors hide pipes and cables, often running right along joists. Before you drive anything, look at the underside from below wherever you can, keep screws a sensible length for the job, and think twice near bathrooms and kitchens where plumbing crowds in. If you cannot see what is under a spot and cannot verify it any other way, do not guess with a drill.
The two mistakes that make it worse
Screwing blind. The most common failure is drilling into a joist line you have not actually found. A screw that misses the joist bites into thin subfloor edge or nothing at all, holds nothing, and leaves you with a row of pointless holes and a still-squeaky floor. Find the joist twice, mark it once, then drill.
Over-tightening. The second is cranking screws down with everything the drill has. A board pulled too hard can bow, cup or split along the grain, and a split board is a much bigger job than a squeaky one. Snug and silent is the finish line. When the squeak stops, so do you.
Questions people ask me about squeaky floors
Will graphite or talc damage my floor?
On a sealed wooden floor, no. Both are dry powders that sit in the joint rather than soaking in. Wipe every trace off the surface so graphite does not track across the room on socks, and skip oil-based sprays entirely, since those can stain and swell the wood.
The squeak is under carpet. How do I find the joist?
A stud finder works through carpet better than most people expect if you go slowly and press it flat. You can also find one joist, from a wall or a downstairs ceiling line, and measure from it, because joists run at regular spacing. This is exactly the job break-off screw kits were designed for.
My squeak came back after a few months. Why?
Usually because the movement got bigger than the fix. Powder wears out of a joint that is still flexing, so move one step up the list, from lubricant to screws or shims. Squeaks that appear when the heating comes on are seasonal: dry winter air shrinks the wood and opens the gaps.
Can I fix a squeak under laminate or tile?
Not from above, without lifting the floor, so work from below instead: shims, adhesive and blocking all reach the underside of the subfloor. If there is no access from below either, the honest answer is that the squeak waits until the floor is next lifted. A rug softens the noise in the meantime. It does not fix it.
Find it first, then climb the ladder: powder, shims, screws, nails, bracing. Most squeaks surrender on the first two rungs. Tell me in the comments where yours lives, landing, hallway or that one traitor stair, and which fix finally shut it up.
Lisa Ben
Lisa paints, builds, thrifts and rearranges her way through one very patient house, then writes down everything she learns here on Wazala. New projects land every Tuesday, Thursday and Saturday, and the Sunday Letter rounds them up once a week.
You might also like

How To Stop A Door From Slamming In The Wind
Loose hinges, tired closers and one felt pad: the small fixes that end the bang.
Read more →
Is That Crack In The Wall Serious? A Calm Guide
Hairline or worrying? How to read a crack, watch it, and know when to call in help.
Read more →
Small Living Room Layouts: 6 Arrangements For Tight Spaces
Six ways to arrange the furniture when the room is small and the sofa is not.
Read more →