9 Small Kitchen Ideas That Add Real Storage
 By Lisa Ben
·
October 28, 2026
·
10 min read
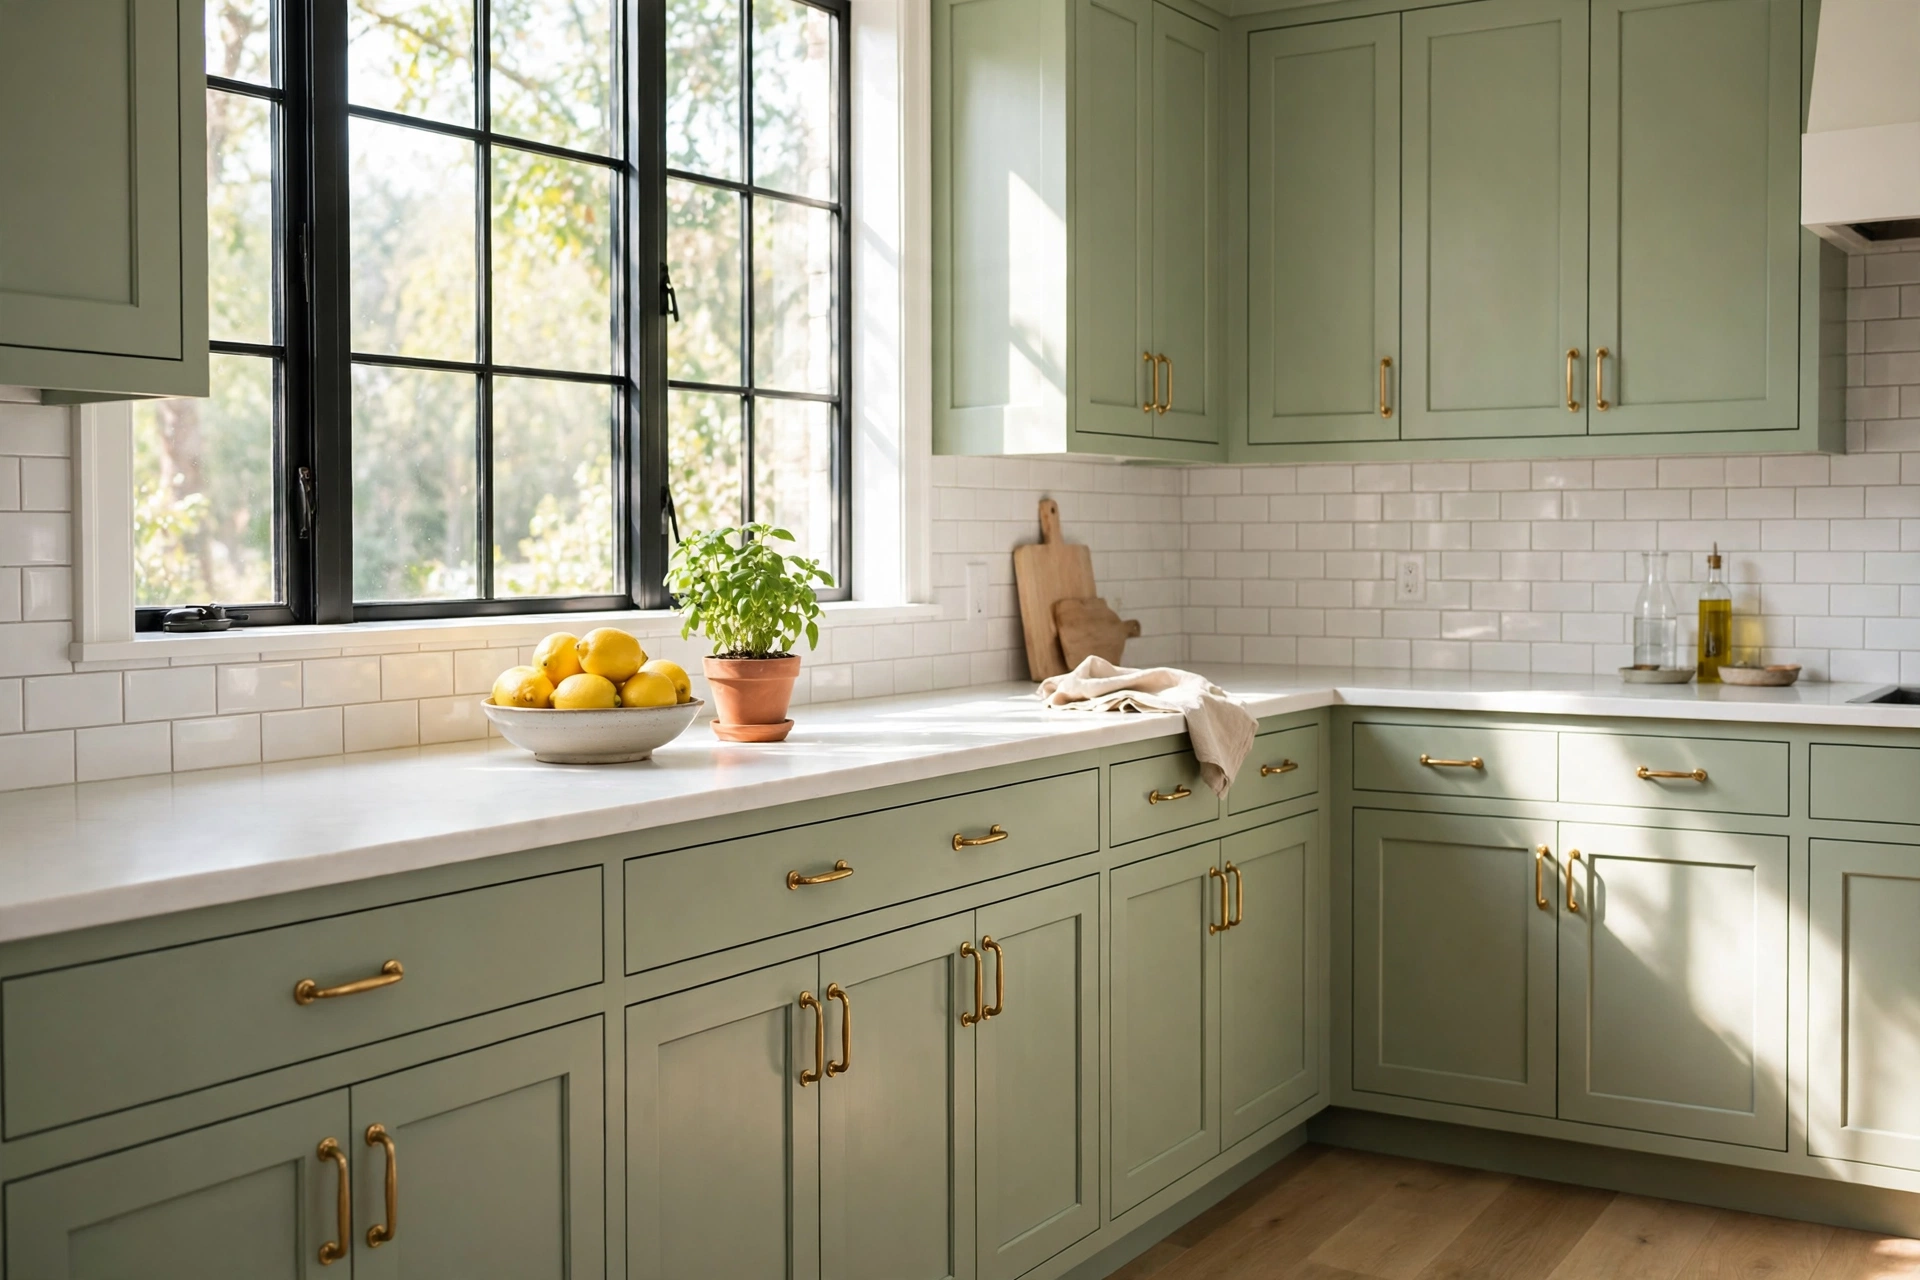
Every small kitchen owner I know says the same sentence: "I need more cabinets." I said it too, standing in my own kitchen with a baking tray in my hand and nowhere to put it. Then I spent a Saturday actually looking at the room instead of wishing it bigger, and I changed my mind. A small kitchen rarely needs more cabinets. It needs its wasted gaps put to work.
They are everywhere once you start hunting. The slot beside the fridge. The top half of every cupboard, empty air above a single layer of mugs. The backs of doors. The corner you gave up on years ago. None of the nine ideas below adds a single cabinet, and most of them cost little or nothing. Together they gave me back a whole cupboard's worth of space, which in a small kitchen feels like an extension.
Start by emptying one cupboard
Before you buy anything, do the unglamorous bit. Take one cupboard, the worst one, and empty it onto the worktop. Then be honest about what earns its place. In mine I found three colanders, a bread maker last used two Christmases ago, and a fondue set I have no memory of buying. Storage problems are often just stuff problems wearing a disguise. Put back only what you have used in the last few months, find other homes for the rest, and then look at what is left. The ideas below work twice as well on a cupboard that has already been edited, because you are organising what you actually cook with, not building shelving for a fondue set.
1. Put the gap beside the fridge to work
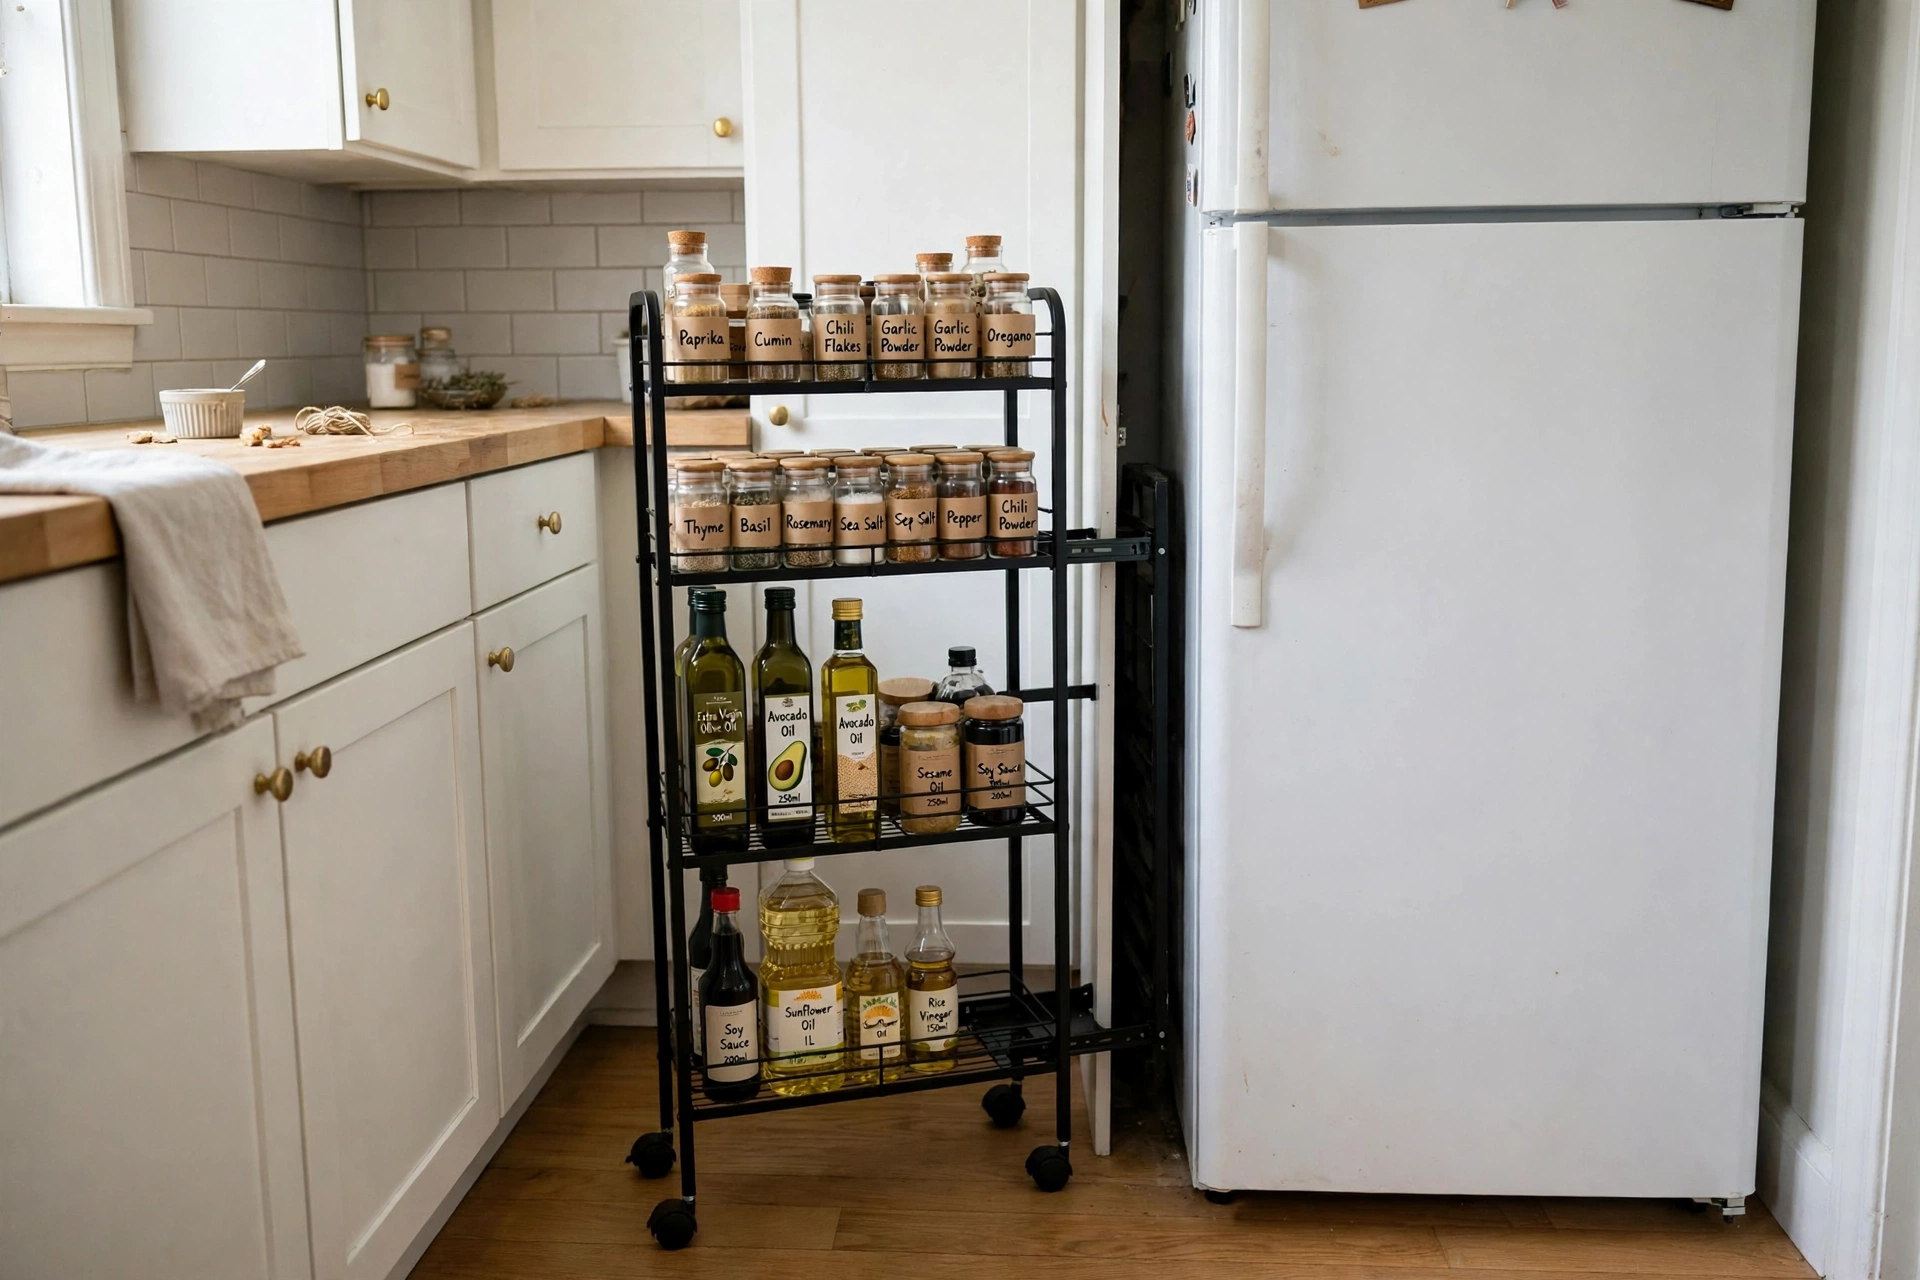
Almost every kitchen has a useless slot between the fridge and the wall or the next cabinet, too narrow for a cupboard and too deep to ignore. Measure yours honestly before anything else: most come in somewhere between 10 and 20 cm, and that number decides what fits. A slim rolling trolley made for exactly this gap slides in and out like a drawer standing up, and it is perfect for the tall thin things that waste shelf space elsewhere: oil and vinegar bottles, spice jars, foil and wrap, a row of tins. If you are handy, the same trick works as a tall narrow pull-out built from a spare shelf on small castors, with a batten across the front to pull it by. Either way, that dead slot quietly holds a whole shelf of ingredients.
2. Use the inside of the cupboard doors
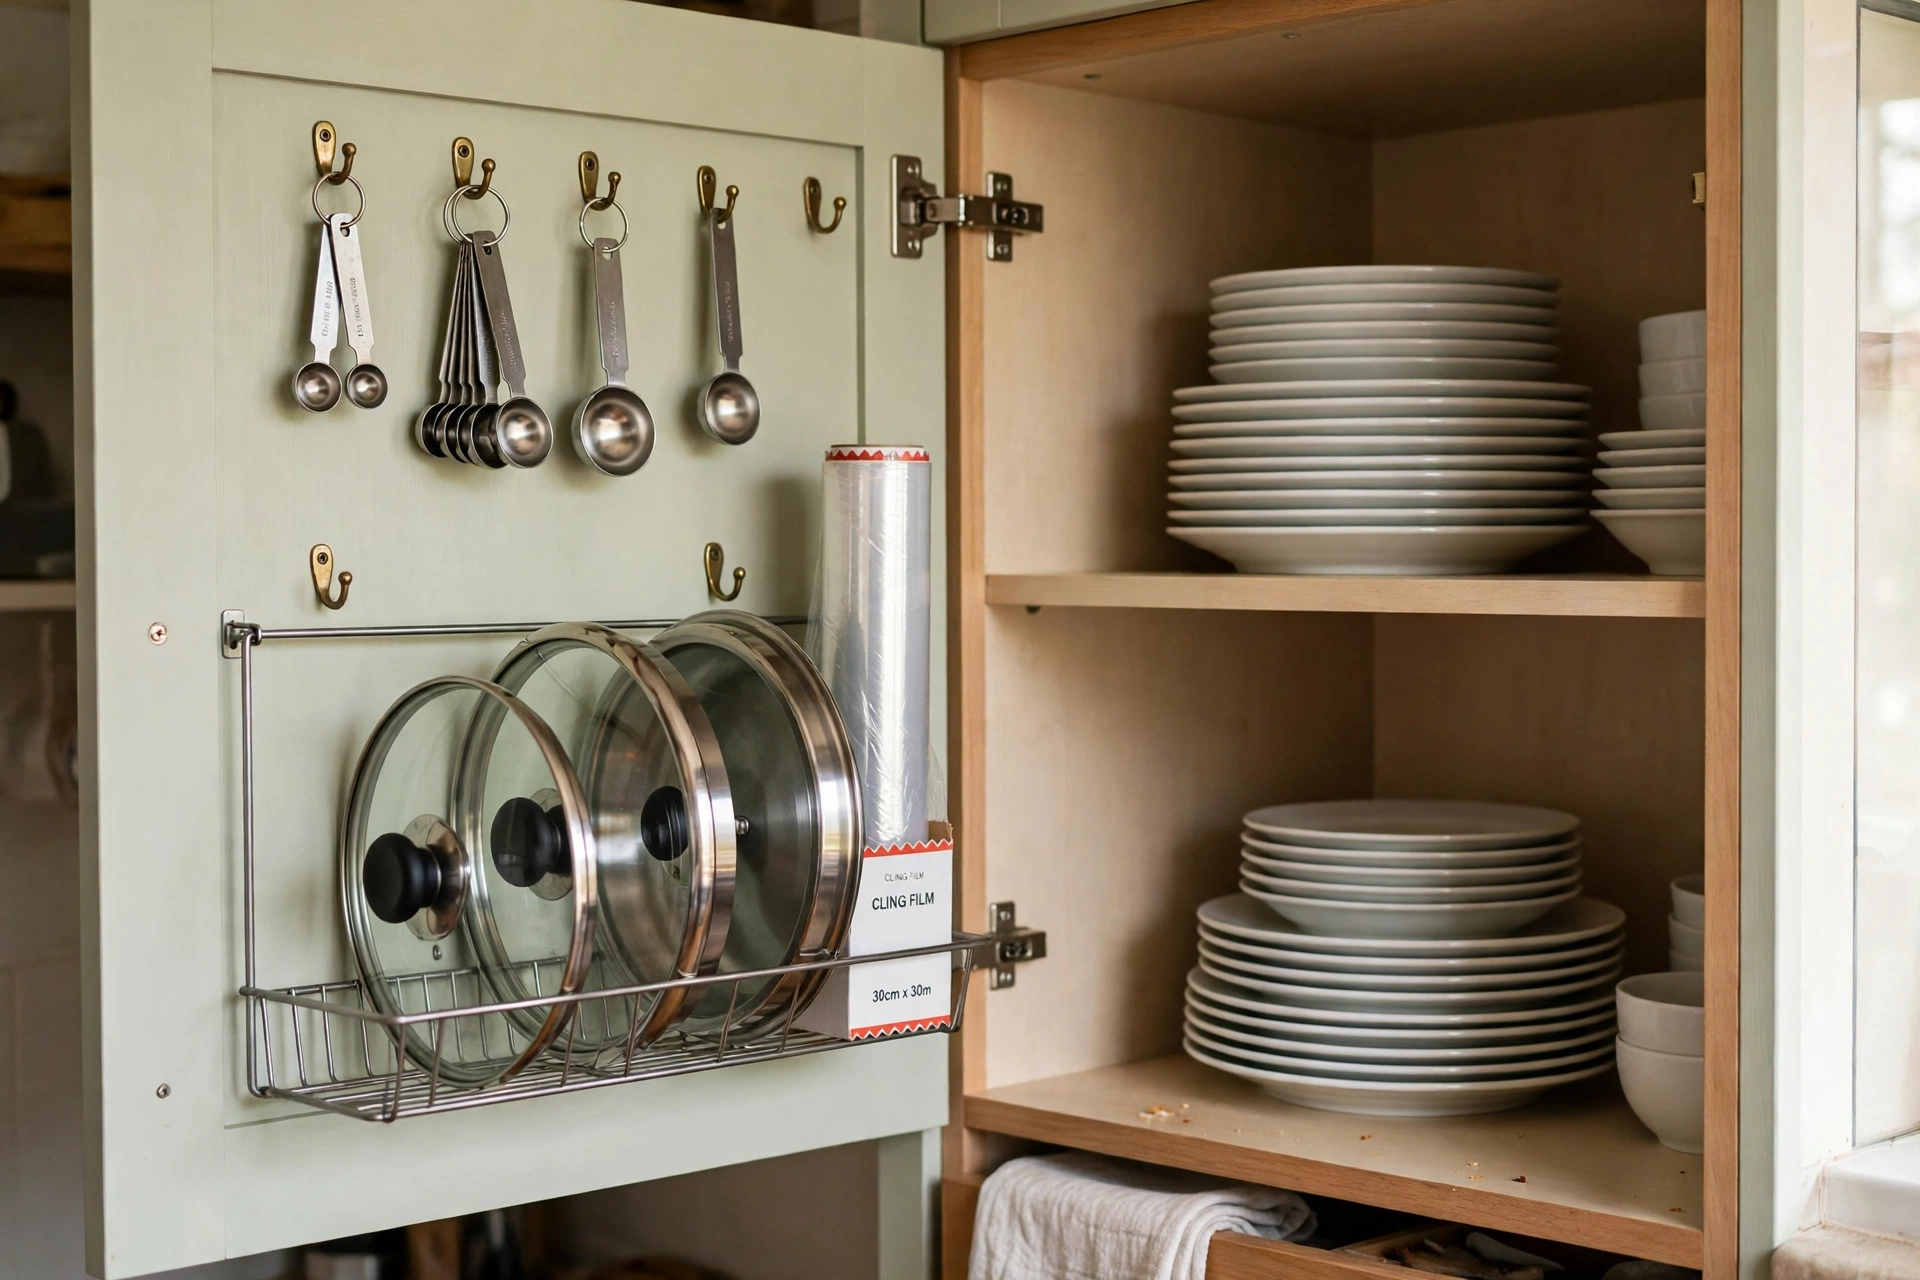
The inside face of a cupboard door is storage space you already own and probably ignore. A few small hooks or a slim rack screwed or stuck to it will hold pan lids, rolls of foil and baking paper, measuring spoons, even the oven gloves that currently live in a heap. Lids are the big win: they are awkward in a cupboard, forever sliding off their pans, and on a door they stand in a neat row where you can see them. One warning from experience. Whatever you fit, add the thickness of the rack and its contents to your measurements and check the door still closes properly against the hinge side and any shelf inside. A rack that stops the door shutting is worse than no rack.
3. Hang a rail where the wall is bare
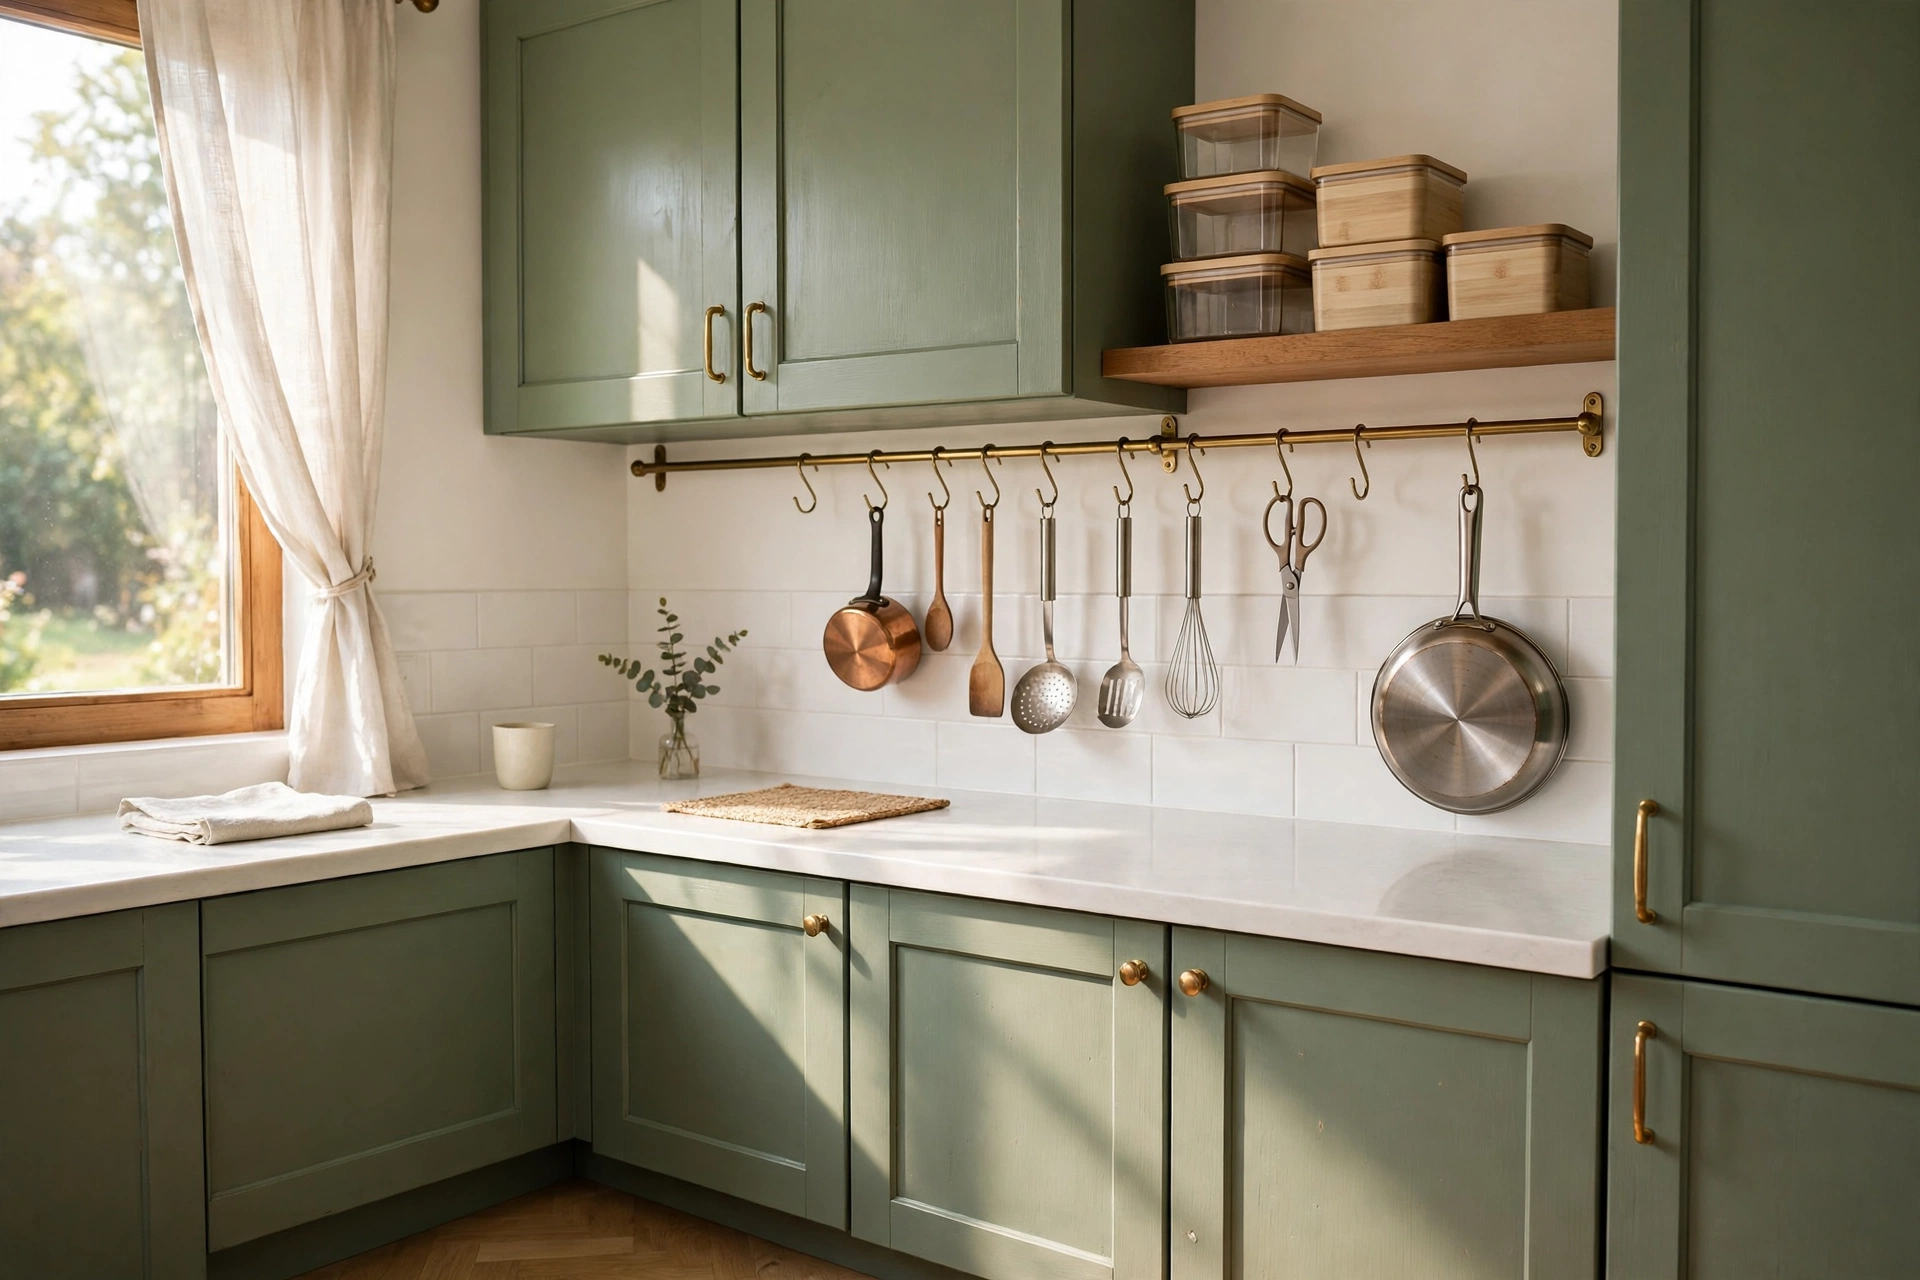
The stretch of wall under the wall cabinets, or along a plain bit of splashback, is prime hanging territory. Fit a simple rail with S-hooks and the utensils and pans you reach for daily can live there: ladle, spatula, whisk, the frying pan that never gets a day off. It frees a drawer and a worktop corner, and cooking gets faster because everything is in sight and in reach. Choose the spot with a bit of care, though. Keep the rail off the wall behind the patch of worktop where you actually chop and roll, or you will be knocking elbows and sleeves against hanging pans every time you cook. Beside the hob, yes. Directly over your main prep space, no.
4. Rescue the dead corner
The corner cupboard is where small kitchens go to lose things. You know it is in there, you just cannot reach it without kneeling and emptying half the cupboard onto the floor. The fix that worked for me is not fancy: a lazy susan turntable, or two sturdy crates stacked one on the other. The turntable brings the back of the cupboard to you with one spin, which makes it ideal for sauces, jars and tins. Crates work better for heavy things like the slow cooker or a stack of baking tins, and the top one can slide out like a drawer. Either way you get the corner back, and you stop buying duplicate mustard because the first jar was hiding in the dark.
5. Double your shelves with risers
Open almost any cupboard and you will find the same waste: a single layer of things at the bottom and a tall column of empty air above them, because the shelf was set for the tallest item years ago. A simple shelf riser, the little platform shelf that stands inside a cupboard, cuts that wasted height in two. Mugs below, glasses above. Tins on two levels instead of one long row you cannot see the back of. It is the cheapest idea on this list and, shelf for shelf, the one that gives back the most space. Measure the inside height of the cupboard and the height of what you want to stand underneath before you buy, because risers come in fixed heights and the wrong one just moves the problem.
6. Take the shelf up high
The band of wall above a kitchen door or window is dead space in most homes, and it is exactly the right size for one long shelf. Up there you store the big, light, rarely used things that eat cupboards: the turkey roasting tin, the party platter, the blender box, the slow cooker you haul out in winter. None of it is needed weekly, so the step stool trip is no hardship, and moving it out frees the easy cupboards for daily cooking. Two honest notes. Fix the shelf into studs or solid wall with proper brackets, because a loaded shelf is heavy. And keep it to bulky-but-light: this is not the place for your cast iron or the full set of pans.
7. Put the knives on a magnetic strip
A knife block takes up a worktop corner and a knife drawer is a rummage with sharp edges. A magnetic strip on the wall holds the whole set in one flat line, visible, dry and out of the way, and it hands you back most of a drawer for the utensils that moved off the rail. Fit it somewhere sensible: on the wall near your prep area but high and clear of little hands, because a strip of exposed blades within reach of children is a bad idea however tidy it looks. If small children are in and out of your kitchen all day, skip this one or mount the strip inside a tall cupboard door instead, where idea two already proved doors earn their keep.
8. Hang the spray bottles under the sink
The cupboard under the sink is usually a jumble of bottles standing on its floor among the pipes. Fit a short tension rod across the inside, near the top, and hang your spray bottles from it by their trigger handles. They dangle in a tidy row, every label readable, and the floor of the cupboard is suddenly free for the washing-up bowl, the bin bags and the bucket. It costs a few pounds, takes ten minutes, and uses a rod you may already own from a shower curtain. Just keep the bottles a hand's width clear of anything stored below, so a drip from a trigger never lands on cloths or sponges.
9. Decant into squares, not rounds
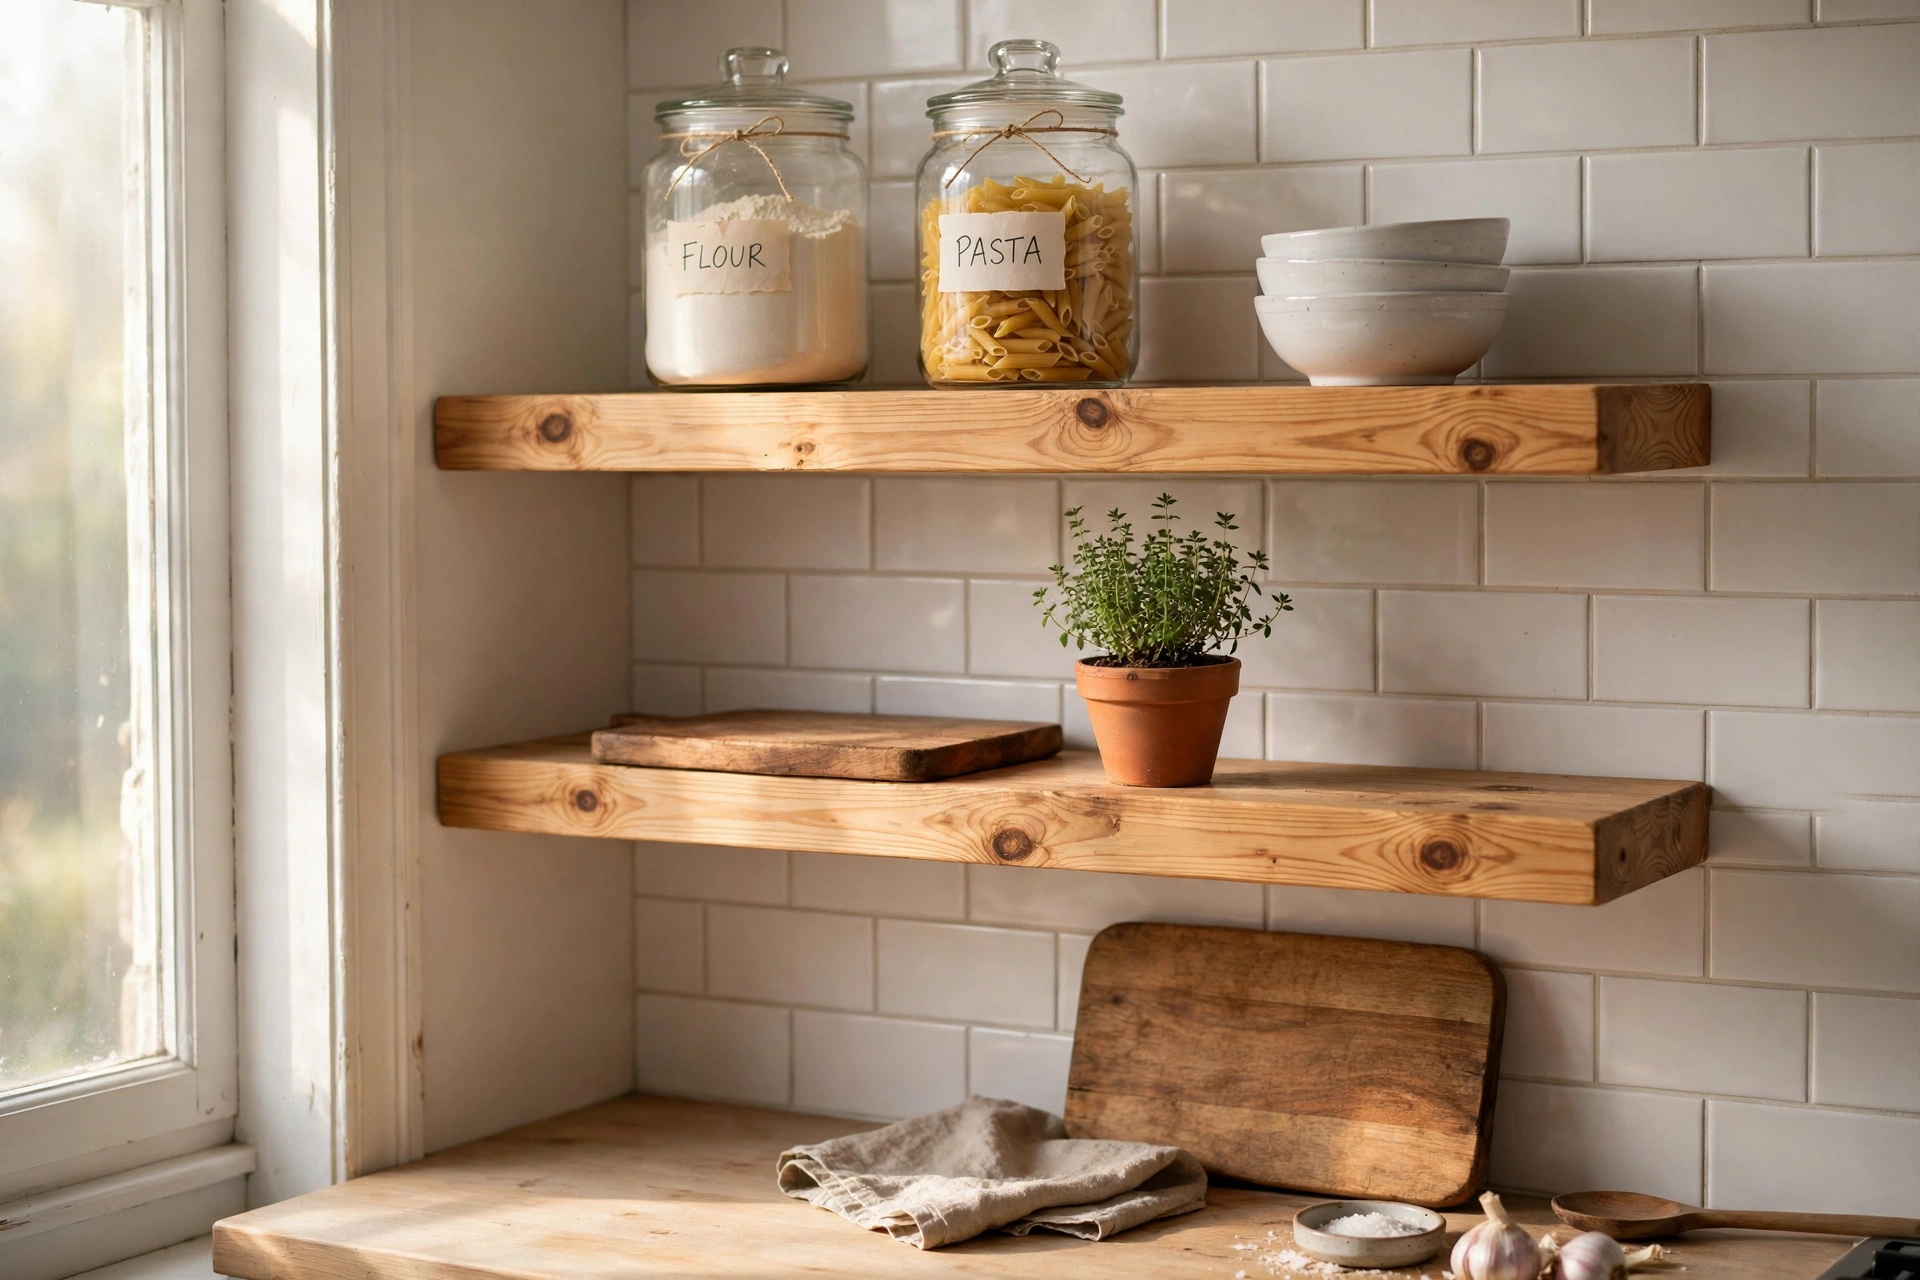
Flour, rice, pasta and lentils arrive in bags and boxes of every shape, and they stack like rubble. Moving them into containers helps, but the shape matters more than people realise. Round jars in a square cupboard waste every corner: line a shelf with round tubs and a good slice of the shelf is just air between them. Square or rectangular containers sit flush against each other and use the whole shelf, and they stack safely two high. Label each one with what is inside and the date you filled it, on the front where you can read it without lifting it down. The plain truth is that decanting only works if you keep the labels honest; three identical jars of mystery white powder will slow you down more than the bags ever did.
The order that works: do the free rearrangements first (the declutter, the corner, the under-sink rod, the risers from a shelf you already have), live with them for a fortnight, and only then buy for whatever gap is genuinely left. Half the organisers I have owned were solutions to problems that rearranged themselves away.
Three mistakes that eat the space back
- Buying organisers before measuring. Gaps, shelf heights and door swings are all different. A trolley or riser bought on a guess usually almost fits, which is worse than not fitting at all.
- Storing daily things up high. The high shelf is for the roasting tin, not the cereal. If you need a stool every morning, the system will collapse within a week and everything drifts back to the worktop.
- Pretty containers, no labels. Matching jars with no dates or names look lovely in a photo and cause real waste in a kitchen. Label as you fill, every time.
Questions I get asked about small kitchen storage
I rent. Which of these can I do without drilling?
More than you would think. The fridge-gap trolley, shelf risers, the lazy susan and square containers need no fixing at all. The under-sink tension rod presses into place. Door racks come in over-the-door and strong adhesive versions, though I would test adhesive ones with light lids first. Save the rail, the high shelf and the magnetic strip for a place you own, or ask your landlord: a few neat screw holes in a splashback are often fine, but ask.
My fridge gap is only 8 cm. Is it still usable?
Just about, but not for a trolley. At 8 cm you are looking at a single flat layer: a slim rack on castors for wrap and foil boxes stood on end, or nothing at all. Measure before you order anything, and be honest if the answer is that the gap is best left empty rather than crammed with something that jams halfway out.
How do I stop a lazy susan wasting the corners of the cupboard?
You cannot fully; a round turntable in a square cupboard always leaves the corners. The trick is to size it well and accept the trade. Fill the corners with the flat, stable things you rarely move, like a spare chopping board stood upright or the rarely used baking tray, and let the turntable carry the jars you reach for daily.
Do I really need to decant everything into containers?
No, and I do not. Decant the things you buy in bulk and use weekly: flour, rice, pasta, sugar, lentils. Leave the small, occasional things in their packets in one basket or crate so they travel together. Half-decanted is fine. It is a system for cooking faster, not a photo shoot.
Start with one gap this weekend. The fridge slot or the under-sink cupboard will take you half an hour, and the small daily pleasure of a drawer that finally closes is out of all proportion to the effort. Tell me in the comments which gap in your kitchen is doing nothing, and I will help you find its job.
Lisa Ben
Lisa paints, builds, thrifts and rearranges her way through one very patient house, then writes down everything she learns here on Wazala. Small rooms are her favourite puzzle. New projects land every Tuesday, Thursday and Saturday, and the Sunday Letter rounds them up once a week.
You might also like
How To Organize A Small Pantry When The Shelves Are Too Deep
Deep shelves swallow things whole. The bins, labels and front-to-back system that brings everything back into reach.
Read more →
How To Paint Kitchen Cabinets And Have The Finish Last
The full cabinet process: degreasing, priming, and the drying times nobody tells you.
Read more →
Small Closet, Sorted: The Two-Hour Edit
The same trick, one room over: edit first, then make every centimetre of a small closet work.
Read more →