Peel And Stick Wallpaper: An Honest Test In A Rental Bathroom
 By Lisa Ben
·
October 9, 2026
·
10 min read
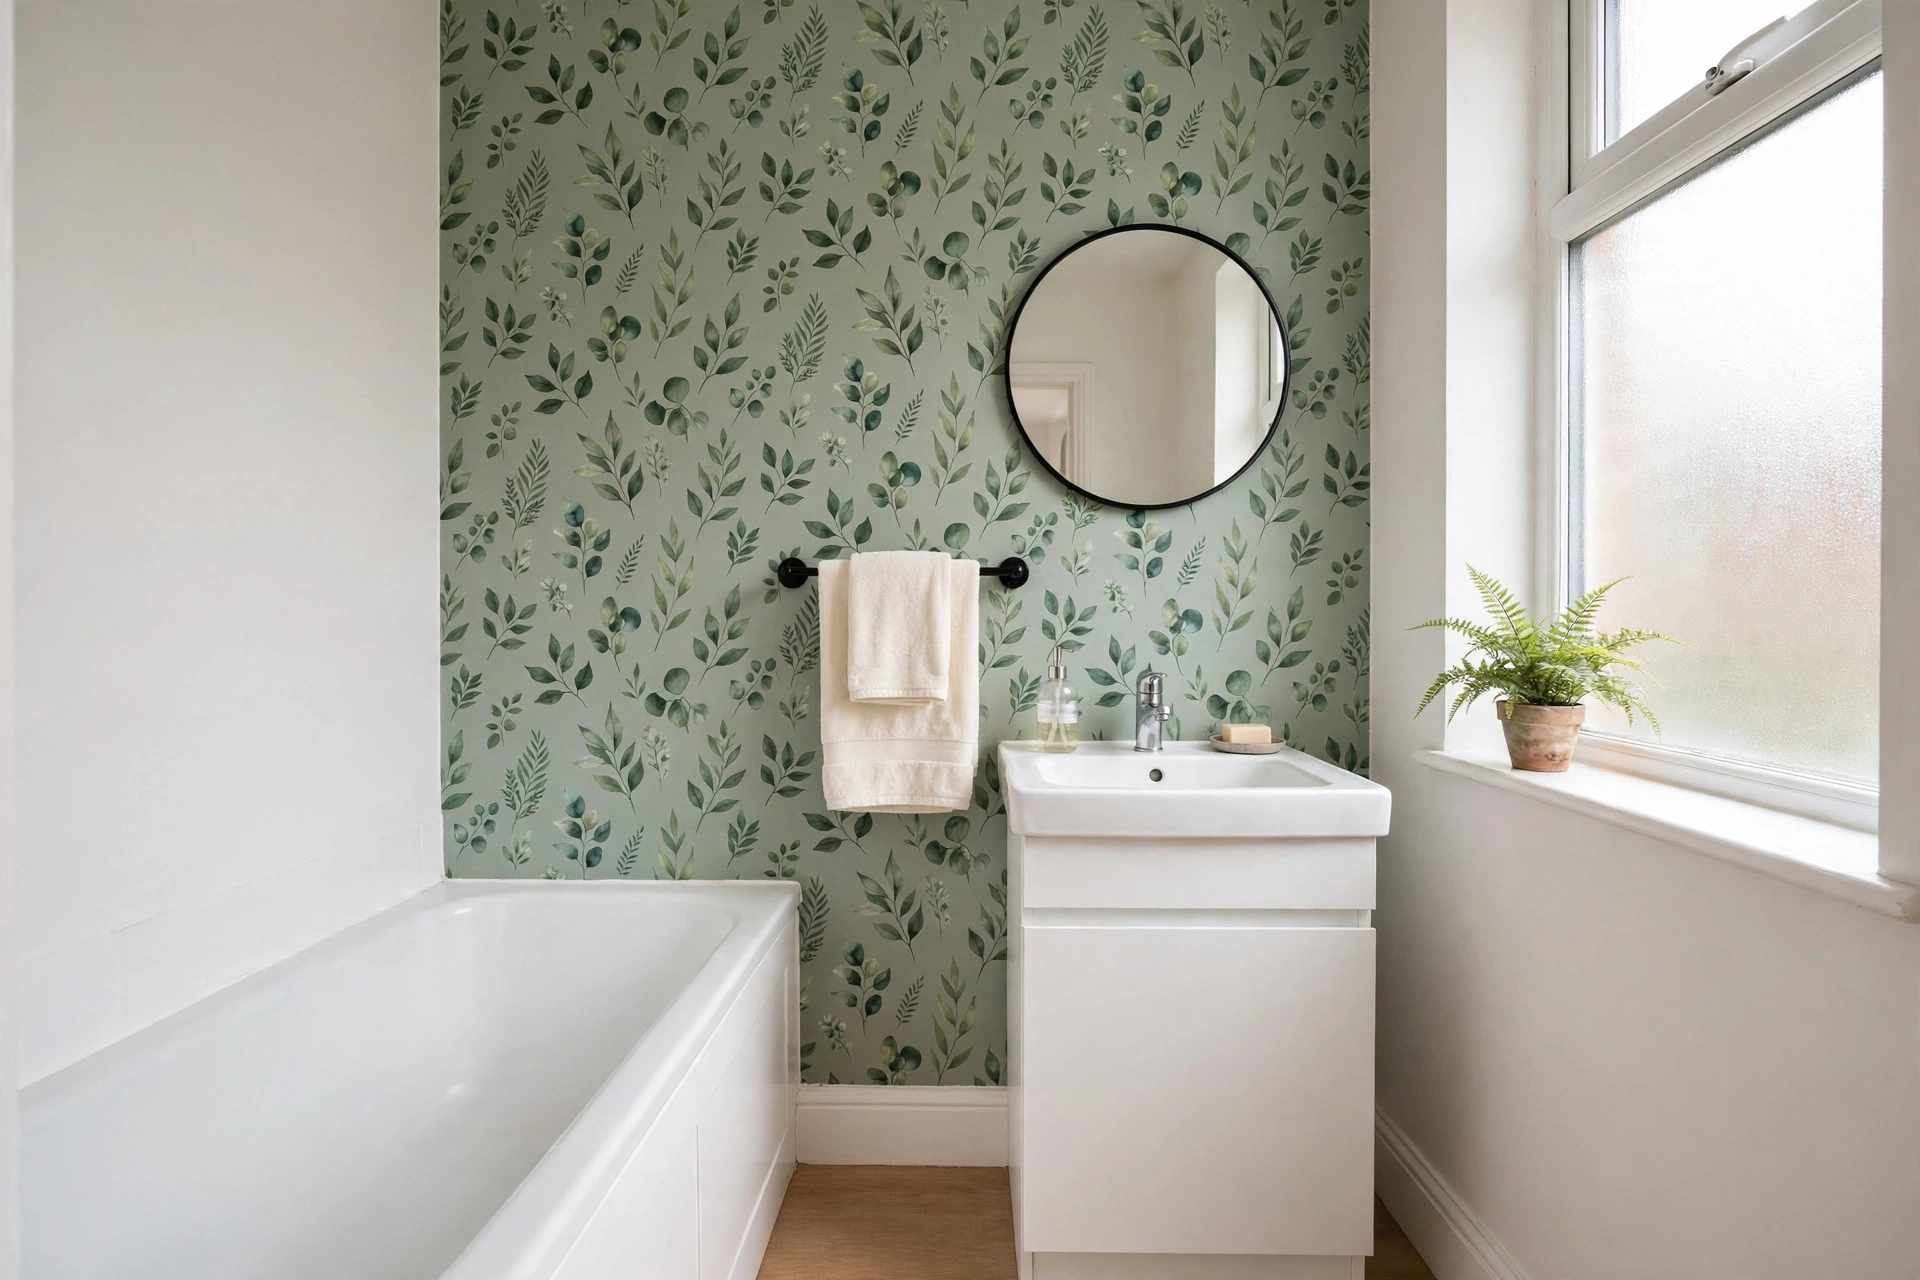
Peel and stick wallpaper makes two promises that renters care about. One: a room that finally looks like yours, without paste, trays of water or a weekend of swearing. Two: when you move out, it peels off like a sticker and your deposit comes home with you. I believed roughly half of that. So I put it to the test in the least forgiving room in our flat, the small rental bathroom, and then I left it there for six weeks of daily showers to see what actually happened.
The paper went up on one wall only, the one behind the basin and mirror, plus a short splashback stretch behind the sink. I kept it well away from the shower itself and anywhere that gets directly sprayed. That placement is the whole secret to this working, and I will keep coming back to it. Below is the honest version: what stuck, what lifted, the mistakes I made, and whether the stuff really came off clean when I tested removal on a hidden patch.
First, the limits of this test
I want to be straight about the sample size before you spend any money. This is one bathroom, roughly two metres by two and a half, one wall, one sort of paper, hung by one person on a Saturday morning. The room has a window I can open and an extractor fan that does an adequate job. Your wall, your humidity and your paper will all be a bit different, and peel and stick papers vary a lot between brands. Mine was a mid-range vinyl-faced one with a leafy pattern, chosen mostly because a busy print hides a multitude of sins. Treat this as a truthful picture of how the material behaves in a real steamy bathroom, not a laboratory result.
Where peel and stick works, and where it really does not
The short version is that this paper is genuinely good on the right wall and a waste of money on the wrong one, and the difference is almost never the paper. It is the surface underneath it.
The walls it likes
Smooth, clean, sound painted walls are its home ground. Plaster or drywall painted in a finish that has been on for a good while, with no flaking, no chalkiness when you rub a hand over it, and no damp patches. Flat, wide tiles can work too if the grout lines are shallow. The wall behind my basin is painted in a washable bathroom paint that went on about a year before I papered it, and the paper grabbed evenly from the first sheet to the last.
The walls it hates
Textured walls are the first problem. Orange-peel texture, woodchip and bumpy old coatings telegraph straight through the paper, and the edges only ever touch the high spots, so they lift within days. Fresh paint is the second, and it caught me out, so learn from my mistake section below. Paint needs weeks to cure fully, not the two days on the tin. Paper stuck over paint that is still curing tends to slide, bubble, or peel the finish away when it comes off. Third is damp. A wall that feels cold and slightly tacky in winter has condensation on it, and nothing removable will stay stuck to that. And keep it out of the direct line of fire: inside a shower enclosure, or on the wall that takes the full blast of steam and spray from a bath, the edges will give up. My splashback stretch sits behind the taps where it catches splashes, not spray, and that distinction turned out to matter.
The renting question: does it actually come off?
Removable turns out to be a spectrum, not a switch. On a sound wall with decent, well-cured paint, my test patch came off cleanly, and I will walk you through that removal later. On chalky, cheap or under-cured paint, the same adhesive can pull the paint off in sheets. The paper is not lying, exactly. It is just assuming your walls are in better shape than some rental walls are.
Which brings me to the landlord rule, and I feel strongly about this one: ask first. A short message is all it takes. Say the paper is removable, say you will test a hidden patch first, and say you will make good any marks at the end. Most landlords, faced with a tenant who has clearly thought about the exit as well as the entrance, say yes. If yours says no, that is the end of the project, because no wallpaper is worth a fight over a tenancy. I also did my test patch behind the bathroom door, where nobody will ever see it, and I would tell you to do the same even with permission. Twenty minutes of patience there can save a deposit-sized argument later.
What you need on the day
- The paper, plus more than the maths says. Pattern matching wastes length on every drop. Order at least one roll beyond your measurement, and keep a spare piece afterwards for repairs.
- Sugar soap, a sponge and two clean cloths for the wash-down and the rinse.
- A plastic smoothing tool, ideally with a felt edge, so you can press hard without scratching the print.
- A sharp craft knife and spare blades. Take more blades than you think. Three went dull on my one small wall.
- A steel ruler or long straight edge for trimming, plus a tape measure and a pencil.
- A spirit level for the plumb line. A phone level app works at a pinch.
- A step stool you can stand on safely, because the top of the wall is where the wobbles happen.
- A hairdryer, not for hanging day, but for removal day and for coaxing one or two edges later.
- A tiny tube of clear adhesive kept in a drawer for the day an edge lifts. It will, and it takes ninety seconds to fix when you are ready for it.
Prep: the boring half hour that decides everything
Peel and stick fails in the prep long before it fails on the wall. Bathroom walls carry an invisible film of shower spray residue, hair products and silicone from sealant, and adhesive hates all of it. I washed the whole wall down with a sugar soap solution, working top to bottom, then rinsed with a cloth wrung out in plain water, because dried sugar soap leaves its own film behind. Then I left the wall alone overnight. A wall that feels dry to your palm at teatime can still be holding moisture deep in the paint by bedtime, and the paper can tell even if you cannot.
While it dried, I filled one small ding near the skirting with ready-mixed filler and sanded it flush once it set. Then I marked my plumb line. Measure one sheet's width in from the corner, check it against the level, and draw a faint vertical pencil line. That line, not the corner, is your truth for the whole job. Corners in rental flats are decorative suggestions at best.
Hanging it, one sheet at a time
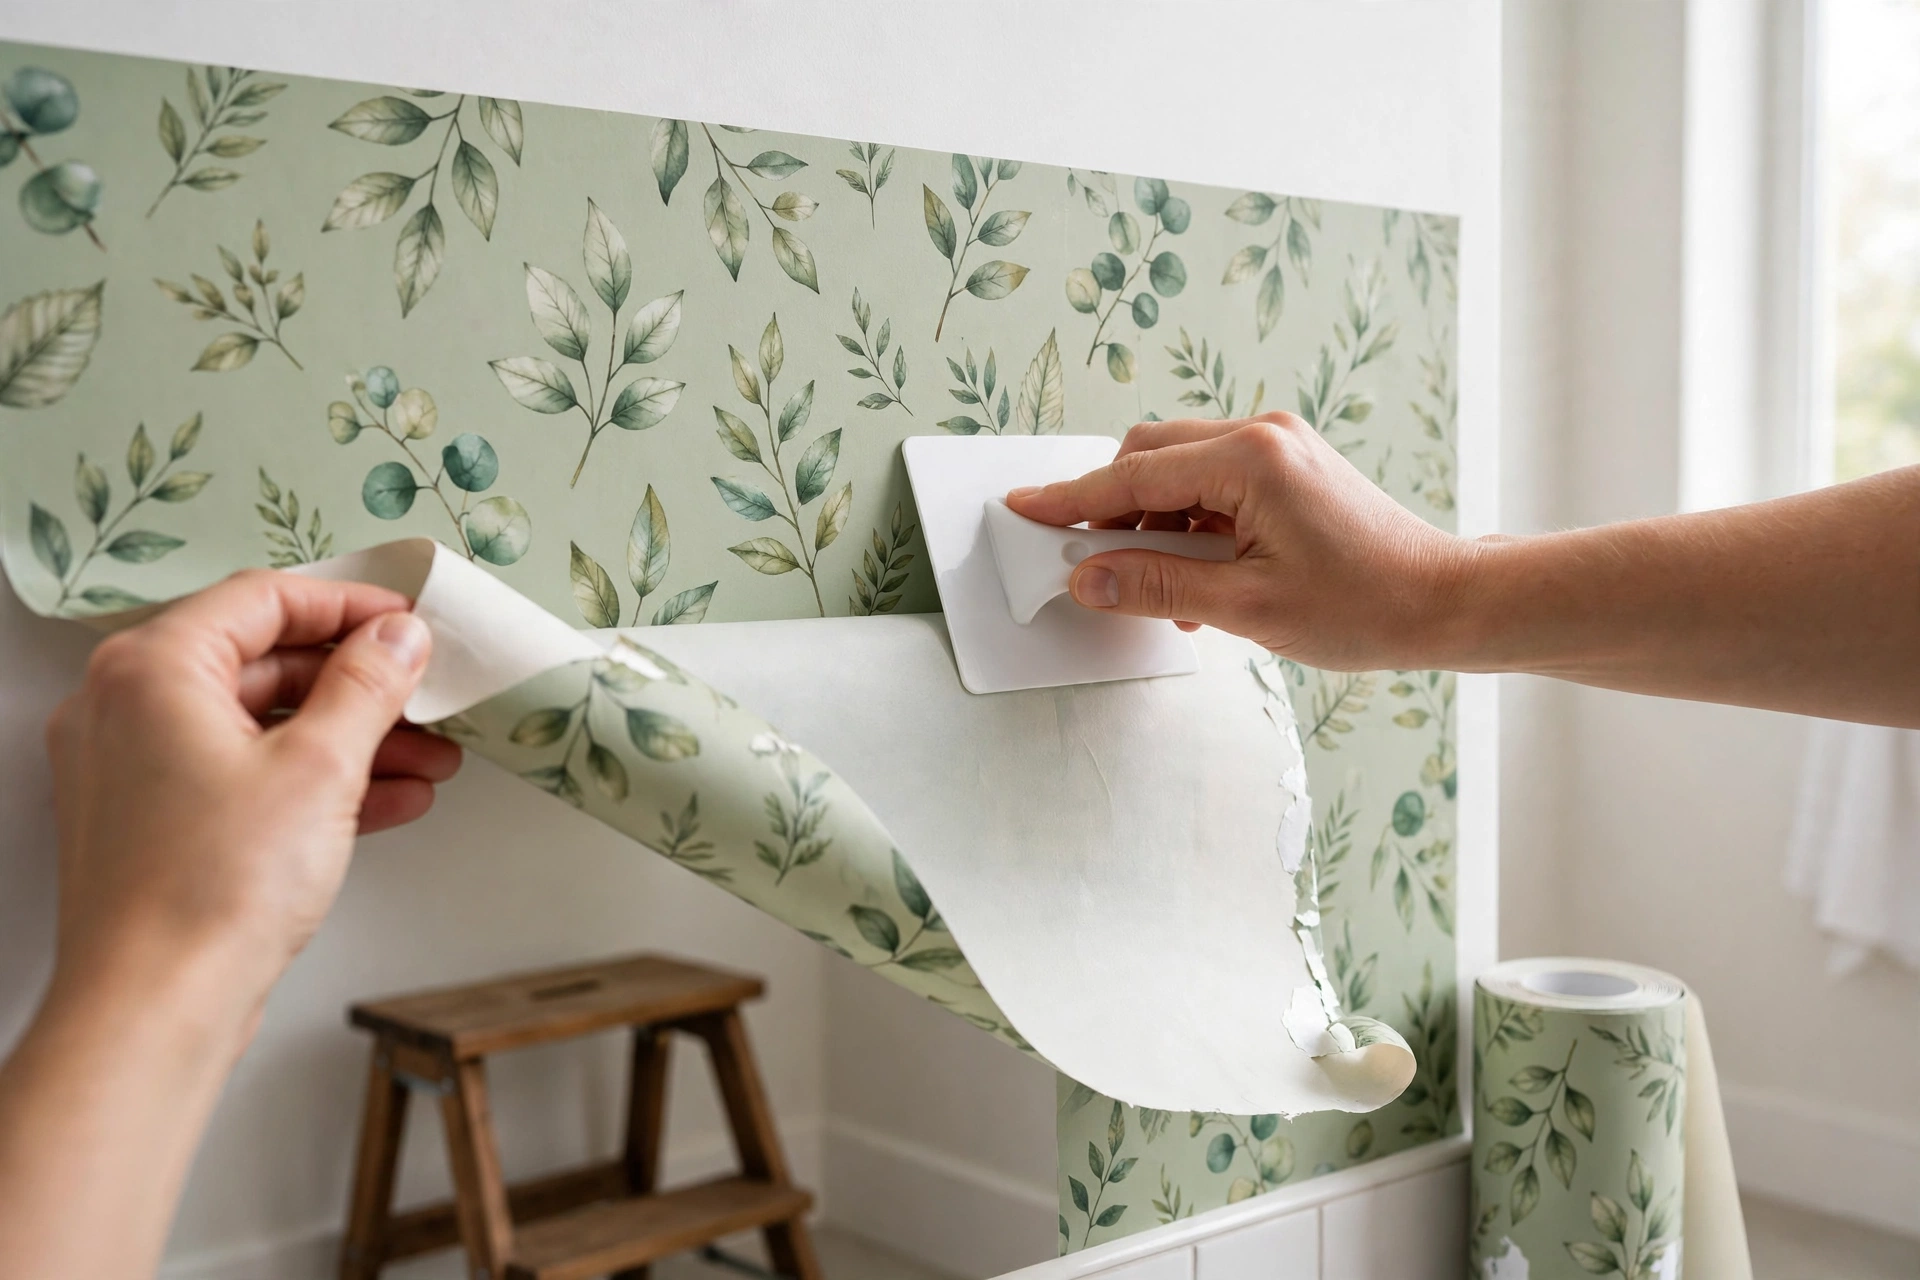
Cut your first drop with about five centimetres spare at the top and the bottom. You trim the excess away at the end, and trying to cut to the exact wall height in advance is how people end up a centimetre short at the skirting. Peel back only the top thirty centimetres or so of the backing paper, stick that strip to the wall with the sheet's edge sitting exactly on your plumb line, and check it twice before you commit. If the first thirty centimetres are true, the rest of the sheet mostly behaves.
From there it is a slow rhythm: peel a little more backing away with one hand, smooth with the other, always working from the centre of the sheet outwards so trapped air has somewhere to escape. Diagonal strokes push bubbles to the nearest edge. Keep your touch firm but flat. The temptation is to haul on the sheet to nudge it into line, and you must not, because this material stretches more than you would guess and a stretched sheet is a warped pattern. If a sheet is drifting, peel it back up and re-lay it. The adhesive forgives repositioning far better than it forgives pulling.
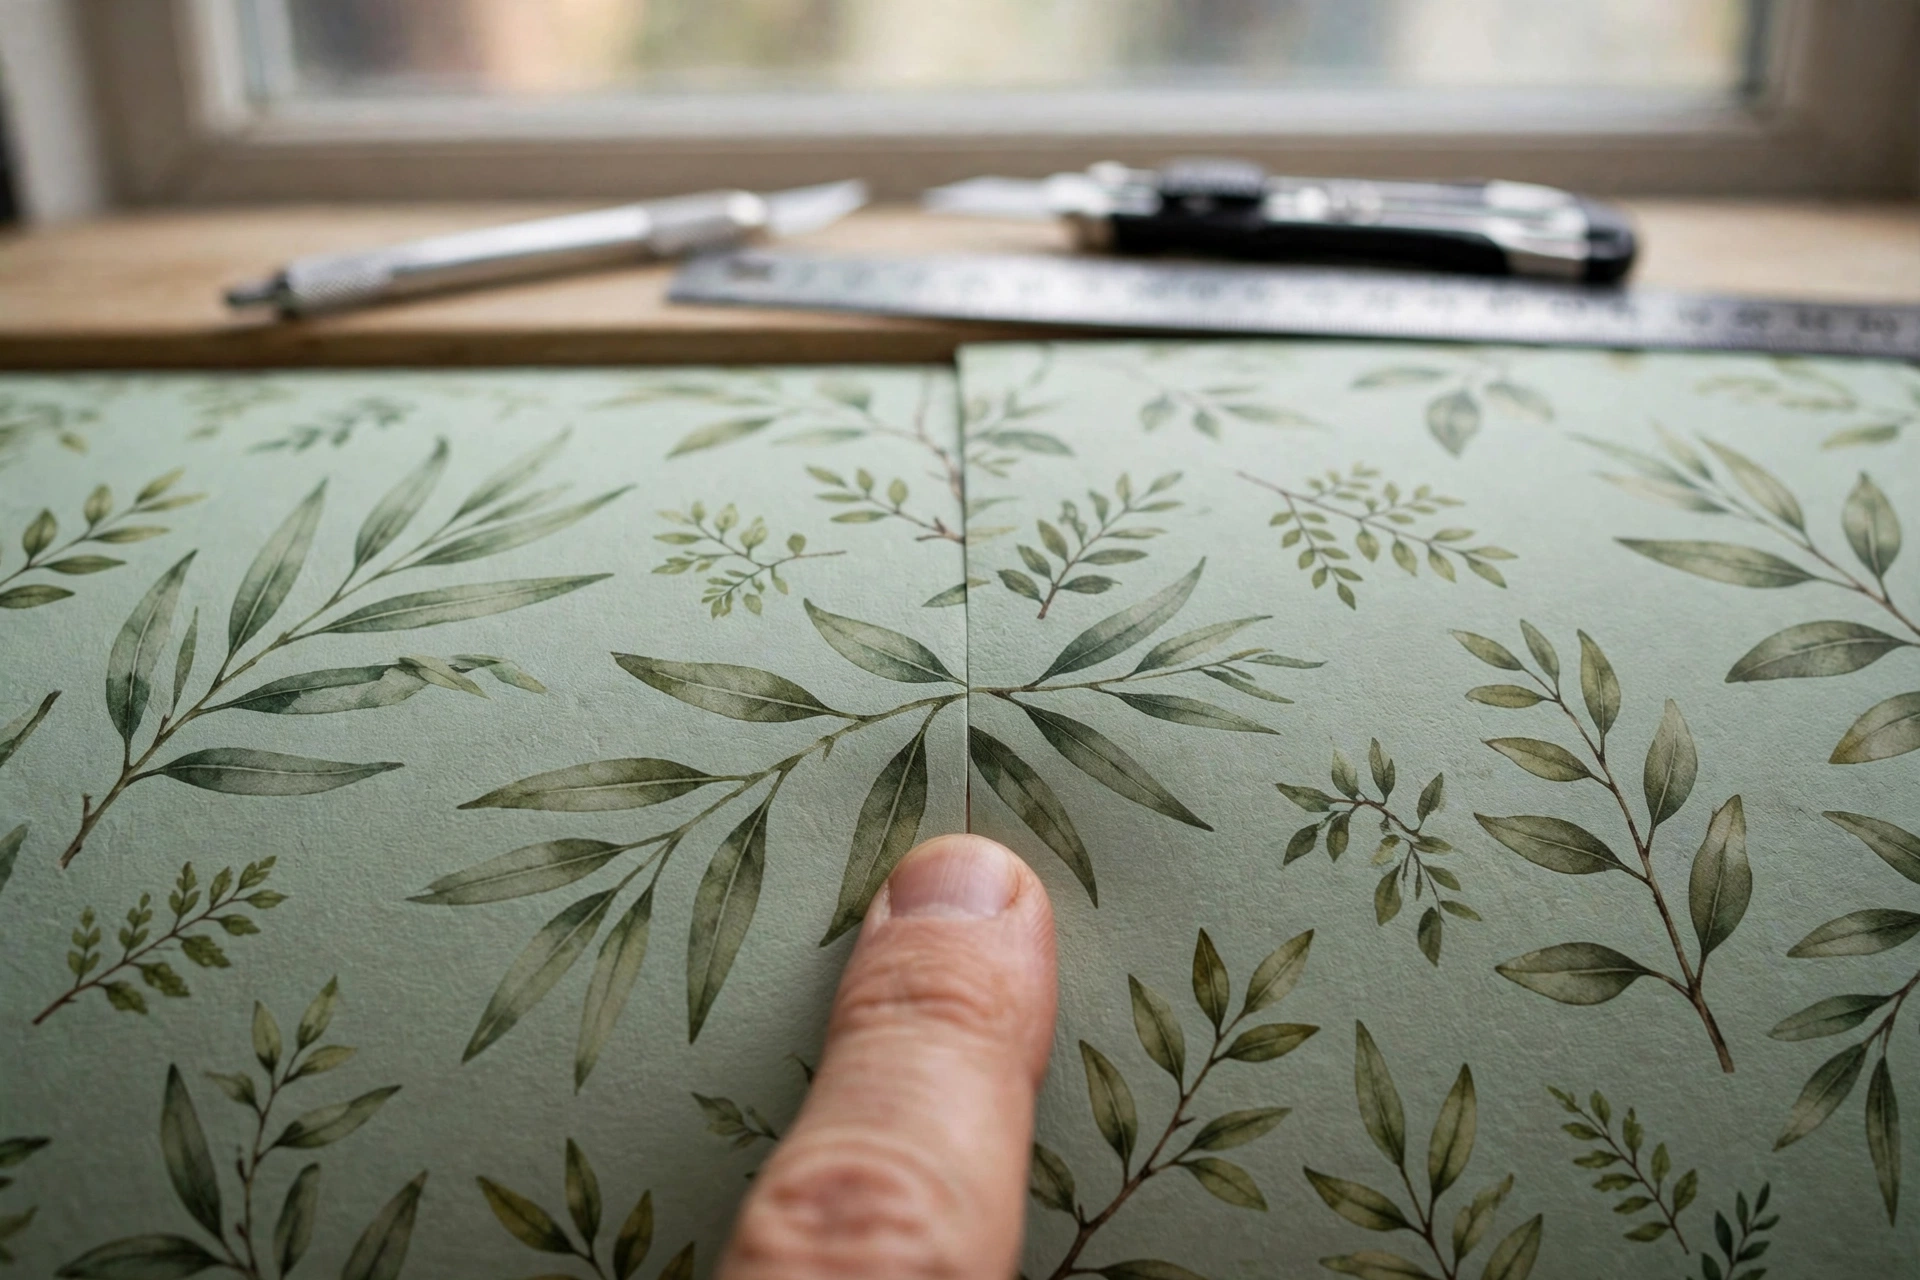
The second sheet is where the pattern match earns its keep. Butt it up tight to the first, then slide it up or down until the leaves line up across the seam. Here is the cost nobody mentions on the packaging: every drop has to start at the right point in the pattern, which meant throwing away a good hand's width of paper at the top of each cut. That is why the spare roll is not optional. With only three drops to hang, the whole wall took me about ninety minutes once the prep was done, including one full peel-back-and-start-again on sheet two, which brings us neatly to the fiddly bits.
Seams, corners and the trimming
Run the smoothing tool firmly down every seam once the sheet is settled, and if you can, plan the layout so no seam lands where window light rakes straight across it. Raking light turns an invisible join into a visible stripe. Inside corners are simpler than they look: wrap the sheet around the corner by about a centimetre, then start the next sheet on the new wall with its own fresh plumb line, overlapping that wrapped centimetre. Trying to bend one sheet around a corner and keep going is how wrinkles are born.
Trimming happens last, with the straight edge held hard against the ceiling line or the skirting and a fresh blade in the knife. Change the blade the moment it starts to drag. A dull blade tears peel and stick instead of cutting it, and a torn edge at the ceiling line is the one flaw you will see every single day. Around sockets and switches, work slowly and follow this rule without exception: turn the power off at the consumer unit before you trim anywhere near a socket. Not off at the switch plate. Off at the consumer unit. Then loosen the faceplate screws, ease the paper behind the plate, cut a small cross over the box and trim inside it, and refit the plate. The power stays off until the plate is back on. It adds five minutes and removes the only genuinely dangerous part of the job.
My shortcut: buy the blade pack, not the single blade. Fresh blade for the ceiling trim, fresh blade for the skirting, fresh blade around the socket. Three blades cost pennies and the difference between a clean line and a chewed one is nothing else.
Bubbles and lifting edges: the small fixes
Small bubbles in the first day are mostly nothing. Plenty of mine shrank flat on their own within twenty-four hours as the paper settled, so do not go chasing every blister the moment you see it. The stubborn ones get a pin prick at the very edge of the bubble, then a smooth stroke that walks the air out through the hole. The hole is invisible afterwards. Lifting edges, when they come, get dealt with the same calm way: slide the tip of a cocktail stick or a coffee stirrer with a dab of clear adhesive on it under the lifted flap, press down, wipe away the squeeze-out with a damp cloth, and hold it for thirty seconds. That is the whole repair. Keep the tube in the bathroom drawer and it stops being a problem and becomes a two-minute job.
Six weeks on: the honest report
So, after six weeks of two people showering daily, what does the wall actually look like? From the doorway, honestly, great. The pattern lifts the whole room and the wall still reads as properly papered. Up close with your nose near the basin, the seams are visible if you go looking for them, in exactly the way the seams on any wallpaper are visible when you go looking for them. The splashback stretch behind the taps has been the surprise success: water spots wipe straight off the vinyl face and the edges there have not moved at all.
The one real casualty is the top corner nearest the shower, where the steam collects. Around week four, the edges of the seam in that corner started to lift, just a few millimetres of curl, the sort of thing only the person who hung it would notice. I dabbed adhesive under both edges, pressed them down, and three weeks later they are still holding. Would I take this paper inside the shower zone itself, or onto the wall the shower spray hits directly? No. Six weeks of nearby steam was enough to test the corner. Direct daily soaking is a different sport, and tiles or paint are welcome to it.
Taking a piece back off: the removal test
The last job was the one the deposit cares about. I removed the test patch behind the door, and one narrow strip at the far end of the splashback that I had always meant to re-cut. The method that worked: start a corner with a fingernail, then pull the sheet back slowly, folding it flat against itself so it comes away at a low angle. Slow is the entire technique. Where the patch resisted, twenty seconds of warm air from the hairdryer on its lowest heat softened the adhesive and it let go without a fight. Underneath, the paint was untouched and glossy, and the faint tacky residue in one spot wiped away with a warm, soapy cloth. That result comes with the same warning as everything else in this post: it happened on sound, year-old paint. Fresh or chalky paint can tell a different story, which is why the hidden patch test comes before the big sheets, not after.
Three mistakes I made, so you do not have to
I tested a strip on a fresh paint patch. There was a small repair near the door that I had repainted a week earlier, and I stuck an offcut there as a quick extra test. The paint had only had a week to cure, and it needed several. The strip never grabbed properly, and when it came off it dulled the sheen of that patch. The wall behind the basin, painted a year ago, behaved perfectly. Fresh paint and removable paper need weeks between them, plural.
I stretched sheet two. The pattern was a fraction out at the top, so I pulled the sheet sideways as I smoothed to force the match. It looked right at eye level and wrong at the skirting, where the leaves had drifted out of line. Vinyl-faced paper stretches quietly and does not spring back. The fix was peeling the whole sheet off and hanging it again without the hauling, which cost me twenty minutes and taught me the lesson properly.
I ordered exactly what I measured. Between pattern-match waste at the top of every drop and the sheet I had to rehang, my careful measurements ran out with one drop still to cut. The last piece came from offcuts joined where the mirror hides the join, which worked, but it was luck, not planning. Order the extra roll. If it stays sealed, it is your repair kit for the next few years.
Questions I get asked about peel and stick wallpaper
Can peel and stick wallpaper go inside a shower?
No, and I would not put it anywhere that takes direct spray. Inside a shower enclosure the edges sit in water daily and they will lift. On a bathroom wall that only deals with steam and the odd splash, like mine, it holds up well, with the occasional dab of adhesive on a steamy corner.
Will it damage my walls when it comes off?
On sound paint that has had weeks or months to cure, my test patch came off with the paint untouched and one soapy wipe for the residue. The risk cases are freshly painted walls, chalky cheap paint and paint that was already flaking. Test a hidden patch first and leave it a few days before you commit to a whole wall.
How much extra paper should I order?
Budget for roughly one pattern-repeat of waste at the top of every drop, because each sheet has to start at the matching point in the design. On top of that, keep one full spare roll. It covers a rehung sheet today and a repair in two years, and it guarantees the batch matches.
How long will it last in a bathroom?
Six weeks in, mine looks good with one small adhesive repair in the steamy corner. My honest expectation is a few years on a ventilated bathroom wall that stays out of the spray, with the odd edge needing attention along the way. Think of it as a renter's refresh with a good lifespan, not a ten-year alternative to tiling.
So would I do it again? Yes, on the same terms: one wall, out of the spray, permission asked, patch tested, spare roll in the cupboard. The room looks like ours now, and I have seen the exit work with my own eyes. If your bathroom wall is smooth and your landlord says yes, tell me which pattern you picked. I read every comment, and I am always collecting ideas for the hallway.
Lisa Ben
Lisa paints, builds, thrifts and rearranges her way through one very patient house, then writes down everything she learns here on Wazala. She believes every rental deserves one wall that makes you smile. New projects land every Tuesday, Thursday and Saturday, and the Sunday Letter rounds them up once a week.
You might also like
How To Paint Kitchen Cabinets And Have The Finish Last
The full cabinet process: degreasing, priming, and the drying times nobody tells you.
Read more →
The 12 Best White Paint Colours For Every Light Direction
Twelve whites sorted by the light your room gets, with codes and undertones.
Read more →
17 DIY Shelf Ideas For Every Room
Storage that earns its wall space, including small bathroom shelves that need no drilling.
Read more →