How To Lay A Small Paver Patio, Step By Step
 By Lisa Ben
·
October 15, 2026
·
13 min read
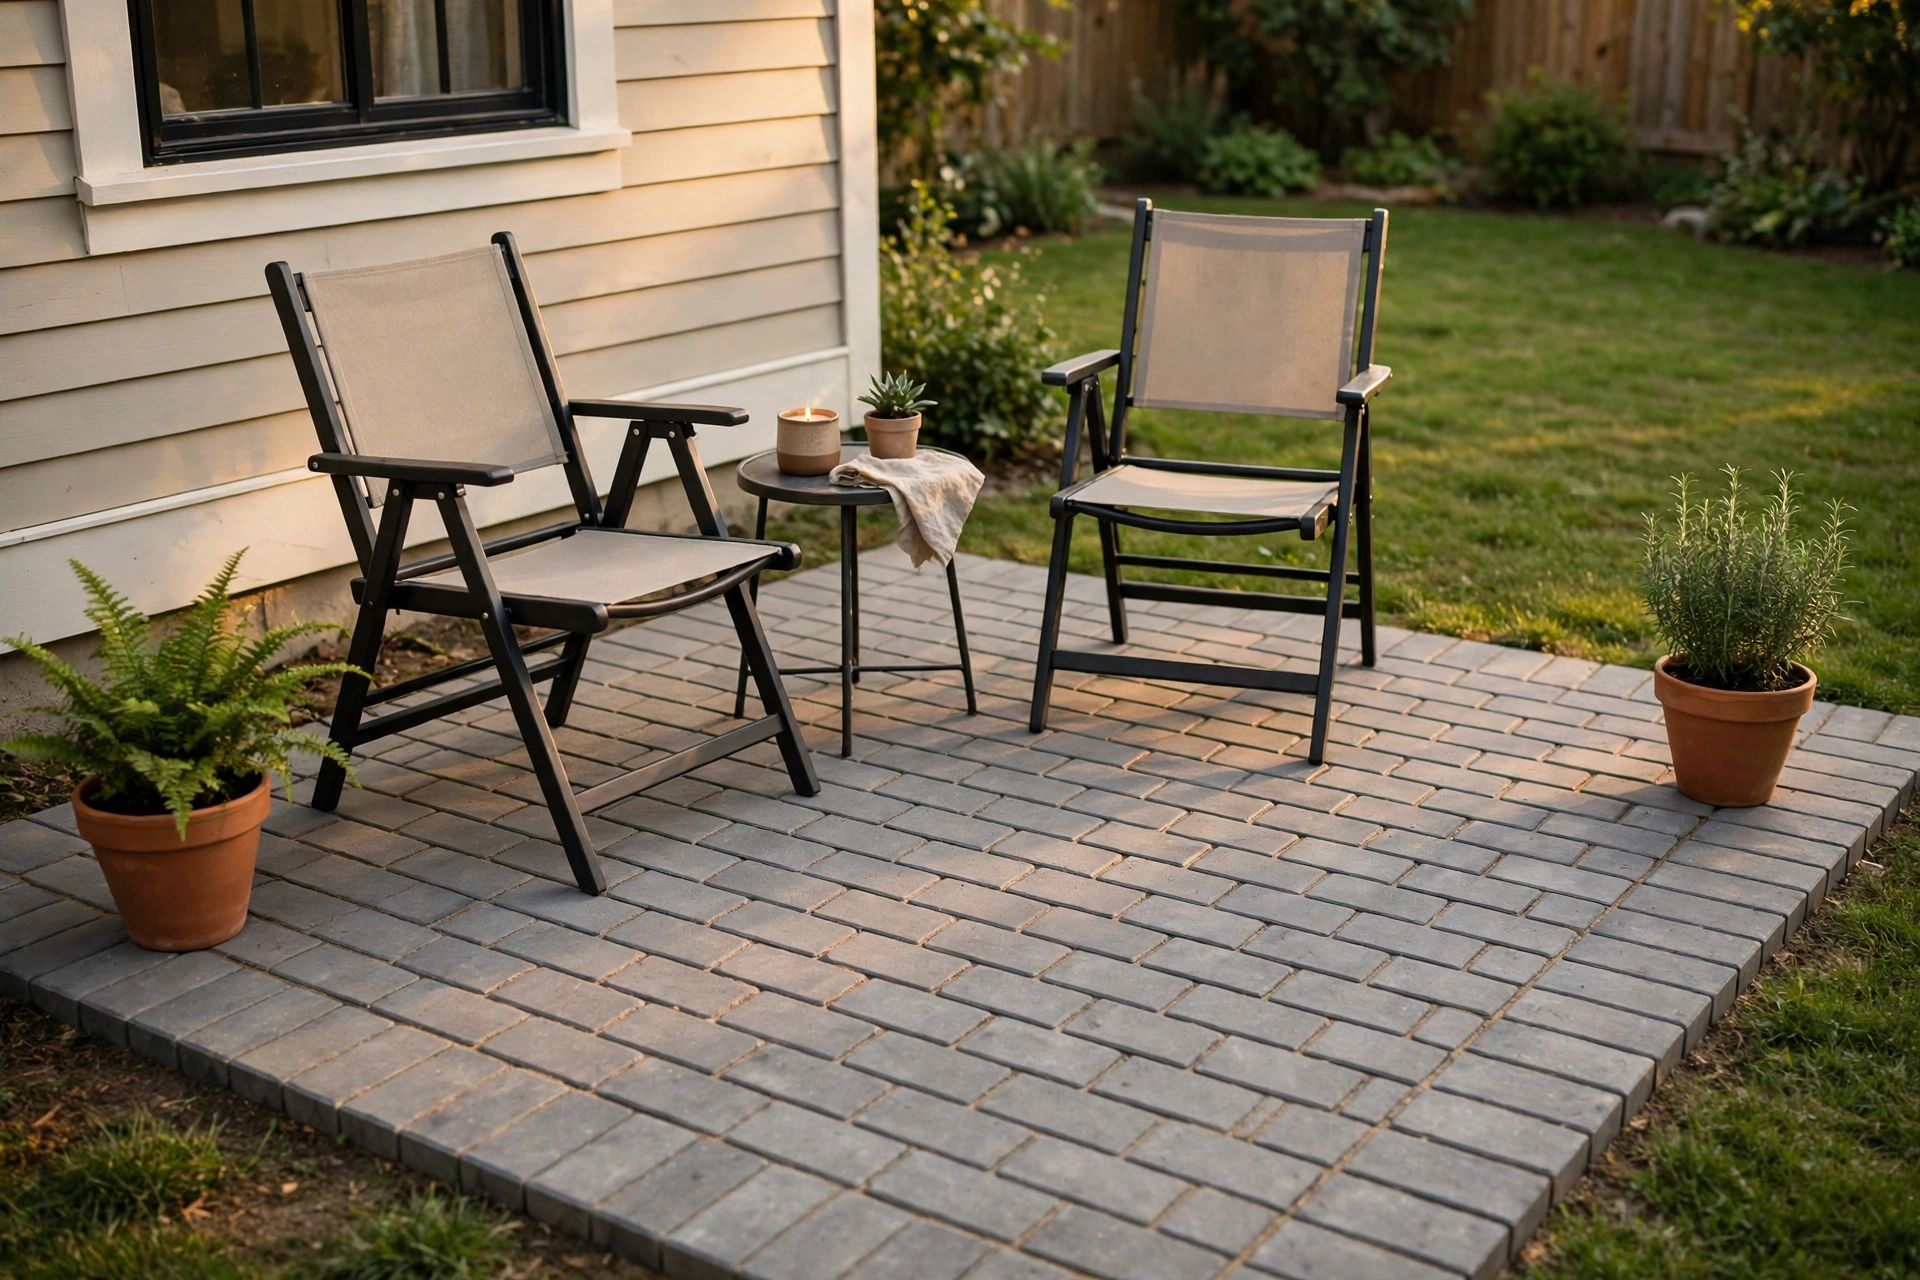
For three summers, our back door opened onto a patch of grass with two chairs on it. Every time it rained, the chair legs sank. Every time someone stood up, they stepped sideways onto wet lawn. This autumn I finally did the job I had been putting off: a small patio, 3 metres by 3 metres, big enough for those two chairs, a small table and a couple of pots, and not one centimetre bigger.
I will not pretend it was easy. It was the heaviest weekend of DIY I have done in years. But it is a simple job. There is nothing clever about it, only a sequence, and the sequence matters more than anything you do with the pavers themselves. Follow it in order and the patio sits flat for years. Skip a step and it tells on you by winter.
The part nobody sees is the part that matters
Here is the honest truth about paver patios: the pavers are the decoration. The patio is the base underneath them. A paver laid straight onto soil, or onto a skim of sand, will move. It rocks when you step on it, sinks where the chairs sit, and creeps apart at the edges until the joints open and the weeds move in. Three patios on our street have done exactly that, and every one of them looked fine on the day it was finished.
What stops the movement is a base of compacted crushed stone, deep enough to spread weight and drain water, with edges holding the whole grid in a frame. Roughly four fifths of this job happens at or below ground level, which feels dispiriting at hour six, when you have a beautiful hole and nothing to show anyone. Push through it. The laying at the end is quick, and it only stays quick because the base is right.
What you need
For a 3 × 3 m patio, work out every quantity by area and let the merchant's calculator turn square metres into tonnes and bags. You need crushed stone sub-base (sold as MOT type 1 or hardcore), sharp sand for the bedding layer, kiln-dried sand for the joints, your pavers, and edging. Add around a tenth extra on the pavers for cuts and the one you will drop, and get the lot delivered in one go.
- Tape measure, string line and pegs
- A long spirit level, borrowed if you do not own one
- Spade, mattock and a wheelbarrow
- Rake for spreading the stone
- Plate compactor, hired for the weekend
- Two straight rails and a straight board for screeding
- Rubber mallet
- Block splitter, hired, or an angle grinder with a diamond blade
- Stiff brush for the jointing sand
- Work gloves and knee pads
Hire the compactor and the splitter together and collect them in one trip. And a warning about the compactor before you are standing in the hire shop: it is far heavier than it looks in photographs. Getting it in and out of a car is a two-person lift, every single time, no heroics.
Step 1: Mark it out, and give the water somewhere to go
Measure your square and knock in pegs at the corners, then run string lines between them at the height of the finished surface. Check the diagonals with the tape: on a true square they match exactly. If they do not, nudge the pegs until they do. It is far easier to fix a crooked patio at the string stage than at the paver stage.
Now the fall, the slope that lets rain run off. The finished patio should drop gently away from the house, roughly 1 to 2 cm for every metre, as a general guide. On a 3 m patio the far edge sits about 3 to 5 cm lower than the edge against the wall. Written down that sounds like a lot; on the ground it is barely visible, and it is the difference between a patio that dries after rain and one that keeps a permanent puddle. Set your string lines at that slope now, because every layer below follows them.
Step 2: Dig out the layers
Digging depth confuses people, because you are not digging a hole for the pavers. You are digging a hole for three layers. Working down from the finished surface: the paver itself (mine were 5 cm thick, so check yours), about 3 cm of bedding sand, and 10 cm of compacted sub-base underneath. Add those up and you dig roughly 15 to 20 cm below where the top of the patio will sit. Mark that depth on a peg and check against it as you go, because your eye will start lying to you by the second hour.
Before the spade touches the ground, though, stop and think about what is buried. Gardens hide cables to sheds, water pipes and old drain runs. If there is a cable and pipe checking service where you live, use it before you dig. Whatever it says, dig carefully by hand near the house and any line you know about, in shallow passes. A mattock through a cable is a bad, expensive day. Treat anything you uncover as live until you know otherwise.
You will move more soil than you expect. Keep the decent topsoil separate if you can; it is gold for topping up beds and tidying the lawn edge at the end.
Step 3: Edge restraints go in first
Pavers creep outwards under weight, a millimetre at a time, and only the edging stops them. So the restraints go in before the base, not as an afterthought. Metal or plastic patio edging pinned into the ground works well, as does a row of pavers set upright in a shallow concrete footing. Set the top of it level with the bottom of where the pavers will sit, so the finished surface runs clean up to it. On the lawn side I used steel edging. Against the house, the wall does the job itself.
Step 4: The sub-base, compacted in layers
Tip the crushed stone in and rake it out to about half its final depth. Then run the compactor over the whole area in slow, overlapping passes, until the surface stops feeling crunchy underfoot. Add the rest of the stone, rake it to your slope (remember, the fall is set at this layer, not in the sand), and compact it again. Two thinner layers compact properly. One thick layer only compacts on top and stays soft underneath, which is exactly the failure you are digging to avoid.
The compactor is loud, it vibrates your arms to jelly, and it is not optional. A hand tamper will do a doorstep; it will not do 9 square metres. When both layers are down, run the long level across the base both ways and along the strings. Any dip you leave now becomes a dip in the finished patio, because the sand bed can only correct a few millimetres.
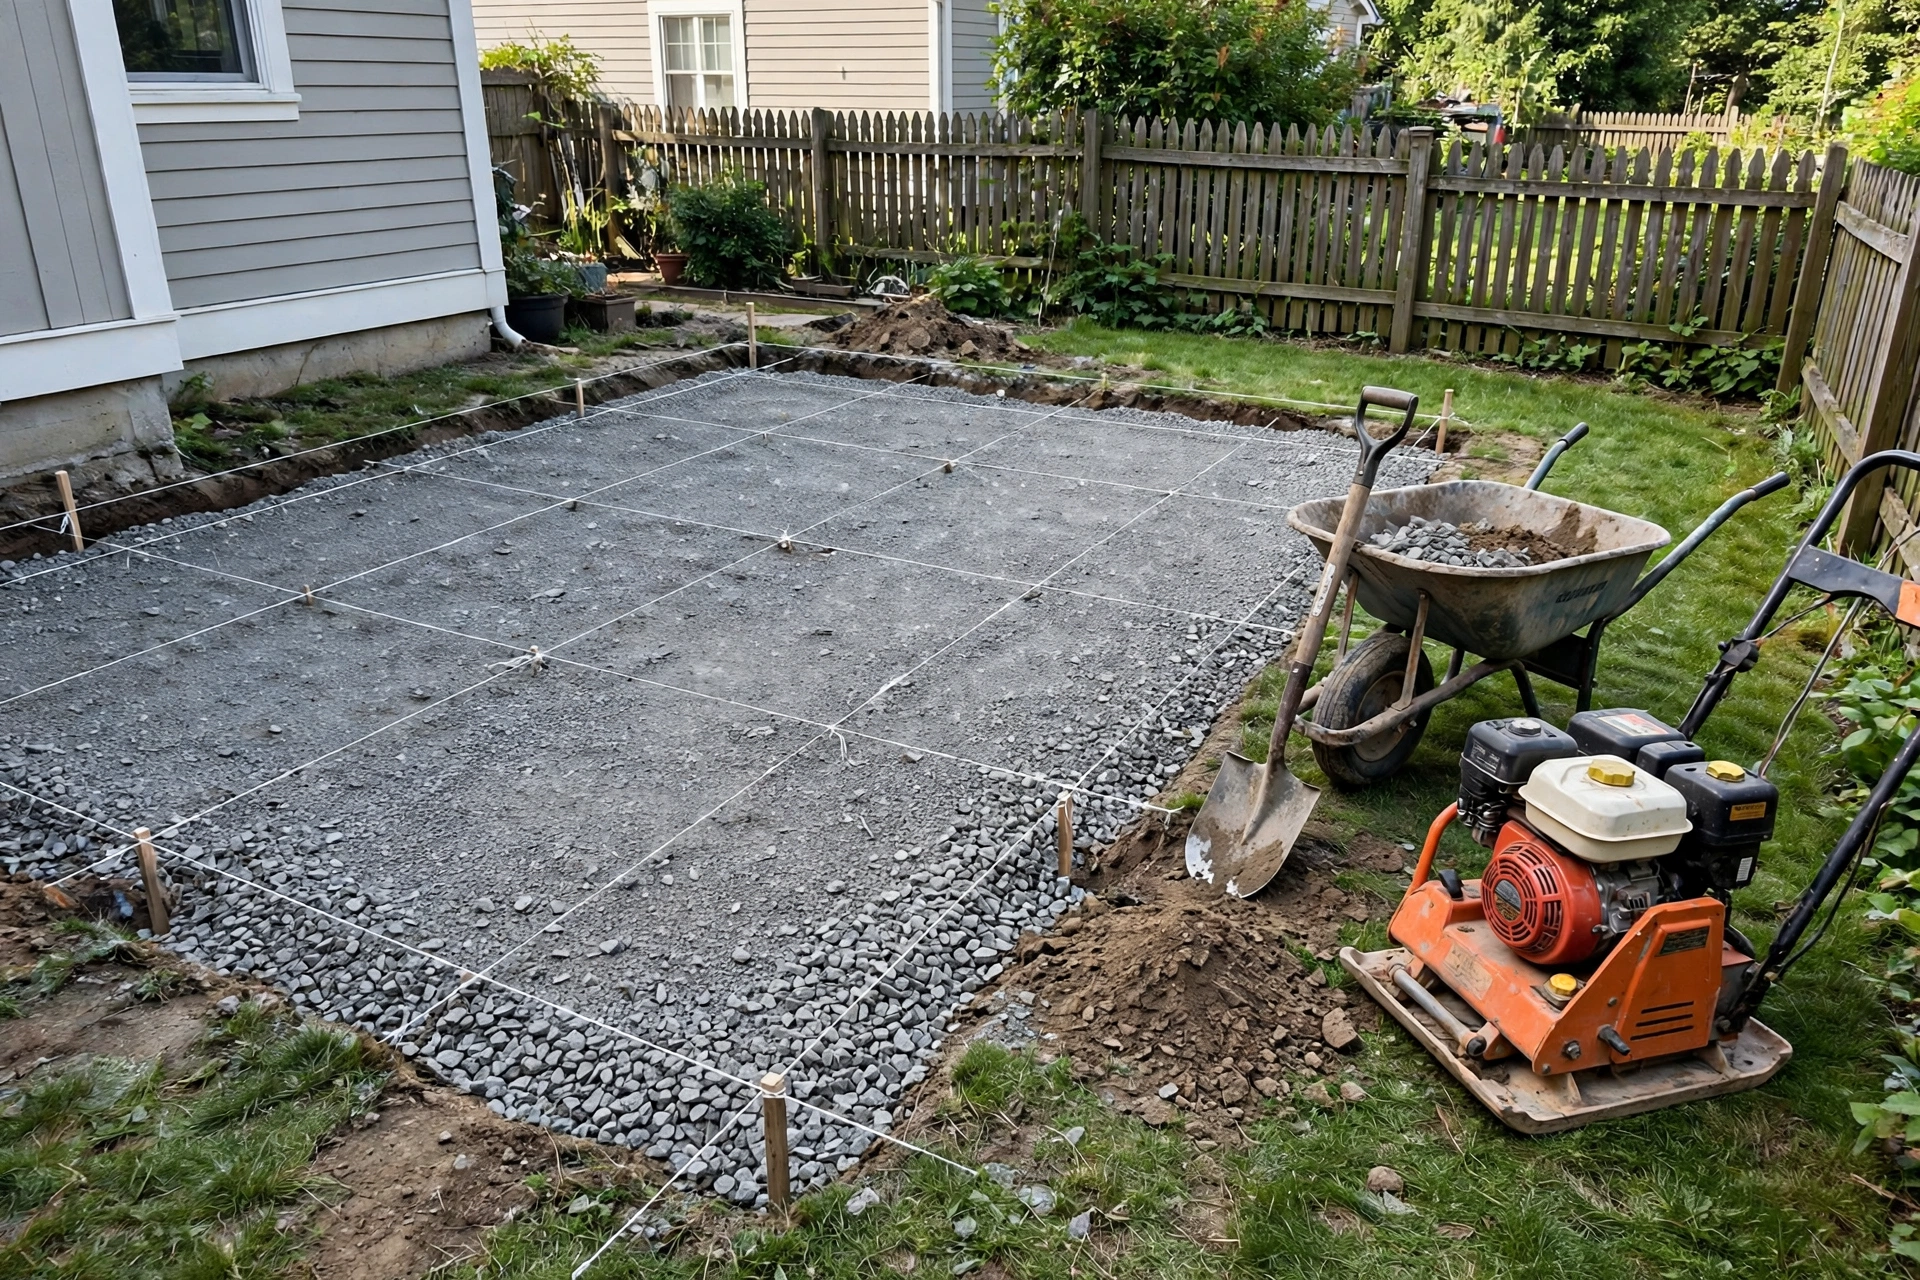
Step 5: Screed the bedding sand
Spread sharp sand over the base. Not soft building sand, which stays spongy forever; sharp sand locks together. Lay your two rails on the base, heap sand between them, and pull the straight board along the rails towards you in a slow sawing motion. The board leaves a flat bed at exactly rail depth. Lift the rails out, fill the grooves they leave with loose sand, and then do not walk on it. Work in sections you can reach from the edge, because once you kneel on a screeded bed you have signed up for a knee-shaped patio.
Step 6: Lay the pavers
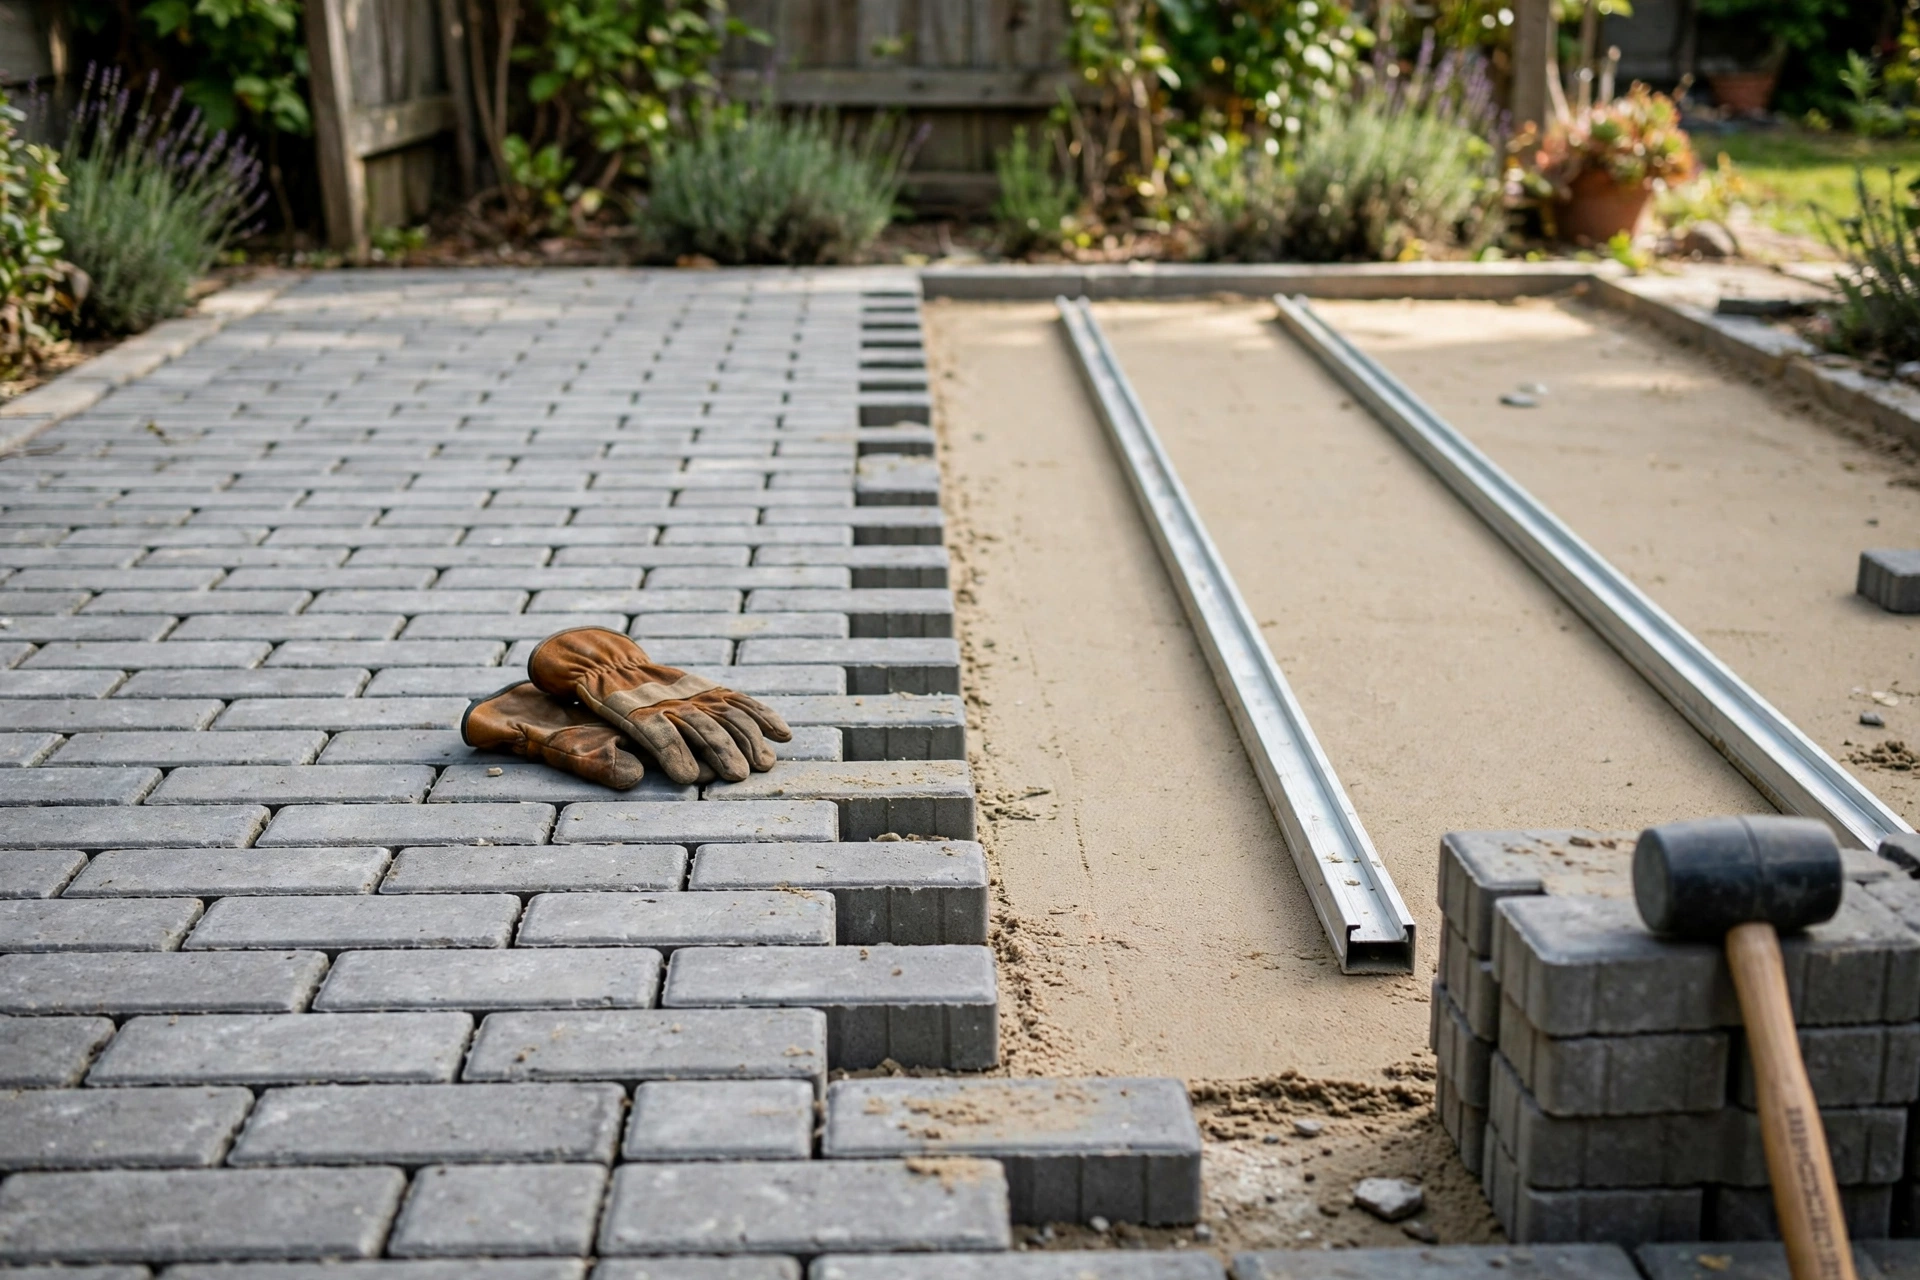
Now the satisfying part, and it goes quickly. Start in a corner against the house, or along your straightest edge, and lay in running bond: the brick pattern where every joint is offset by half a paver. It is the simplest pattern to keep straight and the most forgiving of small errors. Lower each paver onto the sand, do not slide it into place, butt it snugly against its neighbours, and give it a few taps with the rubber mallet to bed it down.
Keep checking as you go: a string line across the rows every few courses, the level both ways on single pavers, and a crouch down to sight along the joints. Lay forwards, standing on the pavers already laid, never on the bare sand bed. Catching a joint that has drifted half a centimetre at row three is a two-minute fix. Finding it at row nine is an afternoon.
Step 7: Cut the edge pavers
Unless your patio size was chosen by a wizard, one edge will need cut pavers to finish it. Mark the cut line in pencil, allowing a small gap for the joint. If you hired the block splitter, use it and enjoy it: it guillotines the paver with a crunch, almost no dust, and it is the safer tool by a mile. If an angle grinder is your only option, take it seriously. Diamond blade, goggles, a proper dust mask, gloves, and the paver clamped or held steady on a solid surface away from everyone else. A grinder does not forgive wandering attention. If you are tired, leave the cuts and do them in the morning with fresh eyes.
Step 8: Sand the joints, then let it settle
With every paver down, sweep kiln-dried sand across the surface and work it into the joints with the stiff brush, brushing diagonally so you do not drag it straight back out. This sand is not decoration. Filling the joints locks the pavers together, so the surface behaves like one slab instead of eighty separate blocks. Run the compactor over the top (the hire shop may offer a rubber mat for it), then brush in more sand to fill whatever settled, until every joint is full.
Expect the joints to drop again over the first week as the sand works its way down, especially after the first proper rain. Keep the rest of the bag somewhere dry and top the joints up after about a week, then once more at the end of the first month. After that the surface firms up and stays put. Keep the pressure washer away from it for the first few months, too. It blasts jointing sand straight back out again.
My ordering shortcut: measure the area, give the merchant the square metres, and let their calculator work out the tonnes and bags. Then add a tenth extra on the pavers for cuts and breakages. Order by area, keep the waste allowance honest, and one delivery does the whole job.
How long it really takes
For two reasonably fit people, a 3 × 3 m patio is one solid weekend: marking, digging and edging on Saturday morning, base and compacting on Saturday afternoon, sand and laying on Sunday. On your own, give it two weekends and feel no shame about it. The digging alone is a full day, and rushing the base to meet an imaginary deadline is how patios go wrong. The pavers themselves were down in about three hours. Everything before that was preparation, and that ratio is about right.
The mistakes that show up by winter
- No fall. Water has nowhere to go, so it stands in puddles, grows a film of algae, and in a hard freeze it works under the pavers and lifts them.
- No edge restraints. The outside rows wander slowly into the lawn, the joints open up, and the middle rows follow them out.
- A sand bed that is too thick. Much over 4 cm and it stays spongy. Pavers rock, point-load the sand and dig themselves little pits.
- The base tipped in one thick layer. It only compacts on top. The soft middle sinks in patches by spring, and no amount of fresh jointing sand fixes a base.
A short word on safety
Three things, plainly. Lift properly: the compactor and bulk bags are team lifts, and single pavers get heavy by the fortieth one, so bend your knees rather than your back and take breaks before you are shaking. Guard yourself around the sharp and spinning things: gloves for cut edges, which are sharper than they look, plus goggles and a real dust mask for any grinder work. And stop when you are tired. Every injury I have ever had in the garden happened in the last hour of a job I was determined to finish that day.
Patio questions I get asked
Can I lay pavers straight onto soil if I tamp it down well?
You can, and it will look fine for one season. Then the soil softens in the winter wet, shrinks in the summer dry, and the pavers follow it in different directions. The crushed stone base exists because soil never stops moving. It is the least glamorous money in the project, and the best spent.
How deep do I actually need to dig?
Add up your three layers: the paver thickness, about 3 cm of bedding sand and 10 cm of compacted sub-base. For most pavers that lands between 15 and 20 cm below the finished level. If your ground is soft or heavy clay, dig at the deeper end and put the extra depth into base. Clay holds water and heaves, and extra stone is cheap insurance.
Can I skip the hired compactor and use a hand tamper?
For a small path or a few stepping stones, yes. For a patio that chairs and people will sit on every day, no. Hand tamping cannot compact a 10 cm layer evenly across 9 square metres, and uneven compaction is just sinking that has not happened yet. The hire cost is small next to lifting and relaying the whole patio.
When can we put the furniture on it?
Straight away, once the joints are sanded. Walk on it the same day and put the chairs on it that evening. Just keep topping the joints up over the first few weeks as the sand settles, and hold off the pressure washer until the joints have well and truly locked.
That is the whole job: a proper hole, a flat bed, and eighty-odd blocks laid in the simplest pattern there is. Our chairs have not sunk since, and coffee outside on a dry morning has quietly become the best part of the day. If you lay one this autumn, send me a photograph of the first breakfast on it. Those are my favourite emails.
Lisa Ben
Lisa paints, builds, thrifts and rearranges her way through one very patient house, then writes down everything she learns here on Wazala. Outdoor projects are her favourite argument with the weather. New projects land every Tuesday, Thursday and Saturday, and the Sunday Letter rounds them up once a week.
You might also like
How To Paint Your Front Door (And Pick The Colour)
Prep, the finish that survives weather, and testing a bold colour first.
Read more →
A Small Balcony Makeover On A Shoestring Budget
Another small patch of outdoors, fixed up for very little money.
Read more →
How To Paint Kitchen Cabinets And Have The Finish Last
The full cabinet process: degreasing, priming, and the drying times nobody tells you.
Read more →