How To Install A Drip Irrigation System For Garden Beds
 By Lisa Ben
·
October 23, 2026
·
11 min read
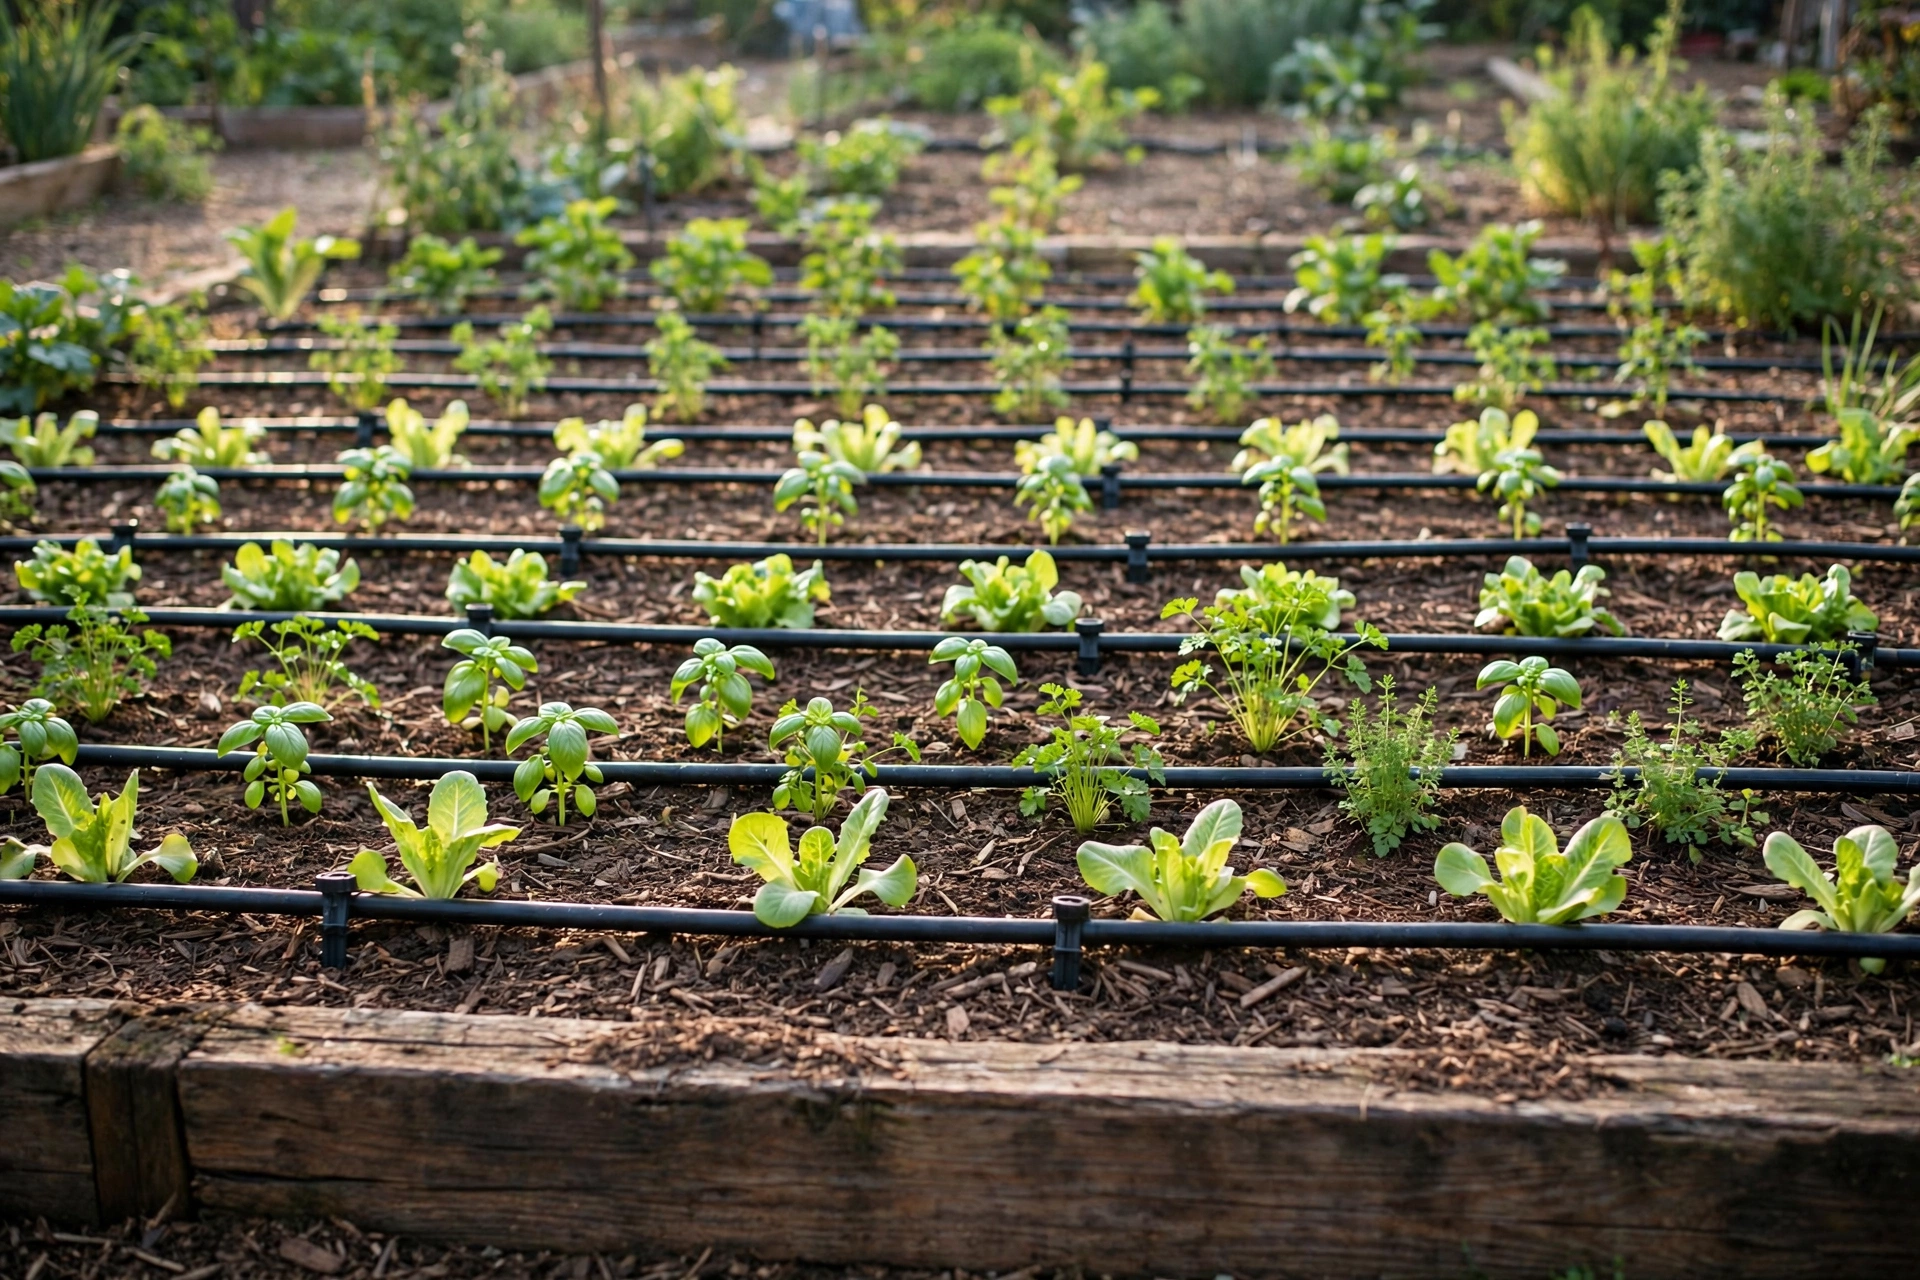
For two summers I watered my vegetable beds with a sprinkler on a timer and told myself it was fine. The tomatoes disagreed. Their leaves were always wet, the paths were always muddy, and the soil at the roots was somehow still dry an hour later. Half the water I paid for landed on the fence.
Drip irrigation fixed all of that in one weekend. It sounds technical, and the boxes in the garden centre do their best to make it look complicated, but it is really just a main tube, some thinner lines with holes in them, and a small stack of fittings at the tap. If you can lay out a hose, you can install this. Here is the whole job, in the order I would do it again.
Why drip beats a sprinkler for beds
A sprinkler throws water into the air and hopes for the best. On a breezy evening a good share of it drifts onto paths and patios, and on a hot day some of it evaporates before it lands at all. What does arrive soaks the leaves, which is exactly what tomatoes, courgettes and most flowering plants do not want. Wet foliage is an open invitation to mildew and blight.
Drip does the opposite. Water leaves the tube a drop at a time, right at the base of each plant, and sinks slowly into the root zone where it is actually used. The surface between plants stays fairly dry, so fewer weed seeds germinate. The leaves stay dry. And because the water goes down instead of sideways, you use far less of it for the same result. My beds get a deep soak in one slow run instead of a shallow daily splash, and the plants are visibly happier for it.
Plan first, on paper, before you buy anything
The planning takes twenty minutes and saves you two trips back to the shop. Sketch your beds roughly to scale, mark where the tap is, and draw the route the main line will take to reach each bed. Measure those runs with a tape, not your eyes, and add a little slack. Tubes that are nearly long enough are the most annoying purchase in gardening.
Then split the beds into zones by thirst. This is the step most people skip, and it is the one that matters most. Tomatoes, cucumbers and sweetcorn drink deeply and often. Lavender, rosemary and established herbs would rather be left fairly dry. If they share one line, something gets the wrong amount of water no matter what you do. Run each group on its own line with its own tap end or valve, and you can water the thirsty bed three times a week and the herb bed once, from the same system.
Count your plants while you are at it. Rows of vegetables suit drip line with emitters built in at regular spacings. Scattered shrubs, pots and individual plants suit blank tube with separate drippers punched in exactly where each plant stands. Most real gardens end up with a mix of both, mine included.
The parts, in plain language
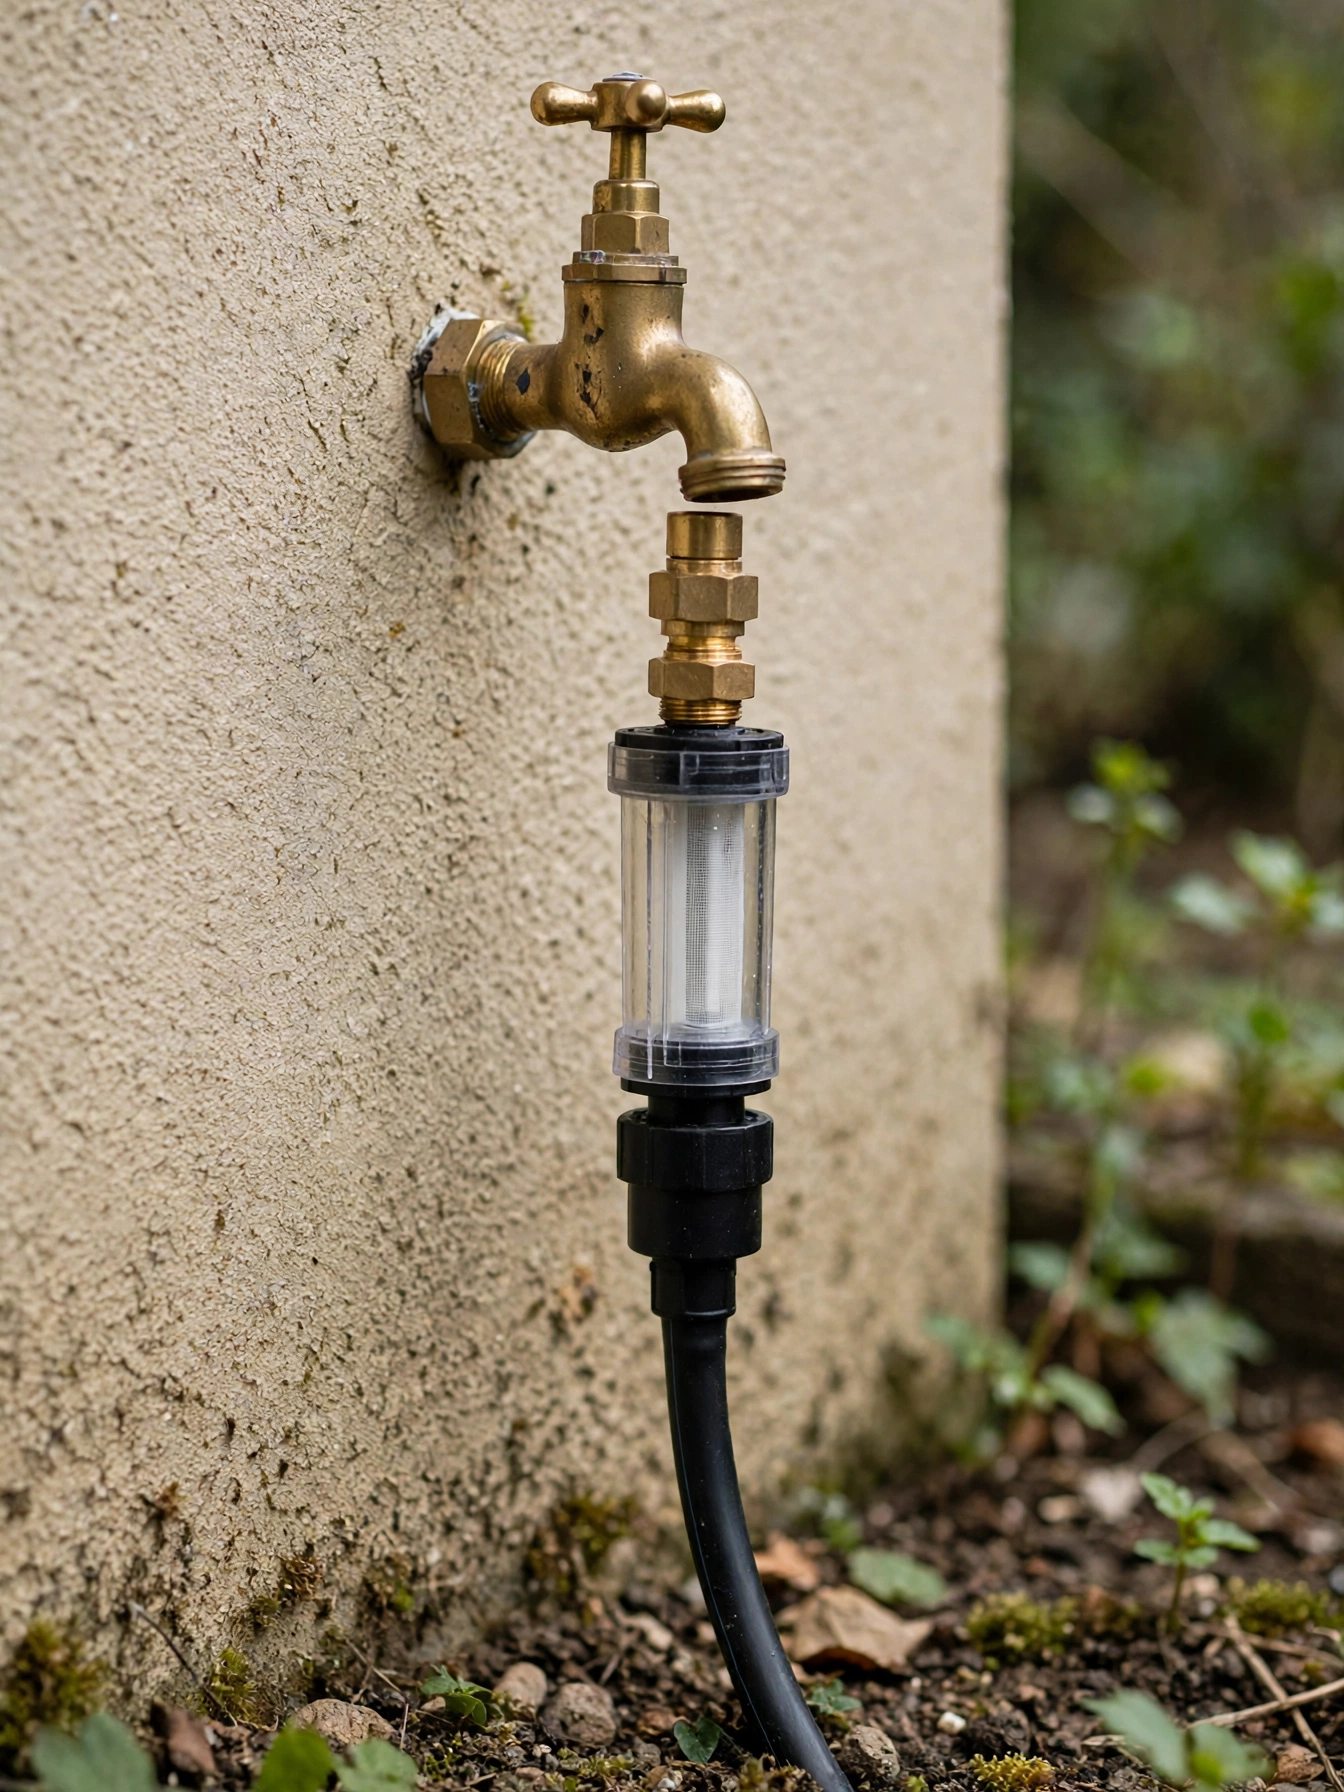
A basic kit looks like a lot of plastic. It is really only eight things, and each one has a simple job.
- Tap connector: screws onto your outdoor tap and gives the whole system its starting point.
- Backflow preventer: a small one-way valve that sits right after the tap. It matters more than it looks. If the water pressure in your house drops while the system is running, dirty water from the lines could in theory be siphoned back towards your drinking supply. This little fitting makes that impossible. It costs very little and it is the one part I would never leave off.
- Filter: a small mesh screen that catches grit and sediment before it reaches the tiny emitter holes. Most clogging problems start with skipping the filter.
- Pressure reducer: drip lines are built for gentle pressure, much lower than what comes out of a household tap. This fitting steps the pressure down so your connections stay on and the emitters drip instead of spray.
- Main line tube: the thick black supply pipe that carries water from the tap to the beds. It does not water anything itself.
- Drip line: thinner tube with emitters already built in at fixed spacings. Lay it along a row and every plant gets its share.
- Blank tube and separate drippers: plain thin tube you punch holes in yourself, pushing a dripper in wherever a plant needs one. Slower to set up, perfect for odd layouts and pots.
- The small stuff: stakes to pin tubes down, end caps to close lines, joiners and elbows for corners, and a punch tool for making clean holes in the main line.
Step 1: Build the tap stack and lay the main line
Screw the parts onto the tap in the order listed above: connector, backflow preventer, filter, pressure reducer. Hand-tight is enough for the plastic threads, and a wrap of thread tape on the tap thread stops the drips that otherwise appear at the joint. Connect the main line tube to the bottom of the stack.
Roll the main line out along the route you drew, following path edges and fence lines where it will be out of the way. Leave the roll in the sun for half an hour first if you can. Warm tube unrolls flat and stays where you put it. Cold tube fights you at every step. Pin it down with stakes as you go, and do not cut anything to final length until the whole route is laid out and you can see it works.
Step 2: Run the drip lines across the beds
Where the main line passes a bed, punch a hole with the punch tool and push in a connector, then run drip line off it across the bed. For a wide bed, lay two or three parallel lines so the whole surface gets covered. For rows of vegetables, one line per row, running right alongside the stems.
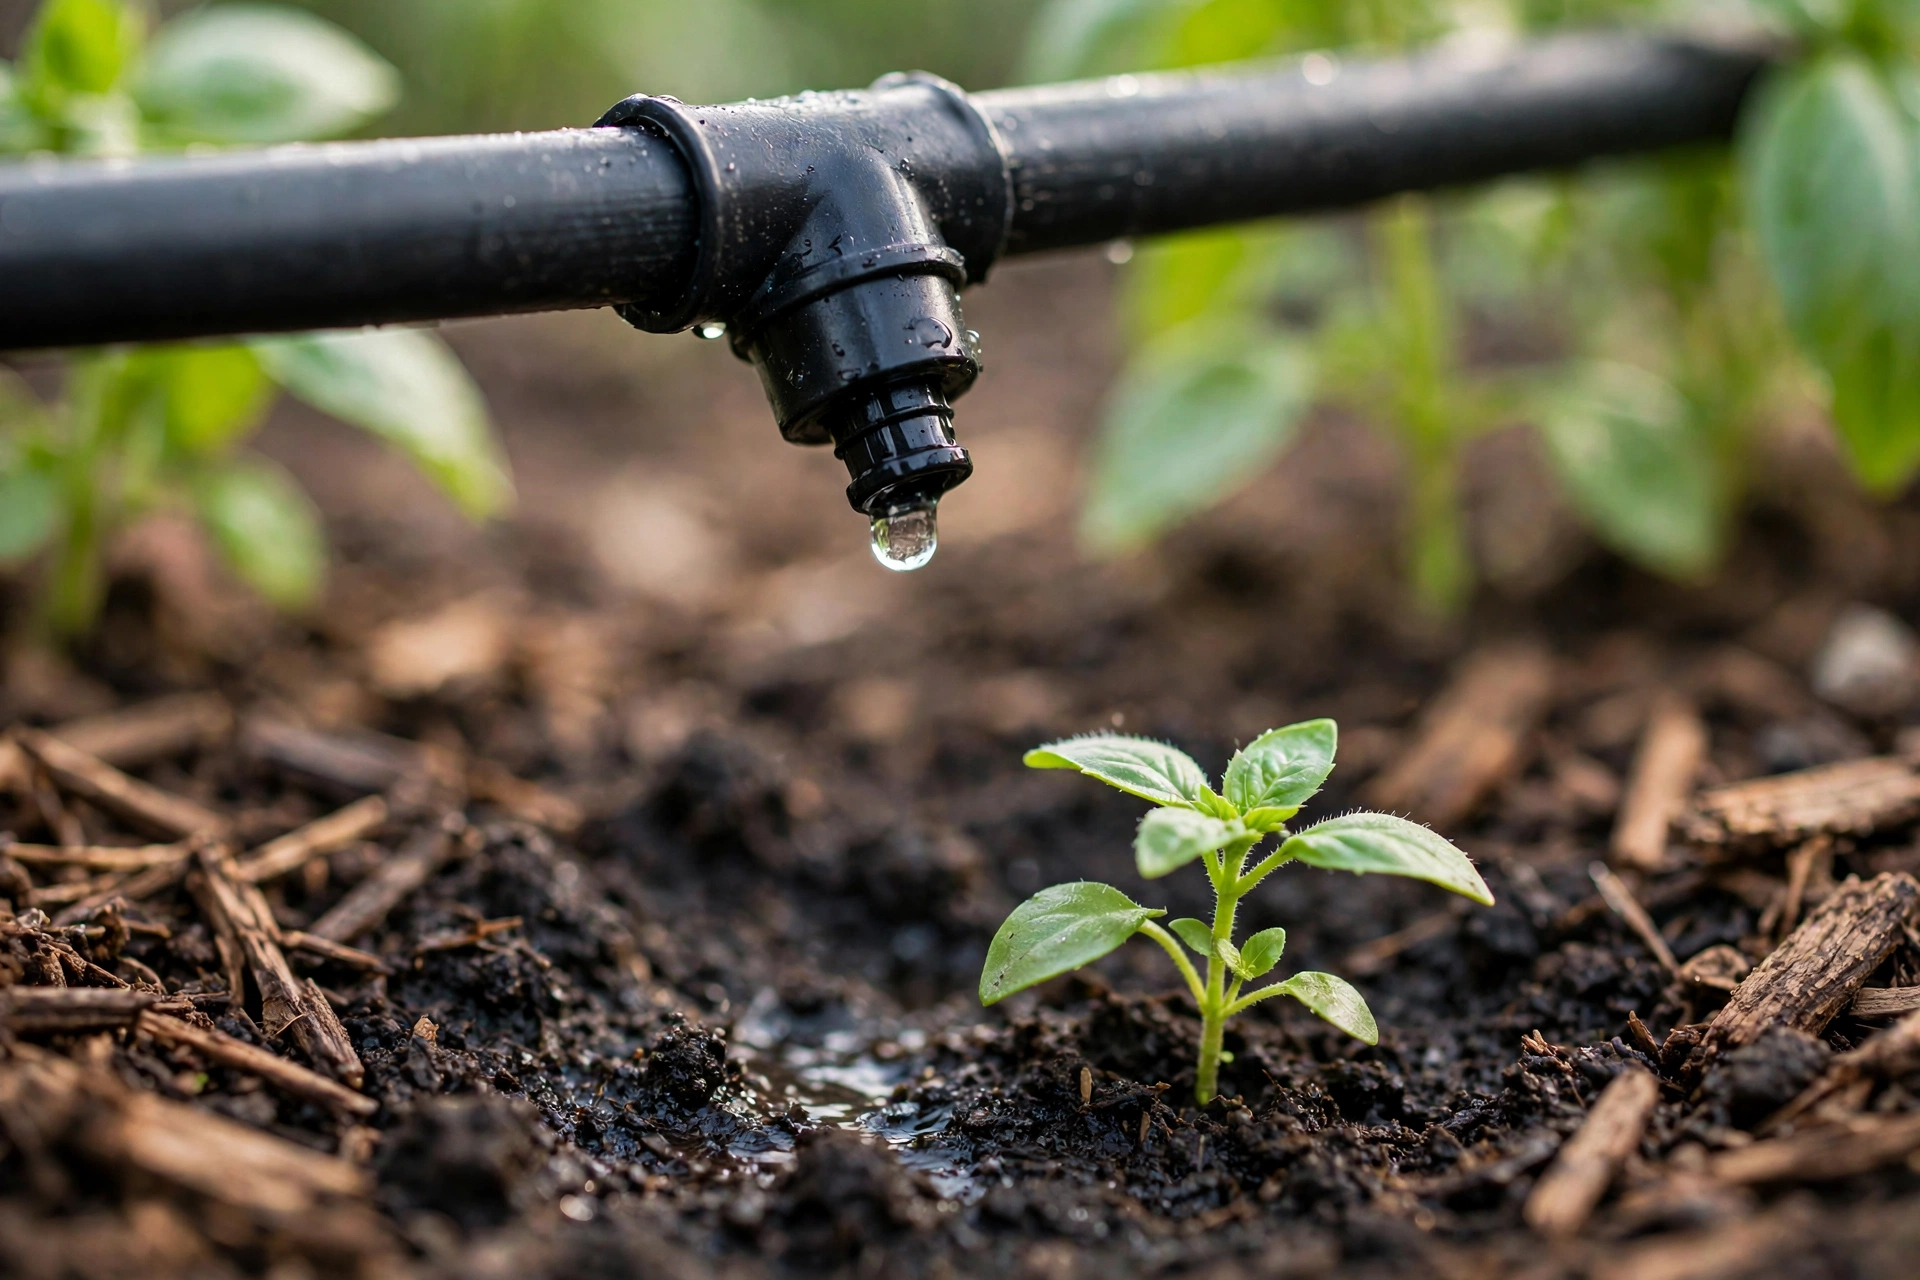
On spacing: common drip line has emitters roughly every 30 cm along its length, which suits rows of veg and dense planting well. The wet patch from each emitter spreads wider in clay soil and narrower, deeper in sandy soil, so on sand I run my lines a little closer together. If you are using blank tube and separate drippers instead, put one dripper at the base of each plant, two for a big thirsty shrub, and keep them a finger's width from the stem rather than touching it.
Pin every line down with stakes as you lay it, especially at the ends and corners. Lines curl, birds tug, and the first time you hoe an unpinned bed you will pull a line clean out of the soil. Ask me how I know.
Step 3: Flush the lines before you cap them
Leave the ends of every line open for now. Cutting tubes makes plastic shavings, and soil gets in during laying, and all of it is currently inside your nice clean system. Turn the tap on gently and let water run through every line until it comes out clear, a minute or two per line. Then fold or cap each end while the water is still running, working from the nearest line to the furthest.
Skipping the flush is the single most common reason a brand new system has dead emitters in its first week. The grit has nowhere to go except into the smallest holes in the system, and it finds them.
Step 4: Test run, and actually watch it
Now run the whole system for a full cycle, half an hour or so, and walk it slowly with a mug of tea. You are looking for three things. Fountains, where a fitting has popped or a dripper was never pushed in properly. Dry ends, where the furthest emitters on a long line barely drip, which usually means the line is too long for one feed and needs splitting. And dry soil around a plant that has a dripper, which means the dripper is sitting on a stone or the soil is shedding water sideways.
Fix what you find while everything is visible and wet. Push fittings home, swap a sluggish dripper, add one extra dripper beside any plant whose soil stays dusty. Then dig one finger into the soil an hour after the run finishes. It should be damp a few centimetres down at each plant and dry on the paths. That is the whole goal, right there.
My test shortcut: put an empty jam jar under one emitter near the tap and one at the far end of the longest line. After a twenty-minute run they should hold close to the same amount of water. If the far jar is nearly empty, that line needs splitting or feeding from the middle.
Step 5: Mulch over the lines
Once the system passes its test, cover the beds with mulch, straight over the top of the lines. A layer of bark, compost or straw around 5 cm deep does three jobs at once. It slows evaporation from the soil surface, which is the other half of why drip saves water. It hides the black tubes, so the bed looks like a bed instead of a plumbing project. And it keeps the tubes out of direct sun, which makes the plastic last longer. Just keep a note, or a photo on your phone, of where the lines run. Future you, holding a fork in April, will be grateful.
The timer: the optional upgrade I now would not skip
A battery timer screws onto the tap between the tap and the backflow preventer, and turns the water on and off on a schedule you set. It is the one upgrade that changes drip from a good system into a holiday-proof one. Set it for early morning, go away for two weeks, and the beds carry on without a neighbour doing you favours.
The honest footnote: the timer only works if you remember the batteries. Mine died in the hottest week of last summer while I was away, and the courgettes have never quite forgiven me. Fresh batteries at the start of the season, and a spare set in the kitchen drawer, is now a written rule in this house. Check the little filter in the timer at the same time.
How often to run it
Drip rewards the opposite habit to sprinkling. Water long and less often. One deep run of one to two hours, two or three times a week in hot weather, pushes moisture down to where roots grow deep and strong. A ten-minute sprinkle every day wets only the surface, and roots stay shallow and needy near the top, which is the worst of both worlds.
Run it early in the morning if you can. The soil soaks it up before the sun gets to work, and the plants start the day charged. Evening is second best. Midday is the worst slot on a timer, water lost to the heat and a warm wet bed overnight for the slugs. In a drought, follow whatever watering rules your local council sets. A drip system on a timer, early in the morning, is usually the method those rules are kindest to, and rightly so.
Winter care: ten minutes in autumn
The lines themselves can stay exactly where they are all winter. The water inside them cannot. Before the first hard frost, turn off the tap, open the end caps and let the lines drain, then leave the caps off or loosely on so nothing is sealed full of water. Bring the timer and the filter indoors, because both have parts that crack when they freeze. That is the whole job. In spring, flush the lines once before capping, check the filter mesh, put fresh batteries in the timer and the system wakes up as if nothing happened.
Four mistakes I see (and have made)
No pressure reducer. Full mains pressure in a drip line does not make it water faster. It makes fittings pop off at 6am and turns emitters into sprinklers. The reducer is cheap, small and non-negotiable.
Emitters buried under soil. A dripper pushed into the ground clogs with soil and root hairs, and a drip line buried completely cannot be checked or fixed. Lines lie on the soil, under the mulch, never in the soil.
Mixed thirsts on one zone. Tomatoes and lavender on the same line means one of them is unhappy all season. Zone by water need at the planning stage, when it is still just pencil lines.
Running it at midday. The system will work, and a good part of the water will not reach the roots. Early morning costs you nothing and keeps the benefit.
A quick word on safety
Three things, briefly, because they matter. Fit the backflow preventer and keep it fitted, it protects your household water. Never drink from a garden line or fill a glass from the end of the tube; the water sits warm in black plastic and is for the garden only. And check your local rules during drought or hosepipe restrictions before running any system, timer included.
Questions I get asked about drip irrigation
Can I add to the system later, or do I have to plan it all now?
Add away. The main line is the only fixed part, and even that extends with a joiner. Punch a new hole, push in a connector and run a new line whenever a new bed goes in. I have extended mine three times, and the joins are invisible in use.
An emitter has stopped dripping. Is the whole line ruined?
Almost never. Unscrew or pull out the blocked dripper, soak it in a mug of warm water with a splash of vinegar for an hour, and poke the hole clear with a pin. Built-in emitters on drip line usually clear with a flush: take the end cap off and run the tap for two minutes. If one section is truly dead, cut it out and join in a fresh piece.
Does drip work for pots on a patio?
Yes, and it is where the system earned its keep in my garden. Run blank tube along the row of pots and punch in one adjustable dripper per pot, pushed into the compost on a little spike. Pots dry out faster than beds, so give them their own zone and a shorter, more frequent schedule.
How long does the tubing last?
Kept under mulch and out of the worst sun, the main line in my garden is on its fourth year and looks unremarkable, which is what you want. Lines lying bare in full sun go brittle sooner. The cheap parts that do wear are end caps and drippers, and those cost pennies to swap during the spring flush.
Plan by thirst, fit the reducer, flush before you cap, and watch one full run with a mug of tea in hand. Do those four things and the system will quietly water your beds for years while you do something more interesting. Tell me in the comments what you are growing this year, and I will help you work out the zones.
Lisa Ben
Lisa paints, builds, thrifts and rearranges her way through one very patient house, then writes down everything she learns here on Wazala. The garden beds out back are her favourite argument after white paint. New projects land every Tuesday, Thursday and Saturday, and the Sunday Letter rounds them up once a week.
You might also like
How To Paint Your Front Door (And Pick The Colour)
Prep, the finish that survives weather, and testing a bold colour first.
Read more →
Propagate Pothos: Turn One Plant Into Twelve
Cuttings in water, the node that matters, and when to move them into soil.
Read more →
A Small Balcony Makeover On A Shoestring Budget
One weekend, a tight budget, and a balcony that finally earns its keep.
Read more →