How To Paint A Simple Wall Mural (Even If You Cannot Draw)
 By Lisa Ben
·
October 12, 2026
·
11 min read
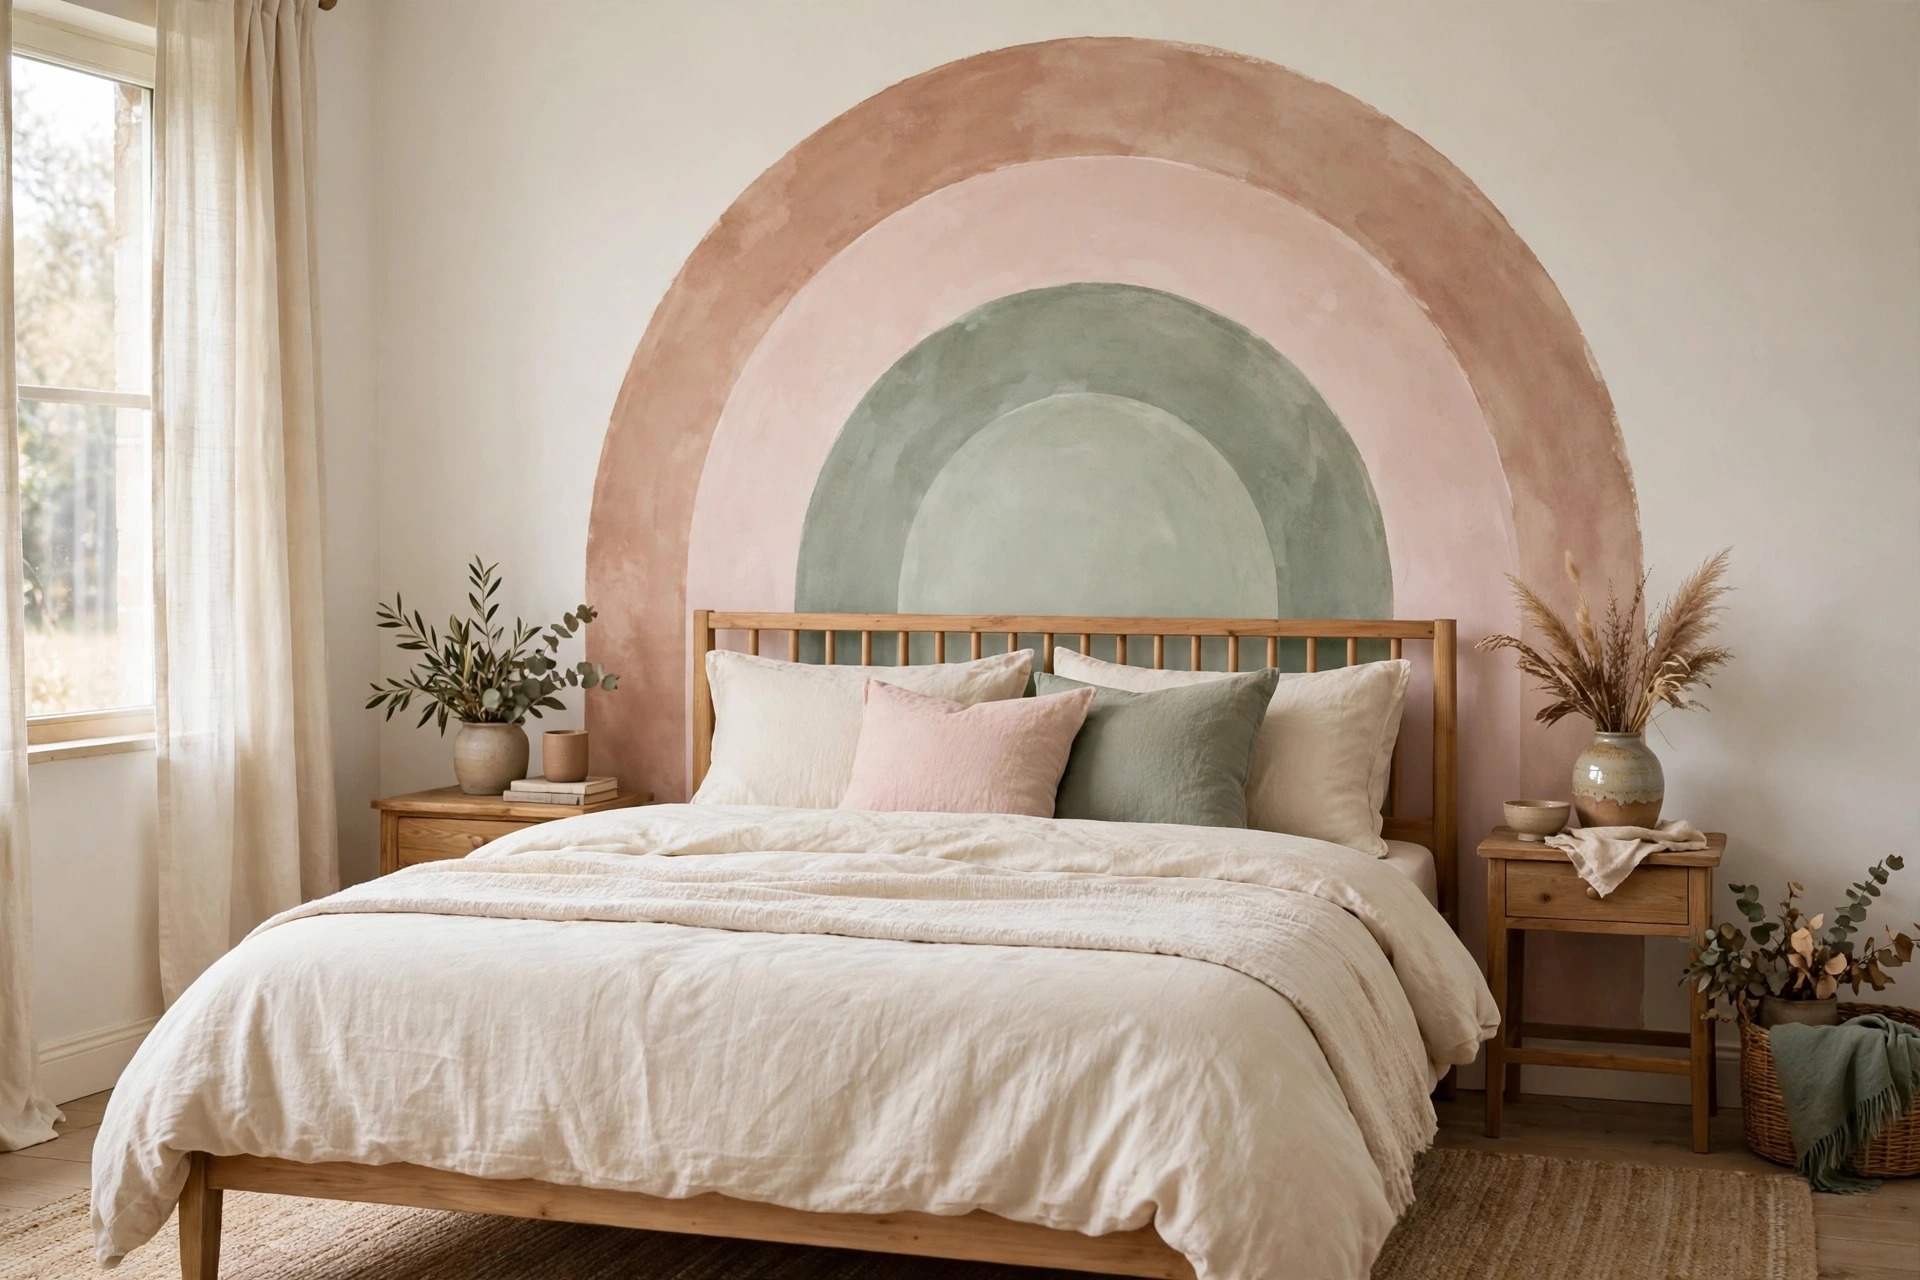
Let me get the confession out of the way first: I cannot draw. My stick figures look apologetic. So when I painted a mural on our spare bedroom wall, I expected to be repainting it white by the weekend. Instead it became the thing every visitor asks about, and nobody who has seen it believes the “cannot draw” part. That gap between how hard it looks and how simple it actually is comes down to one decision, made before any paint comes out: picking a design that cannot really go wrong.
This is the method I used. No freehand sketching, no artistic talent required. Tape, string, tester pots and shapes so simple that a wobble reads as charm.
Pick a design that forgives
A beginner mural succeeds or fails at the choosing stage. Some designs punish every shaky line. Faces, detailed animals, lettering, anything that needs two sides to match perfectly: those are out. You want the opposite, shapes so simple that the edges do not have to be identical to look right.
Top of the forgiving list: arches, the single most beginner-proof mural there is. One big arch behind a bed or a sofa looks designed, and its outline can be drawn with string, as you will see below. Scallops are next, a row of half-circles along a wall or just along the top of wainscoting height, dipped with a plate or a pot lid as your template. Rolling hills are just long, lazy curves stacked in two or three colours, and a hill that dips a little more than you planned is still a hill. Simple leaves, big oval leaf shapes on curved stems, work the same way: in nature no two leaves match, so yours do not have to either. And plain colour blocks, big rectangles and squares in a few toning colours, need nothing but tape.
What all of these have in common is that there is no wrong version. If your arch ends up slightly wider than the sketch, the room does not know. Keep that rule in your pocket while you plan: if a wobble would ruin it, it is not your design yet.
Pick the wall, then go bigger than you think
Choose a wall that is mostly bare and mostly seen. Behind the bed, behind the sofa, the wall a desk faces, the end of a hallway. Walls chopped up by doors, windows and radiators fight the shapes. One plain wall with one clear stretch is all you need.
Then the scale, which is where nearly everyone goes too small. Twenty little shapes scattered over a wall read as fuss, and every one is another outline to paint. One big motif is both easier and better looking. An arch that spans most of the bed. Hills that run the full width of the wall and rise a good metre. Scallops the size of dinner plates, not teacups. Big shapes mean fewer edges and calmer brush strokes. If your sketch feels slightly too big on paper, it is probably exactly right for the wall.
Colours: three or four tester pots, borrowed from the room
Resist the rainbow. A simple mural lives on three, at most four, colours, and the cheapest way to get a set that works together is to steal them from the room itself. Pull one colour from the bedding or cushions, one from the curtains or rug, and one from something wooden or metallic in the space, and you already have a palette that belongs there. The wall colour counts as one of your colours too, which we will use on purpose in the painting order below.
Buy tester pots, not tins. Mural shapes use surprisingly little paint, and one tester usually covers a large shape in two coats. Testers also let you try the real colours at full size before committing. Pick colours a step deeper than you think you want: paint looks paler spread over a whole wall than it does on a swatch card.
Getting the shapes up there without drawing
Here is the part that makes the whole project possible. You are not going to draw the mural freehand in the middle of the wall. You are going to construct it, with tools, in this order of ease.
1. Tape does the straight lines
For colour blocks, stripes and the straight sides of arches, painter’s tape is the whole technique. Stick it on, check it from the doorway, press the edges down firmly with a fingertip, and paint. Pull the tape off while the last coat is still slightly tacky and the line underneath is beautifully sharp. Tape fails when it is rushed onto dusty walls or left on for days, so wipe the wall first and finish taped sections the same day.
2. String and a pencil draw the curves
For arches and big circles, use the oldest trick in decorating: a pencil on a string works as a giant compass. Push a pin or a small nail into the wall at the centre point of your arch, tie a loop of string around it, and tie the other end around your pencil so the string’s length equals half the width of the arch. Keep the string pulled taut and swing the pencil slowly from one side to the other. The pencil traces a true, smooth arch that no free hand could match. Draw your two straight sides down from the ends of the curve with a level, and the whole arch is mapped. The same trick draws scallops at any size: move the centre pin along a taped straight line and swing a series of half-circles, each one starting where the last one ended.

3. Project or print the tricky bits
If your design has leaves or one motif you love from a picture, there is no shame in tracing it. A cheap mini projector, or a borrowed one, throws the image onto the wall at any size, and you simply run a pencil or a piece of chalk along the projected lines. No projector? Print the shape across several sheets of paper, tape the sheets together on the wall, and draw through them with hard pressure from a pencil, or prick along the outline and join the dots. It feels like cheating because it works like cheating. Professionals transfer designs exactly this way.
4. The grid method, honestly
The last resort is the grid: draw a light grid of squares over a small sketch, draw a matching grid of bigger squares faintly on the wall, then copy each square’s contents one at a time. It is accurate and it is slow, and for the simple shapes in this article you will almost certainly not need it. I mention it because it exists and because it is the right tool the day you fall for something more detailed. Start with tape and string. Promote yourself to grids later, if ever.
Painting order: big first, edges last
Paint in this order and the wall practically finishes itself. Start with the biggest shapes first. They set the structure, and small shapes can be nudged to fit around them, while the reverse is a fight. If you have designed it that way, leave the wall’s existing colour as your background: hills rising from the skirting board, with the wall colour as the sky above them, means the largest area needs no paint at all, and the mural automatically ties into the room.
Work one colour at a time across the whole design, then move to the next. Two thin coats beat one thick one every time. The first coat will look patchy, especially over a strong existing colour; that is normal, and the second coat is where it becomes a mural. Keep a wet edge, working in one direction across each shape rather than dabbing at random spots.
Edges are the last job, not the first. Once both coats are on and touch-dry, go around every outline with a small artist’s brush and tidy the line. A line that wobbled mid-shape can be straightened at this stage by painting the neighbouring colour a whisper over it. And while any paint is still wet, a damp cloth wrapped around a fingertip wipes a mistake off cleanly, right back to the colour underneath. Wet paint forgives; dry paint negotiates. Keep the cloth in your pocket the whole time.
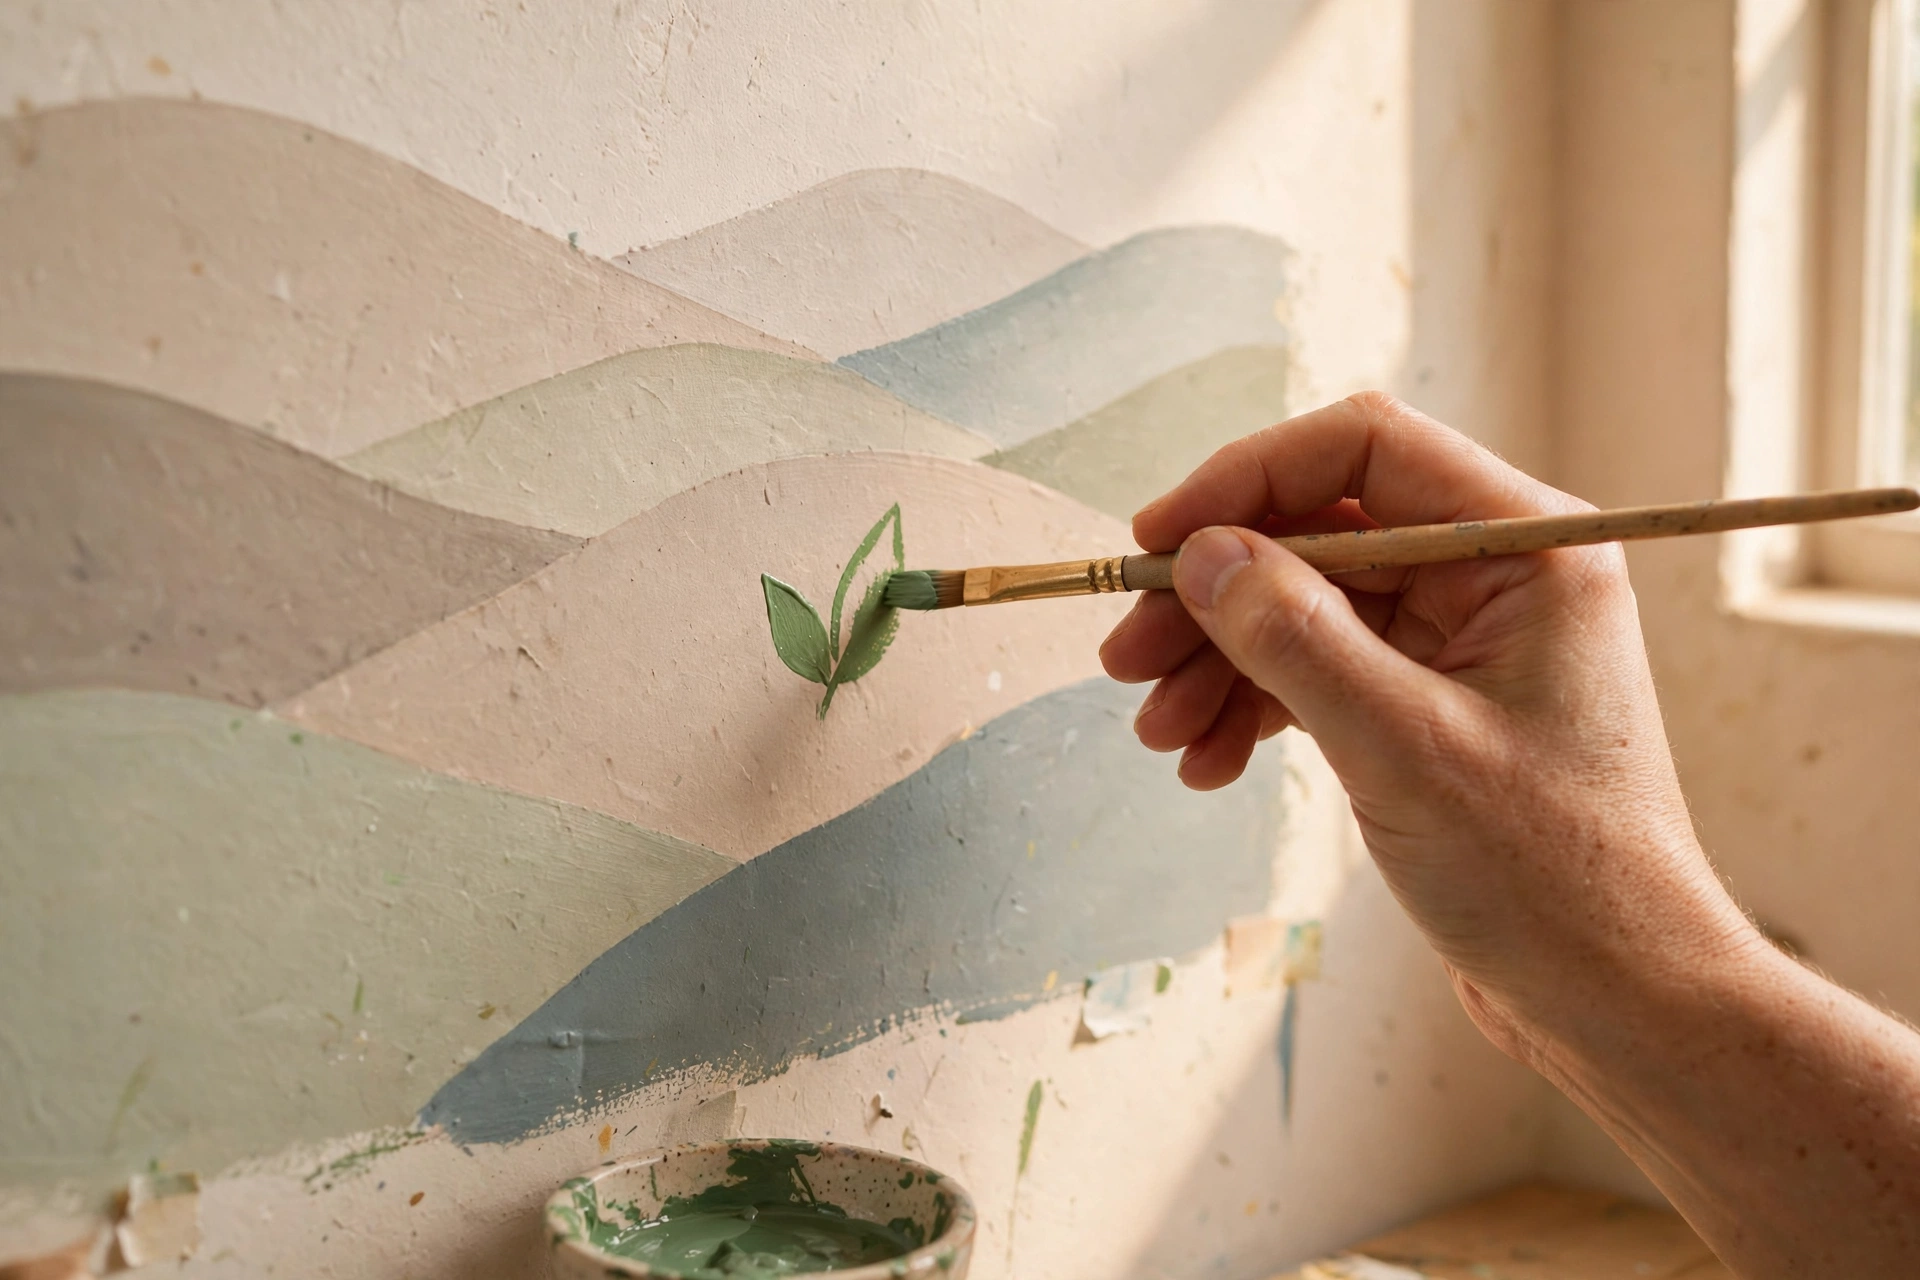
My habit: before the real wall, paint the whole design at small scale on a spare board or a big piece of lining paper, using the actual tester pots. Twenty minutes, and you will catch a colour that fights, a scallop that is too small, or an arch that wants to be wider, while all of it is still free to change.
Step back. Then step back again
Most mural mistakes are invisible from painting distance and obvious from the doorway. Nose half a metre from the wall, a scallop can look perfect; from across the room, the whole band can be quietly sloping downhill. So build the pauses in. After taping, after the pencil lines, after each colour, put the brush down, walk to the furthest corner, and look from wherever the wall will actually be seen. A phone photo helps too: the screen flattens the wall and shows up uneven spacing your eyes keep excusing.
Living with it: matt paint hides a multitude of wobbles
Choose a matt or flat finish for mural shapes, always. A flat finish swallows tiny bumps, brush marks and slightly wobbly edges, because it does not throw light back at them. Glossy or satin paint does the opposite: it spotlights every ridge and roller line the moment the sun crosses the room. The one exception is a high-traffic hallway or a small child’s wall, where a washable matt gives you wipeability without the shine. That is the paint to ask for at the counter.
And the honest safety net under this entire project: it is paint. If you hate it in a month, you paint over it, two coats of emulsion and the wall has forgotten everything. A mural is honestly easier to remove than most wallpaper. Nothing here is permanent, which is exactly why it is worth trying. The one exception is renters: a mural is a change to the landlord’s wall, so ask first, in writing, and keep the wall colour matched and ready.
The mistakes I made so you do not have to
- Starting freehand in the middle. My first attempt began with a confident freehand flower in the centre of the wall, which then had to be matched, badly, by everything around it. Construct the outlines first, all of them, then paint. The middle is the worst place to begin.
- Too many colours. Six tester pots felt like options; on the wall they looked like an argument. Three or four colours, one of them repeated, is the whole secret. If the wall feels loud, it is the count, not the shades.
- Glossy paint. A satin finish on my first arch showed every single wobble in the afternoon light, like it was under a spotlight. Matt is not a preference here, it is the disguise that makes beginner work look deliberate.
- Skipping the small test. The one mural I did not trial on a board first had a green that dried two shades darker and swallowed the lightest hill whole. Twenty minutes on lining paper would have caught it. Test the full motif, at small scale, in the real colours.
None of those mistakes cost more than a tester pot and an hour. That is the real shape of this project: every error is small, fixable and painted over by bedtime.
Questions I get asked about wall murals
I genuinely cannot draw a straight line. Can I still do this?
Yes, because the method never asks you to. Tape makes the straight lines, a pencil on a taut string makes the curves, and a projector or printed sheets handle anything more detailed. Your actual jobs are measuring, taping and colouring inside shapes, and colouring inside shapes is a skill most of us mastered at age five.
How long does a simple mural take?
An arch plus a couple of shapes is a relaxed weekend: an hour or so for taping and pencil outlines, then two coats with drying time between them. Rolling hills along one wall are quicker, often a single day. The drying gaps are the schedule, not the painting, so it fits around everything else.
What if I get bored of it?
Then it has done its job and you paint over it. Two coats of ordinary emulsion cover a matt mural completely, because the shapes are nothing more than a thin layer of colour. Keep a note of the colours you used, in case you would rather retouch a scuff than redo the whole wall one day.
Can I paint a mural in a rented home?
Only with your landlord’s written permission, because it is a change to their wall even though it is easy to reverse. Ask with a sketch attached and an offer to repaint it to the original colour when you leave, and keep the matching wall paint aside. Plainly put, paint you can remove is still a change you should clear first.
Pick the forgiving design, go bigger than feels sensible, and let tape and string do the drawing. Then tell me which wall you are brave enough to start with. The spare bedroom gets the most volunteers in this house, and I suspect yours is the same.
Lisa Ben
Lisa paints, builds, thrifts and rearranges her way through one very patient house, then writes down everything she learns here on Wazala. Her first mural survived contact with actual visitors, which counts as a review. New projects land every Tuesday, Thursday and Saturday, and the Sunday Letter rounds them up once a week.
You might also like
The 12 Best White Paint Colours For Every Light Direction
The white that makes your mural colours behave, sorted by the light your room actually gets.
Read more →
How To Hang A Gallery Wall Around The TV
Another wall, another no-talent-needed layout: paper templates first, nails second.
Read more →
Small Living Room Layouts: 6 Arrangements For Tight Spaces
Where the furniture goes once the wall looks good: six layouts that fit small rooms.
Read more →