How To Make A Simple DIY Garden Trellis From Battens
 By Lisa Ben
·
October 12, 2026
·
10 min read
If you have priced up a ready-made trellis panel lately, you know the problem. The cheap ones wobble if you look at them, the sturdy ones cost more than the plant they are meant to hold, and none of them is ever the size of the awkward gap you actually need to fill. A homemade trellis is a handful of wooden battens, a box of screws and one quiet afternoon, built to the exact centimetre your bed, wall or pot asks for.
Mine carries sweet peas in spring and climbing beans all summer, and there is nothing fancy about it: a flat grid of battens, screwed together, coated against the weather and fixed up wherever it stands. If you can measure a line, drill a hole and drive a screw, you can build this. Here is the whole job, in the order I do it.
The design: one flat grid, nothing clever
The panel is a simple grid. Two uprights form the sides, a few thinner vertical battens sit between them, and horizontal battens are screwed across the front to lock the whole thing together. The squares give climbing stems plenty to grab onto.
A good starter size is about 60 cm wide and 180 cm tall. That suits one vigorous climber or a small group of sweet peas, and it fits the gap beside most doors and fences with very little waste. Scale it to the plant, though. A clematis settling in for years deserves the full height, climbing beans want width as much as height, and a patio pot needs a smaller panel, nearer 120 cm tall, so it does not catch the wind like a sail.
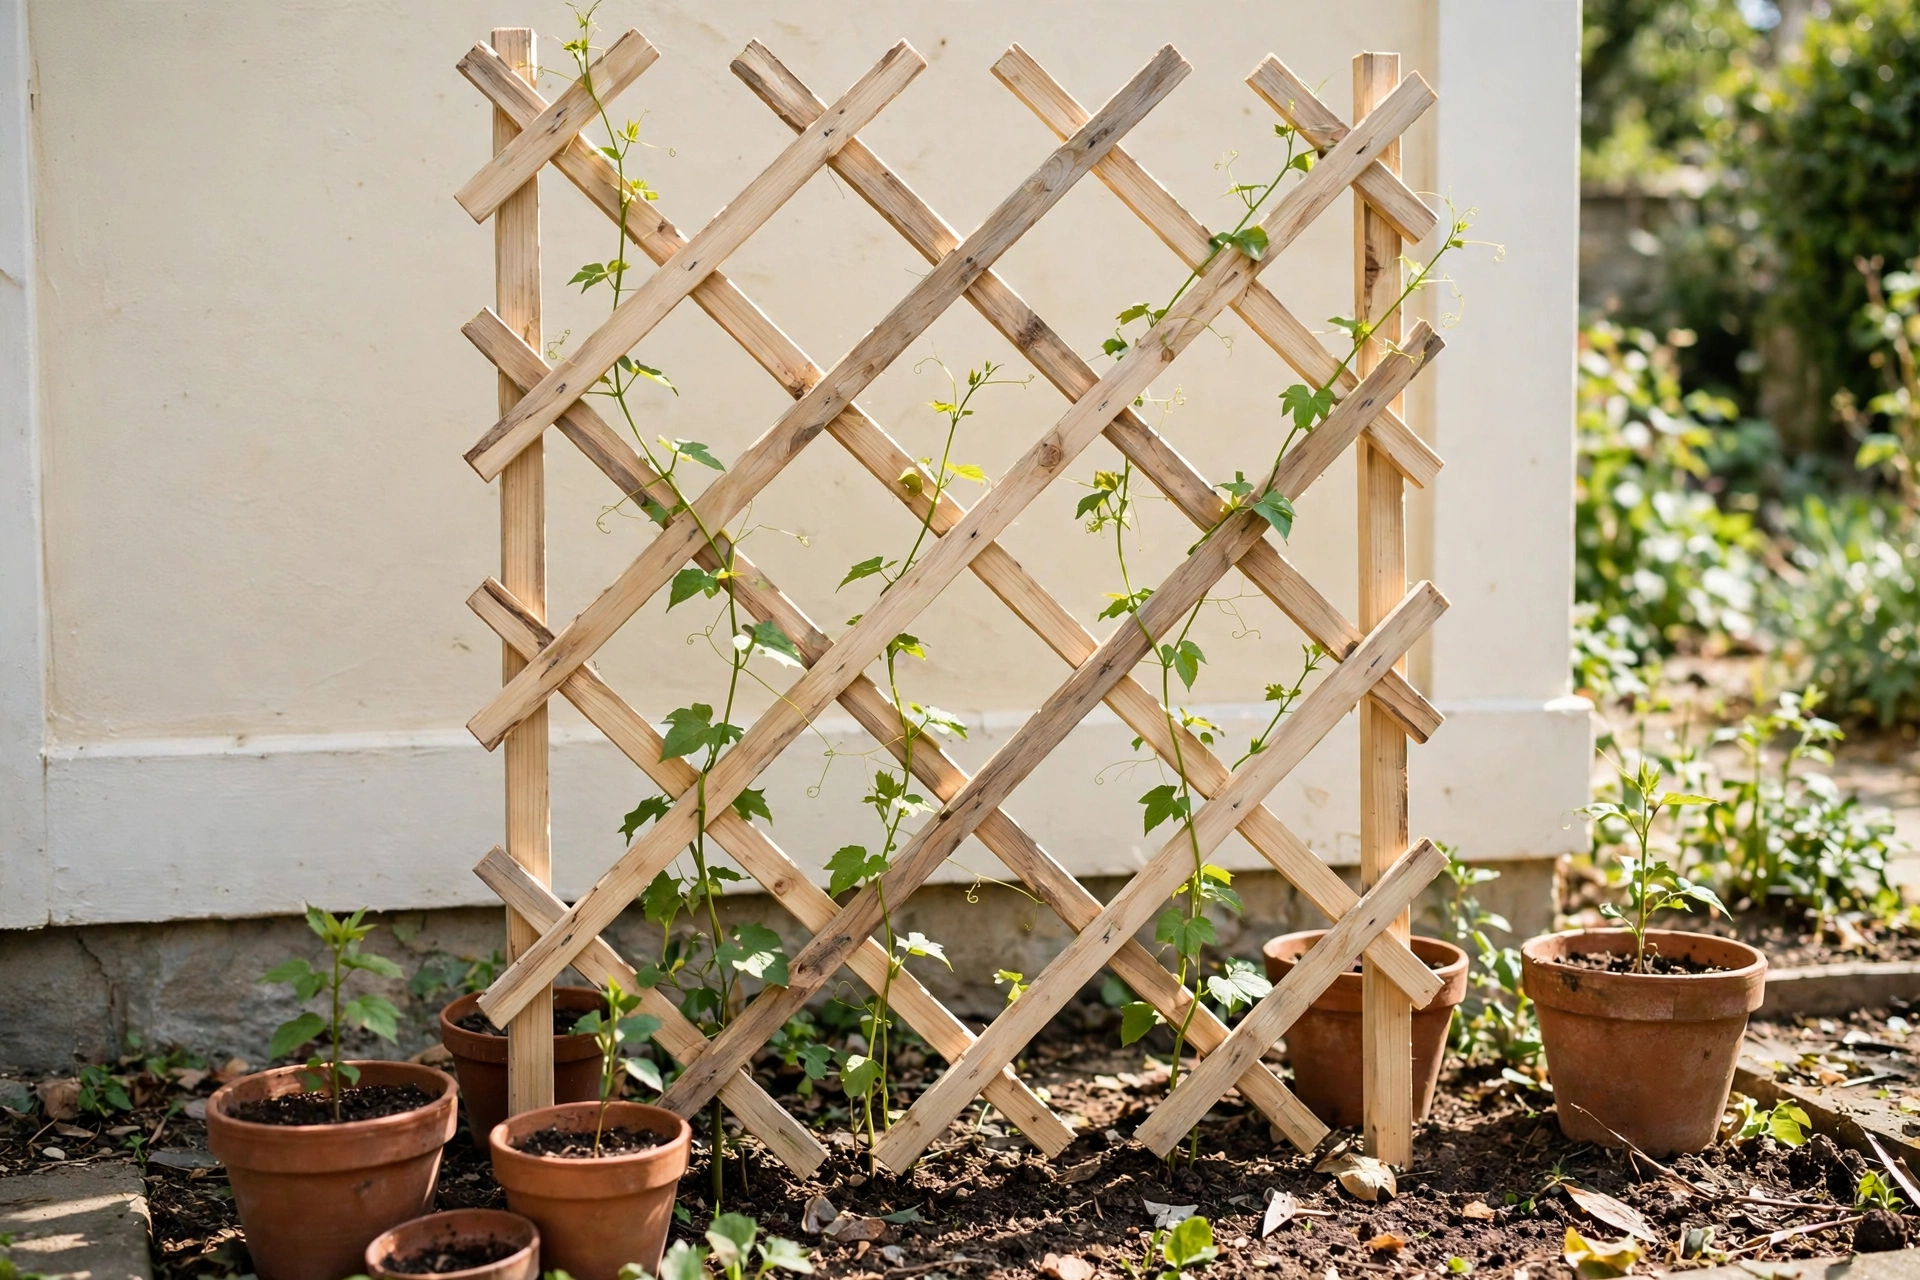
The panel in the photo at the top has its battens crossed diagonally, which gives the diamond lattice look: prettier, and slightly more fiddly to measure. The straight grid in this tutorial is the one I build most often, because every cut is a right angle and every gap is the same.
What you need
Timber first, because it decides how long your trellis lives. Buy battens sold for outdoor use: pressure-treated softwood, the kind labelled for exterior or garden use, around 25 x 38 mm. Treated softwood shrugs off rain for years. The smooth planed pine sold for indoor jobs does not: it drinks water, swells, and starts rotting around the screw holes within a couple of seasons. I learned that on a panel I built from shed offcuts because they were free. It was not free by the time I had built it twice.
Screws matter more than they look. Use galvanised or stainless steel screws made for outdoor use. Ordinary bright screws rust quickly outside, and the rust weeps down the wood in brown streaks before the screw itself gives up. A box of 40 mm exterior screws builds two or three panels.
- Treated softwood battens (see the cut list below)
- 40 mm exterior screws, galvanised or stainless
- A saw, handsaw or mitre saw, either is fine
- A drill/driver, with a 3 mm bit for pilot holes
- Tape measure, pencil and a try square or speed square
- Sandpaper, around 120 grit, for splinters
- Exterior wood stain or outdoor paint, plus a brush
- Soft plant ties or garden twine, for later
Step 1: Work the cut list out on paper
Before you pick up a saw, draw the panel on paper and write down every piece. Five minutes with a pencil saves the mid-build discovery that you are one batten short. For the 60 x 180 cm grid, with squares of roughly 15 cm, my cut list looks like this:
- 2 uprights at 180 cm (the outside edges)
- 3 inner verticals at 180 cm (evenly spaced)
- 7 horizontals at 60 cm (across the front)
That is about 13 metres of batten in total. Buy one spare length on top: everyone miscuts one piece, and a spare is cheaper than a second trip to the timber yard.
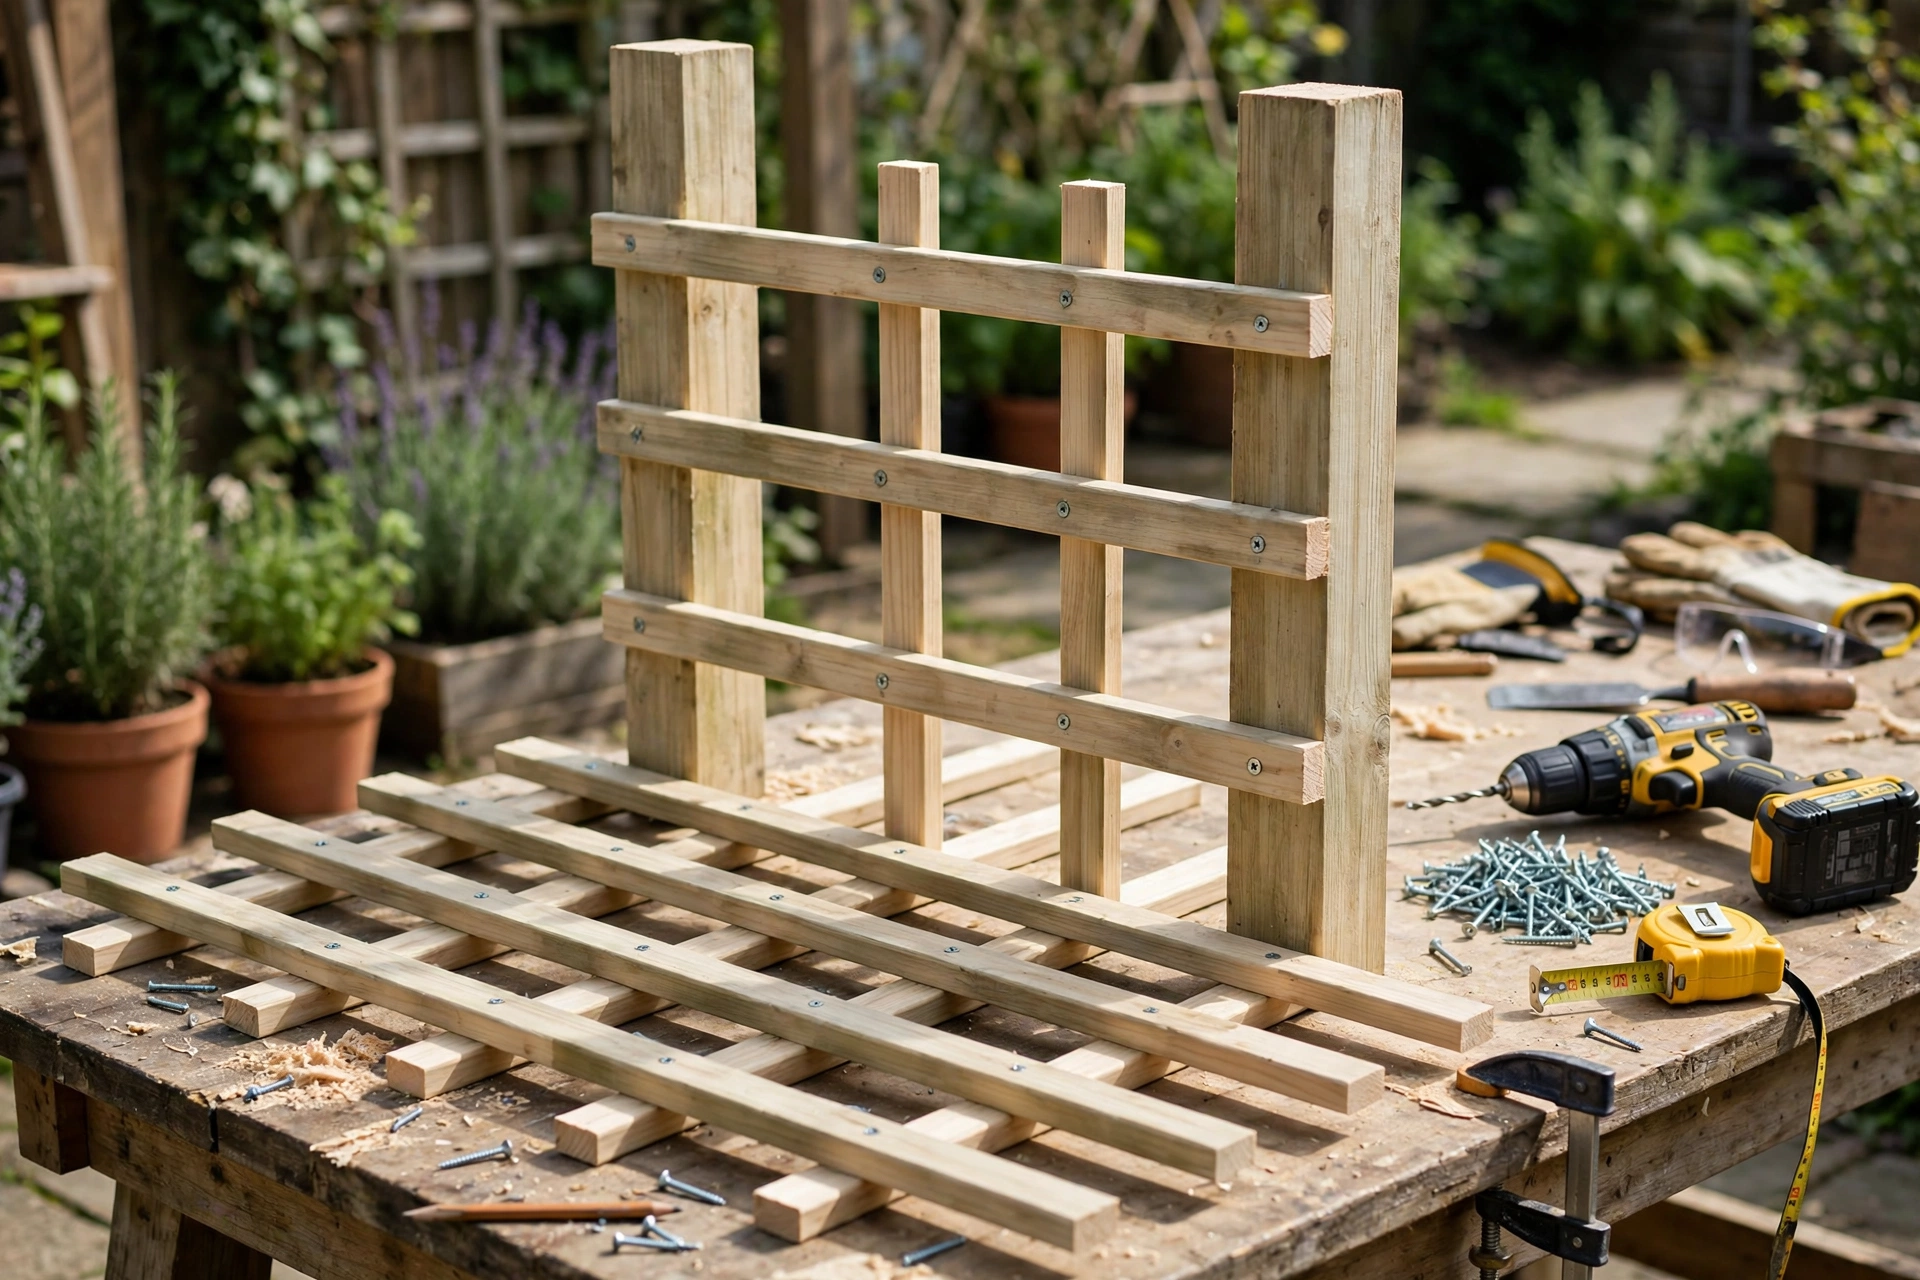
Step 2: Lay it out flat and check it is square
Build the panel flat, on the flattest surface you can find: a workbench, a patio, a sheet of board on trestles. Not the lawn. Grass looks flat and is not, and a panel screwed together on a slope keeps the slope forever. My first one did, and it leaned like it was listening for gossip.
Lay the two uprights down first, 60 cm apart, then the three inner verticals between them with even gaps, and the horizontals across the top. Before a single screw goes in, check the panel is square: measure diagonally from corner to corner, then the other diagonal. If the two numbers match, you are square. If they do not, push the longer corner in gently until they do. This ten-second check is the whole difference between a tidy grid and a parallelogram.
My spacer trick: cut one offcut to exactly the gap width you want, about 15 cm, and use it as a measuring block for every gap as you work. The squares come out identical, and identical squares are what make a homemade panel look shop-bought.
Step 3: Pre-drill, then screw it together
Pre-drill every hole that lands near the end of a batten. Thin battens split along the grain the moment a screw goes in close to the end without a pilot hole, and a split end means cutting the piece again. A 3 mm pilot hole takes two seconds.
Then screw the horizontals to the verticals, one screw at each crossing, working from one end to the other and checking the gaps against your spacer block as you go. Put two screws into each of the outer uprights, where the strain lands when the panel is lifted and fixed. Keep the screw heads sitting just flush: heads left proud catch your hands every time you train a plant.
Step 4: Sand it, then finish it properly
Run sandpaper quickly over the whole panel, mostly at the crossings and cut ends, anywhere a hand will grab later. Five minutes, and it is the difference between training plants bare-handed and wearing gloves all summer.
Then the finish: an exterior wood stain or an outdoor paint, two coats, brushed on before the panel goes up, while you can still reach every side. Pay special attention to the cut ends. End grain drinks water like a straw, and the ends are where rot starts, so give every cut end an extra brushful and let it soak in. Let the panel dry for the time the tin tells you before you fix it up. A well-coated trellis asks for nothing but a fresh coat every couple of years.
Step 5: Fix it where it will live
There are three sensible homes for a panel like this, and the build is the same for all of them. Only the fixing changes.
In the ground, on two short posts
The strongest option for a flower or veg bed. Screw the panel to two short treated posts or metal post spikes set in the ground behind it, and keep the bottom batten a hand's width clear of the soil. A panel whose feet sit in wet earth rots from the bottom up, whatever the label on the tin said; held clear of the ground, it can last for many seasons.
On a wall, with spacers
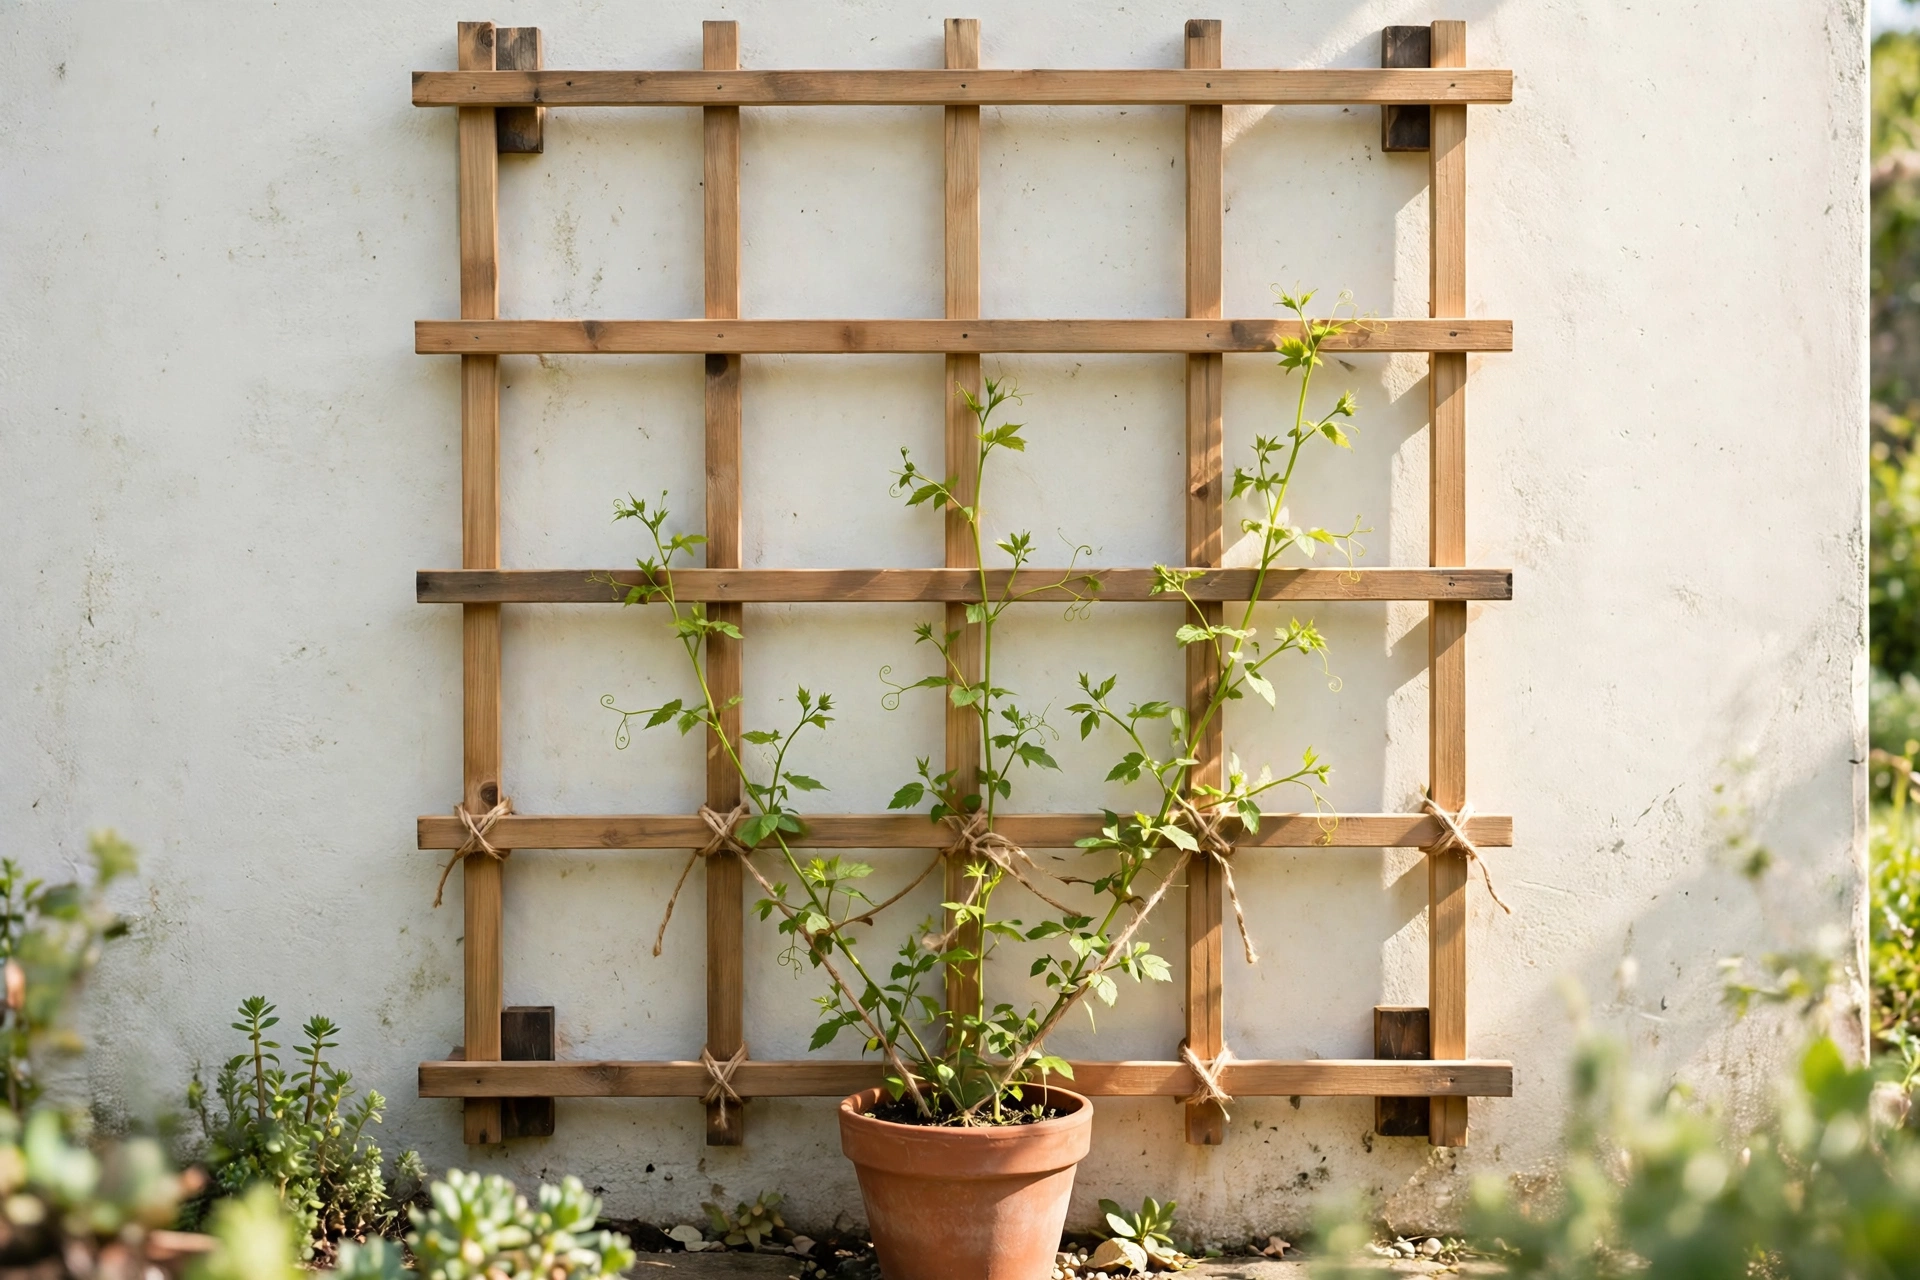
Fix through small blocks of wood, offcuts of the same batten are perfect, so the panel stands about 5 cm off the wall instead of flat against it. That gap is not a detail, it is the point. Air moves behind the panel, the leaves dry after rain instead of sitting damp, and the wall itself stays dry instead of growing a green shadow. One thing before you drill: check the wall or fence is actually yours to drill into. Boundary fences very often belong to the neighbour, and a polite knock and a quick question costs nothing. Most neighbours say yes.
In a big pot, for a patio climber
The renter-friendly option. Take the biggest pot you have, screw the panel to two short stakes pushed deep into the compost, and stand the pot somewhere sheltered or against a wall, because a tall panel in a pot will catch the wind. Drop a brick or a few stones in the bottom if the spot is exposed. A 120 cm panel suits a pot; the full 180 cm one is asking to be blown over.
Training the plant up it
Plant at the base, water well, and be patient for the first few weeks. As stems grow long enough to reach, tie them in loosely with soft twine or fabric plant ties, in a loose figure of eight, so the tie holds the stem without squeezing it. Where a young stem is soft and bendy, weave it gently in and out of the squares. Never force an older, stiff stem to bend where it does not want to go: tie it to the nearest batten and let the new growth do the weaving. Check the ties every week or two through the growing season, and loosen any that a thickening stem is biting into.
Good first plants for a homemade trellis
Sweet peas are the kindest first climber: fast, forgiving, and the more you pick the more they bloom. Climbing beans are the hardest workers, up the panel in weeks and paying rent in dinners. Give them width, because the leafy growth gets heavy. Jasmine is the slow starter that rewards patience, quiet in its first year and then away, with summer scent in the evenings. Clematis comes in a hundred varieties, so check the label for height when you buy. It likes its flowers in the sun and its roots cool: a flat stone over the roots at the base keeps it happy.
Mistakes I have made, so you do not have to
Building it flat on the grass. The panel came out racked, a tidy parallelogram. Build on a hard, flat surface and check the diagonals before the screws go in.
Using the shiny screws from the kitchen drawer. They looked fine in April; by autumn there were rust streaks down the battens and two screw heads had gone soft. Exterior screws cost pennies more.
Screwing the panel flat against the wall. The plant got no air, the leaves stayed wet and mildewed, and the wall behind it stayed damp and green. The 5 cm spacer gap fixed all three problems at once.
Tying stems in with thin wire. It cut into the stems as they thickened, like a cheese wire. Soft twine or fabric ties, checked every few weeks, and nothing else.
Questions I get asked about homemade trellis
How long will a homemade batten trellis last?
Longer than the flimsy shop panels. Treated softwood, exterior screws and two coats of finish get you years rather than seasons. The first panel I built this way is on its sixth summer. The ends, and anywhere the panel touches soil, fail first, which is why sealed ends and clear feet matter so much.
Can I build one without power tools?
Yes. A handsaw cuts battens easily, and the screws will go into softwood with a screwdriver if your wrists are up to it; it just turns an afternoon job into a longer one. If you only buy or borrow one tool, make it a basic drill/driver. It does the pilot holes and drives every screw, and it is the difference between a pleasant build and a sore arm.
How far apart should the battens be?
Squares of roughly 13 to 15 cm are the sweet spot: small enough that tendrils and young stems find a hold quickly, big enough that you can reach through to tie stems in at the back. For heavy, leafy growers like beans you can open the grid up to 20 cm squares and save some timber. Much wider and small climbers like sweet peas struggle for a grip.
Should I paint my trellis or stain it?
Either works, as long as it is an exterior product and you do two coats. Stain soaks into the wood, shows the grain and is the easier of the two to refresh later. Paint gives you colour, handy for matching a fence or a painted door, but it flakes eventually and needs a light sand before you re-coat. Whichever you pick, the cut ends get an extra brushful. That part is not optional.
That is the whole build: one grid, one afternoon, and a plant with somewhere to go. Tell me in the comments what you are growing up yours, and where the panel stands, ground, wall or pot. I read every one, and the bean growers and I have an ongoing argument about spacing that I fully intend to win.
Lisa Ben
Lisa paints, builds, thrifts and rearranges her way through one very patient house, then writes down everything she learns here on Wazala. The garden gets the same treatment as the rooms: simple builds, honest costs, mistakes included. New projects land every Tuesday, Thursday and Saturday, and the Sunday Letter rounds them up once a week.
You might also like
How To Paint Your Front Door (And Pick The Colour)
Prep, the finish that survives weather, and testing a bold colour first.
Read more →
Propagate Pothos: Turn One Plant Into Twelve
The indoor climber that roots in a jar of water. Snip, root, pot up, repeat.
Read more →
17 DIY Shelf Ideas For Every Room
More batten-and-screw energy, indoors: shelves for books, plants and everything else.
Read more →