Board And Batten Wall: The Weekend Project That Makes A Plain Room Look Built
 By Lisa Ben
·
October 30, 2026
·
12 min read
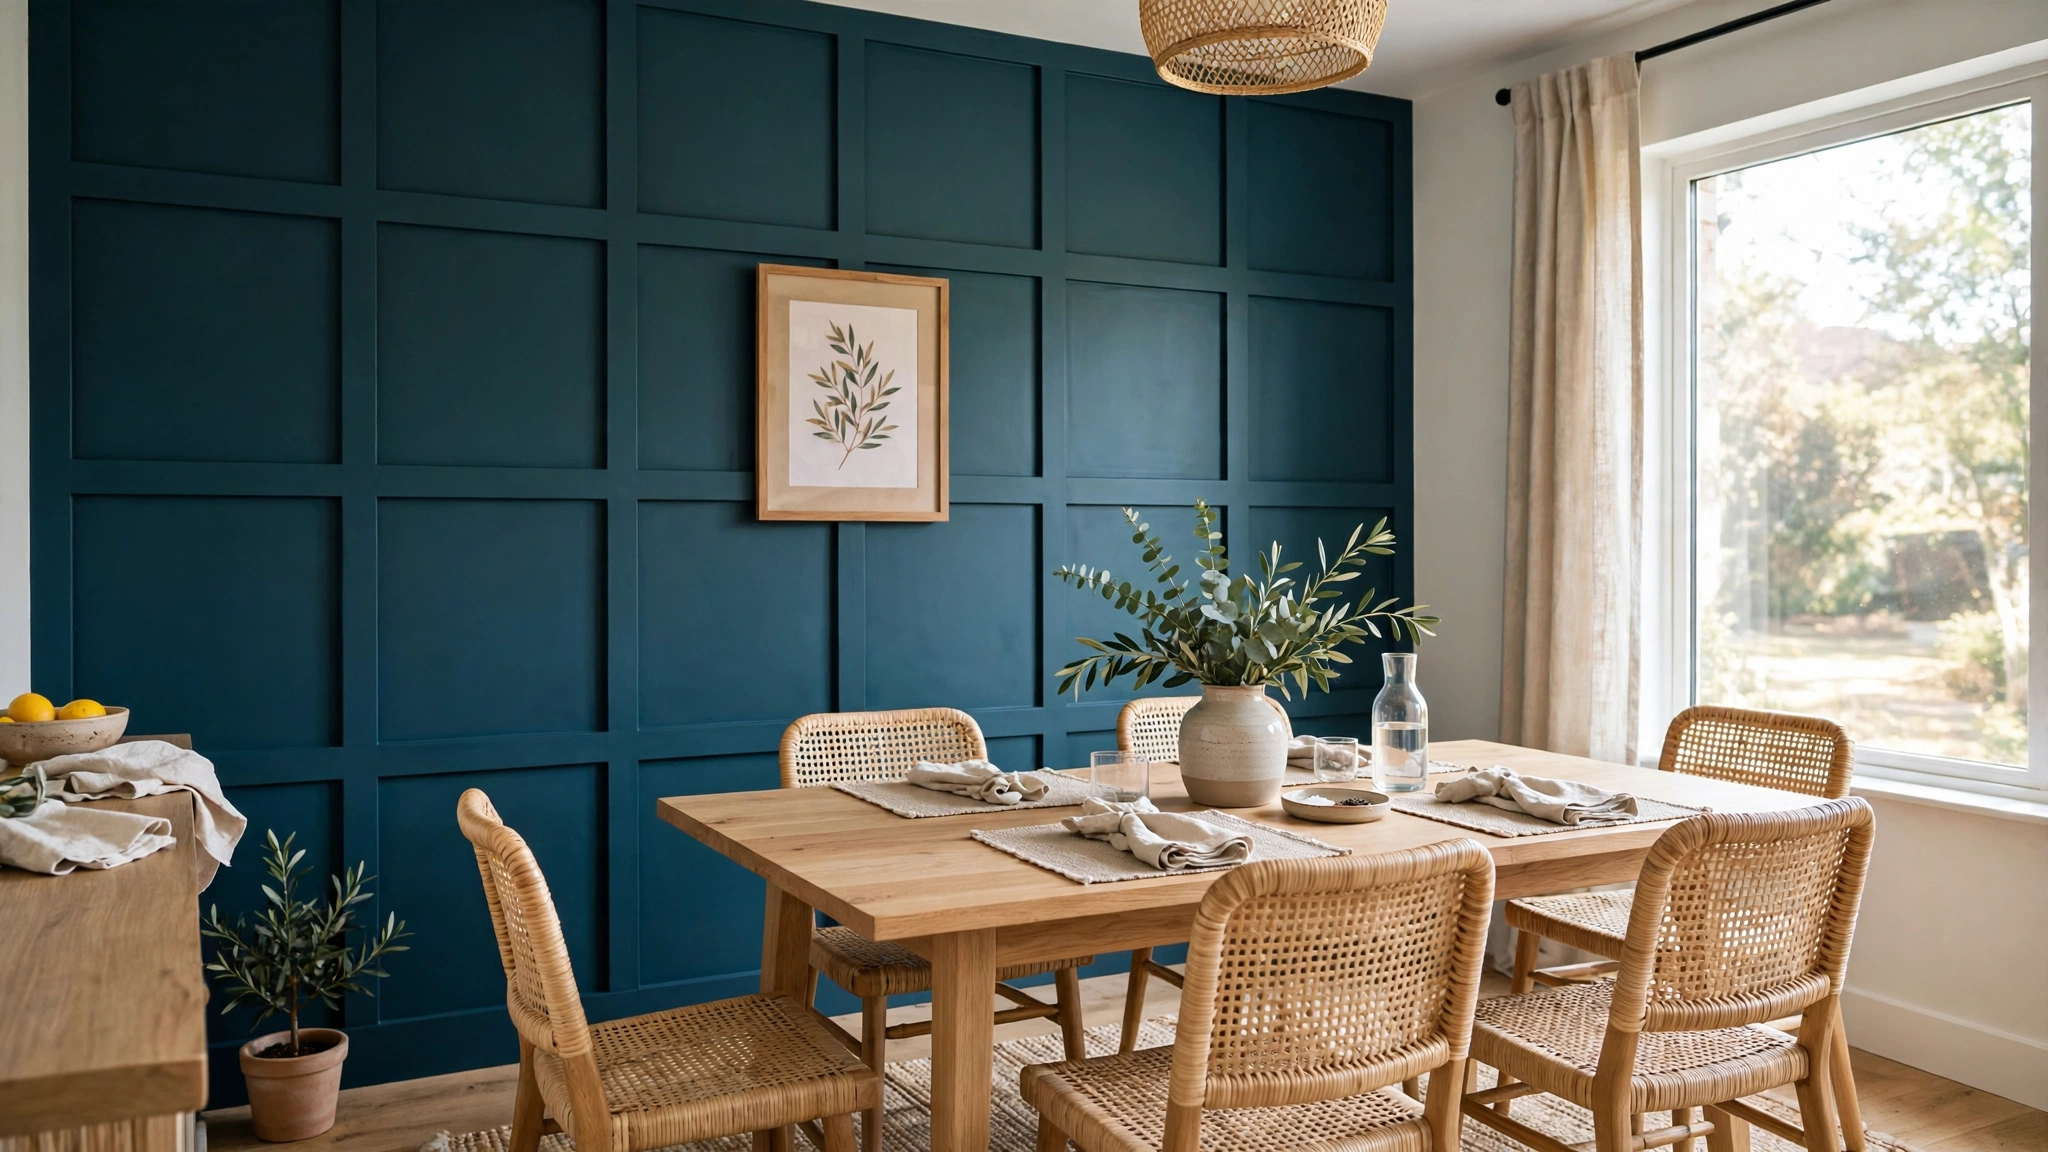
Every house has one wall that gives up. Ours was the long wall in the dining room: flat, pale and completely uninterested in being looked at. Art looked lost on it. The sideboard looked like it was waiting for a bus. Then I covered it in a grid of plain MDF strips, filled, caulked and painted the whole thing one deep blue-green, and now people ask which joiner built it. Nobody built it. I did, over a weekend, with a saw, a spirit level and more caulk than I thought a wall could want.
That is the whole appeal of board and batten. It is the cheapest way I know to give a flat wall some architecture, and the skills are beginner skills: measure, cut straight, glue, pin, fill, paint. The patience is in the planning and the caulking, not in anything fancy. Here is exactly how I do it, maths included.
What board and batten actually is
Traditionally it is wide boards fixed to a wall with narrow strips, called battens, covering the joins. The modern indoor version, the one all over dining rooms and hallways right now, keeps the look and drops the lumber. In the square-grid style I used, you fix thin battens in a pattern of boxes: two horizontal rails, verticals between them, and one or two horizontal rails crossing the middle. The wall itself becomes the panel inside each box.
That gives you two ways to build it. If your walls are smooth, battens go straight onto the plaster with adhesive and pins, and the painted wall shows through as the panel. If your walls are rough, heavily textured or wavy, you add the board part: a thin sheet of MDF fixed to the wall first, with the battens on top. It costs a bit more and takes longer, but it guarantees a flat finish. Most newer houses with smooth walls can skip the sheet entirely, which is why this project fits in a weekend.
Plan the grid before you buy a single batten
This is the step that decides whether the wall looks designed or improvised, so do not skip it even though nothing feels like it is happening. Measure the full width and height of your wall and write both numbers down. Then choose your batten width. Mine are 9 cm wide MDF strips, about 12 mm thick, which look chunky enough to read as panelling without eating the room.
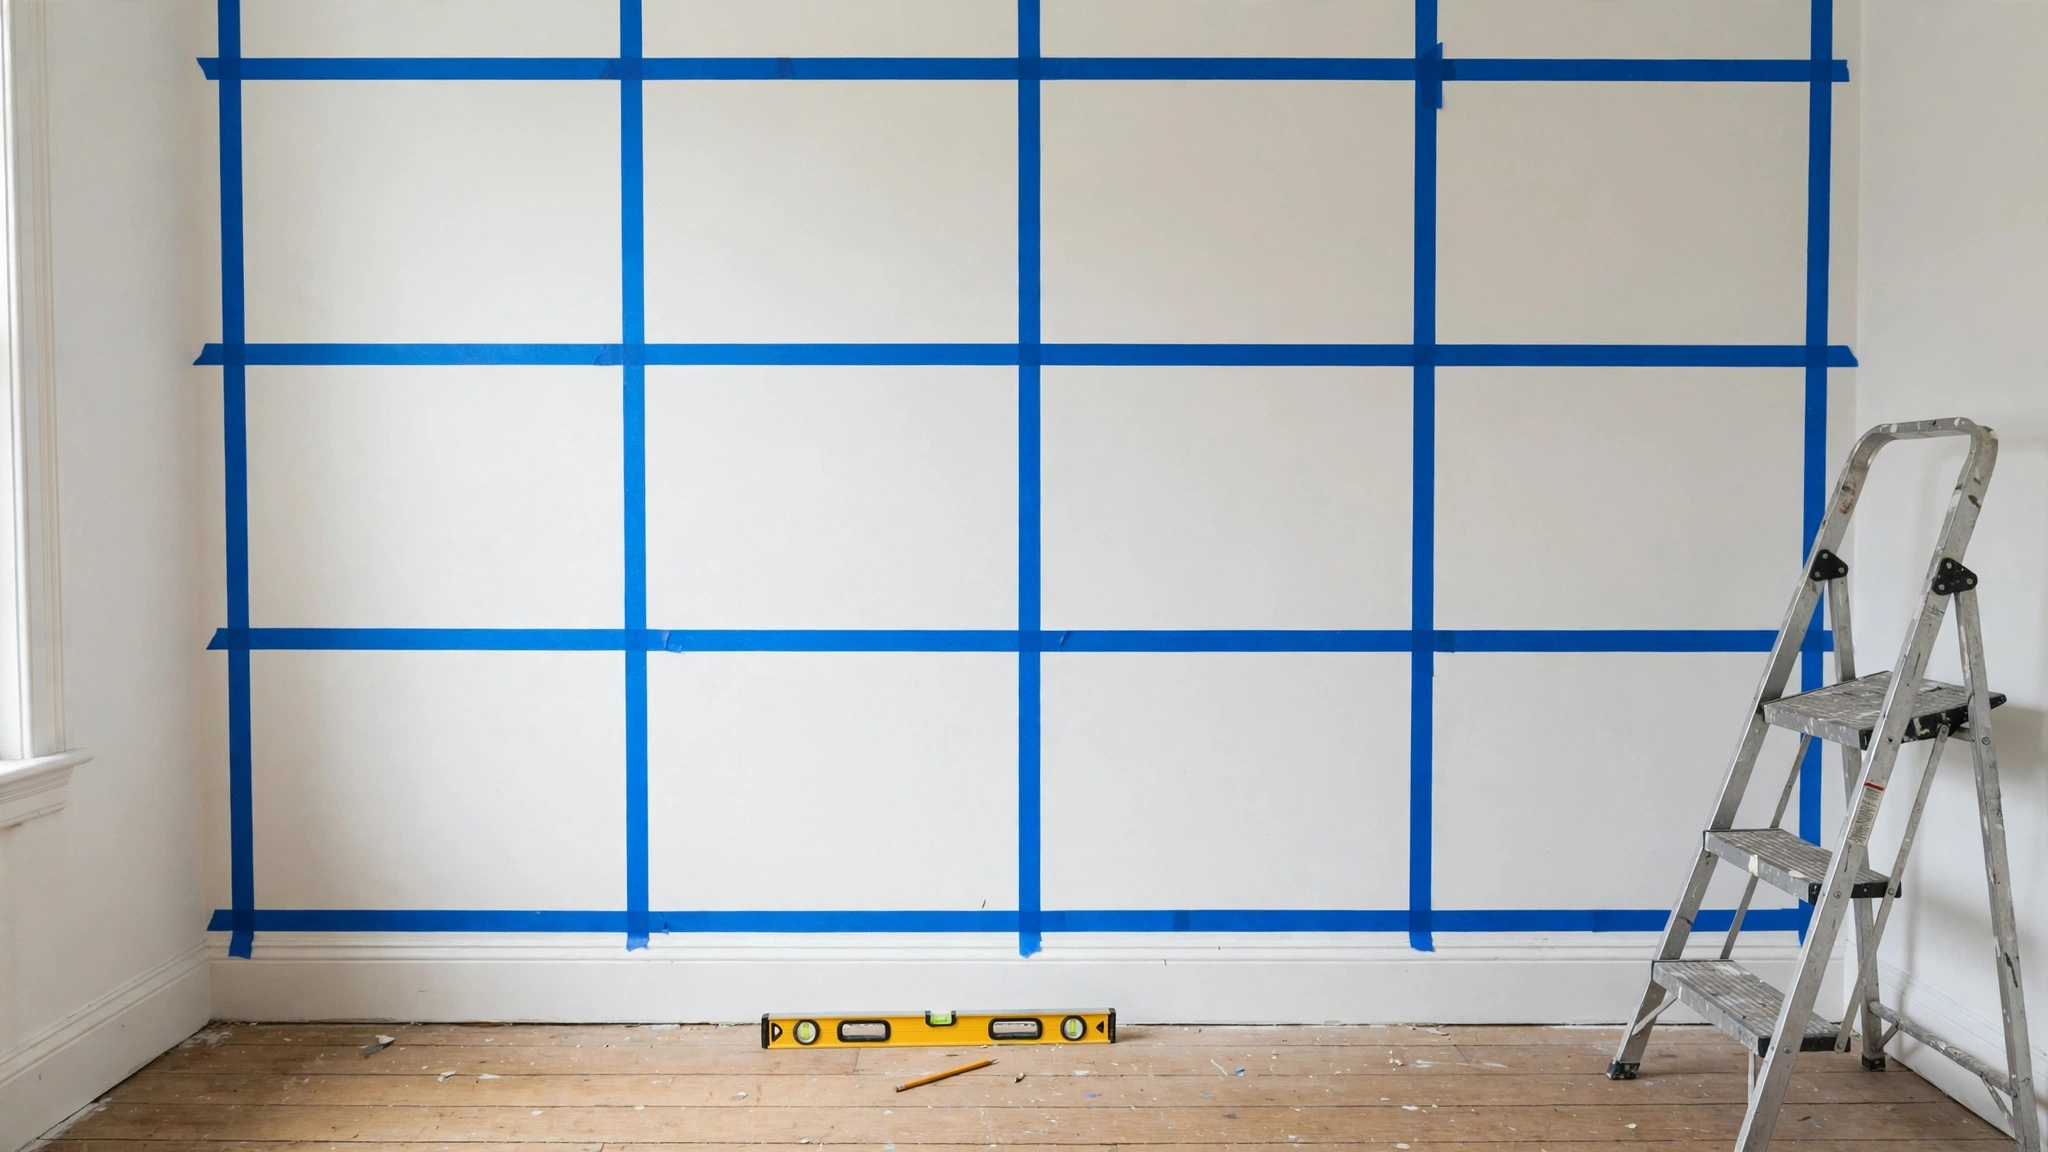
Now work out the spacing from the wall width, working backwards from how many boxes you want. My dining wall is 3.6 m wide. Six vertical battens at 9 cm use up 54 cm, leaving 306 cm to share between five boxes, so each box opening is 61 cm. Five verticals would have made four boxes of nearly 79 cm, too wide and lazy-looking. Openings somewhere between 55 and 75 cm tend to look right, and boxes that are roughly square look best of all, so let the height choose your rows too: my wall is 2.4 m, and two rows of boxes with a rail through the middle gave me near-squares top and bottom.
Walk the plan along the wall before you commit. A box edge that lands in the middle of a doorway, a window or a light switch looks like a mistake forever, so slide the whole grid a few centimetres rather than squeezing one box at the end. Mark where sockets and switches fall and plan a batten route that steps around them, never straight over one. Then tape the entire grid onto the wall with painter's tape, stand back, and live with it for a day. Tape is free to move. MDF is not.
What you will need
- Battens: MDF strips (mine are 9 cm x 12 mm) or pine boards if you prefer real wood edges
- Construction adhesive in a cartridge gun, plus panel pins or a pin/nail gun
- Wood filler and a flexible filling knife
- Decorator's caulk and a gun: two tubes for a full wall, you will use more than you think
- Primer (an MDF-friendly one) and your topcoat paint, eggshell or satin
- Tools: tape measure, long spirit level, stud and cable detector, saw and mitre box or a mitre saw, 120 and 180-grit sandpaper, painter's tape, pencil
- A dust mask for cutting and sanding MDF. The dust is fine and unpleasant; the mask is not optional
Step 1: Prep the wall and find out what is inside it
Take everything off the wall, fill old picture holes, wash off the greasy marks that hide above skirting level, and let it dry. Then run a stud and cable detector slowly over the whole wall and mark what it finds in pencil: studs where you would love a pin to land, and, more importantly, the cables and pipes you must not put a pin through. A pin through a cable is a very bad weekend. Mark the positions of sockets and switches on your plan as well, and keep battens a clear few centimetres away from them.
Decide about the skirting board now. If yours is tall and chunky, the battens can sit neatly on top of it and it reads as the bottom rail of the panelling. If it is thin and sad, the neater option is a bottom batten rail fixed just above it, wide enough to look deliberate. Either works. The only wrong answer is battens stopping dead at different heights because the skirting wandered, so check it with the level before you decide.
Step 2: Fix the top and bottom rails first
Rails set the whole geometry, so these two get fixed first and checked twice. Run a line of construction adhesive along the back of the bottom rail, press it into place above the skirting, level it, then pin it, aiming for studs where the wall gives you the chance. Do the same with the top rail, either hard under the ceiling or, for the two-thirds look, at your chosen height with a capping piece on top later. If the ceiling waves, and they all wave, follow the ceiling line with the top rail rather than your level. A small, even shadow gap looks fine; a rail that fights the ceiling line draws the eye straight to the fight.
Step 3: Verticals next, measured one at a time
Here is the thing nobody warns you about: the distance between your two rails will not be the same measurement twice. Floors slope, ceilings dip, and a vertical cut to the first measurement will be 4 mm short at the other end of the wall, with a gap glaring at the top. So measure every single vertical in its own spot, mark it, cut it, and offer it up before the glue comes out. It feels slow. It is still much faster than filling a row of gaps.
Glue and pin each vertical, checking it against the level as you go. A spacer helps more than your eye does: cut one offcut to your exact box width, hold it against the last vertical, and butt the next one up to it. Work down the wall and every box comes out identical, even at 6pm on a Saturday when your measuring has gone a bit optimistic.
Step 4: The horizontal rails
With the verticals up, the middle rails are short pieces cut to fit between them, and the same rule applies: measure each gap separately, because the verticals are never perfectly parallel. One rail across the middle gives you the classic two-row grid. Two rails, dividing the height into thirds, suit very tall rooms. Level each piece before the adhesive grabs, and wipe any squeezed-out glue straight away with a damp cloth, because dried adhesive shows through paint as a shiny ghost.
Step 5: Fill, then caulk every single seam
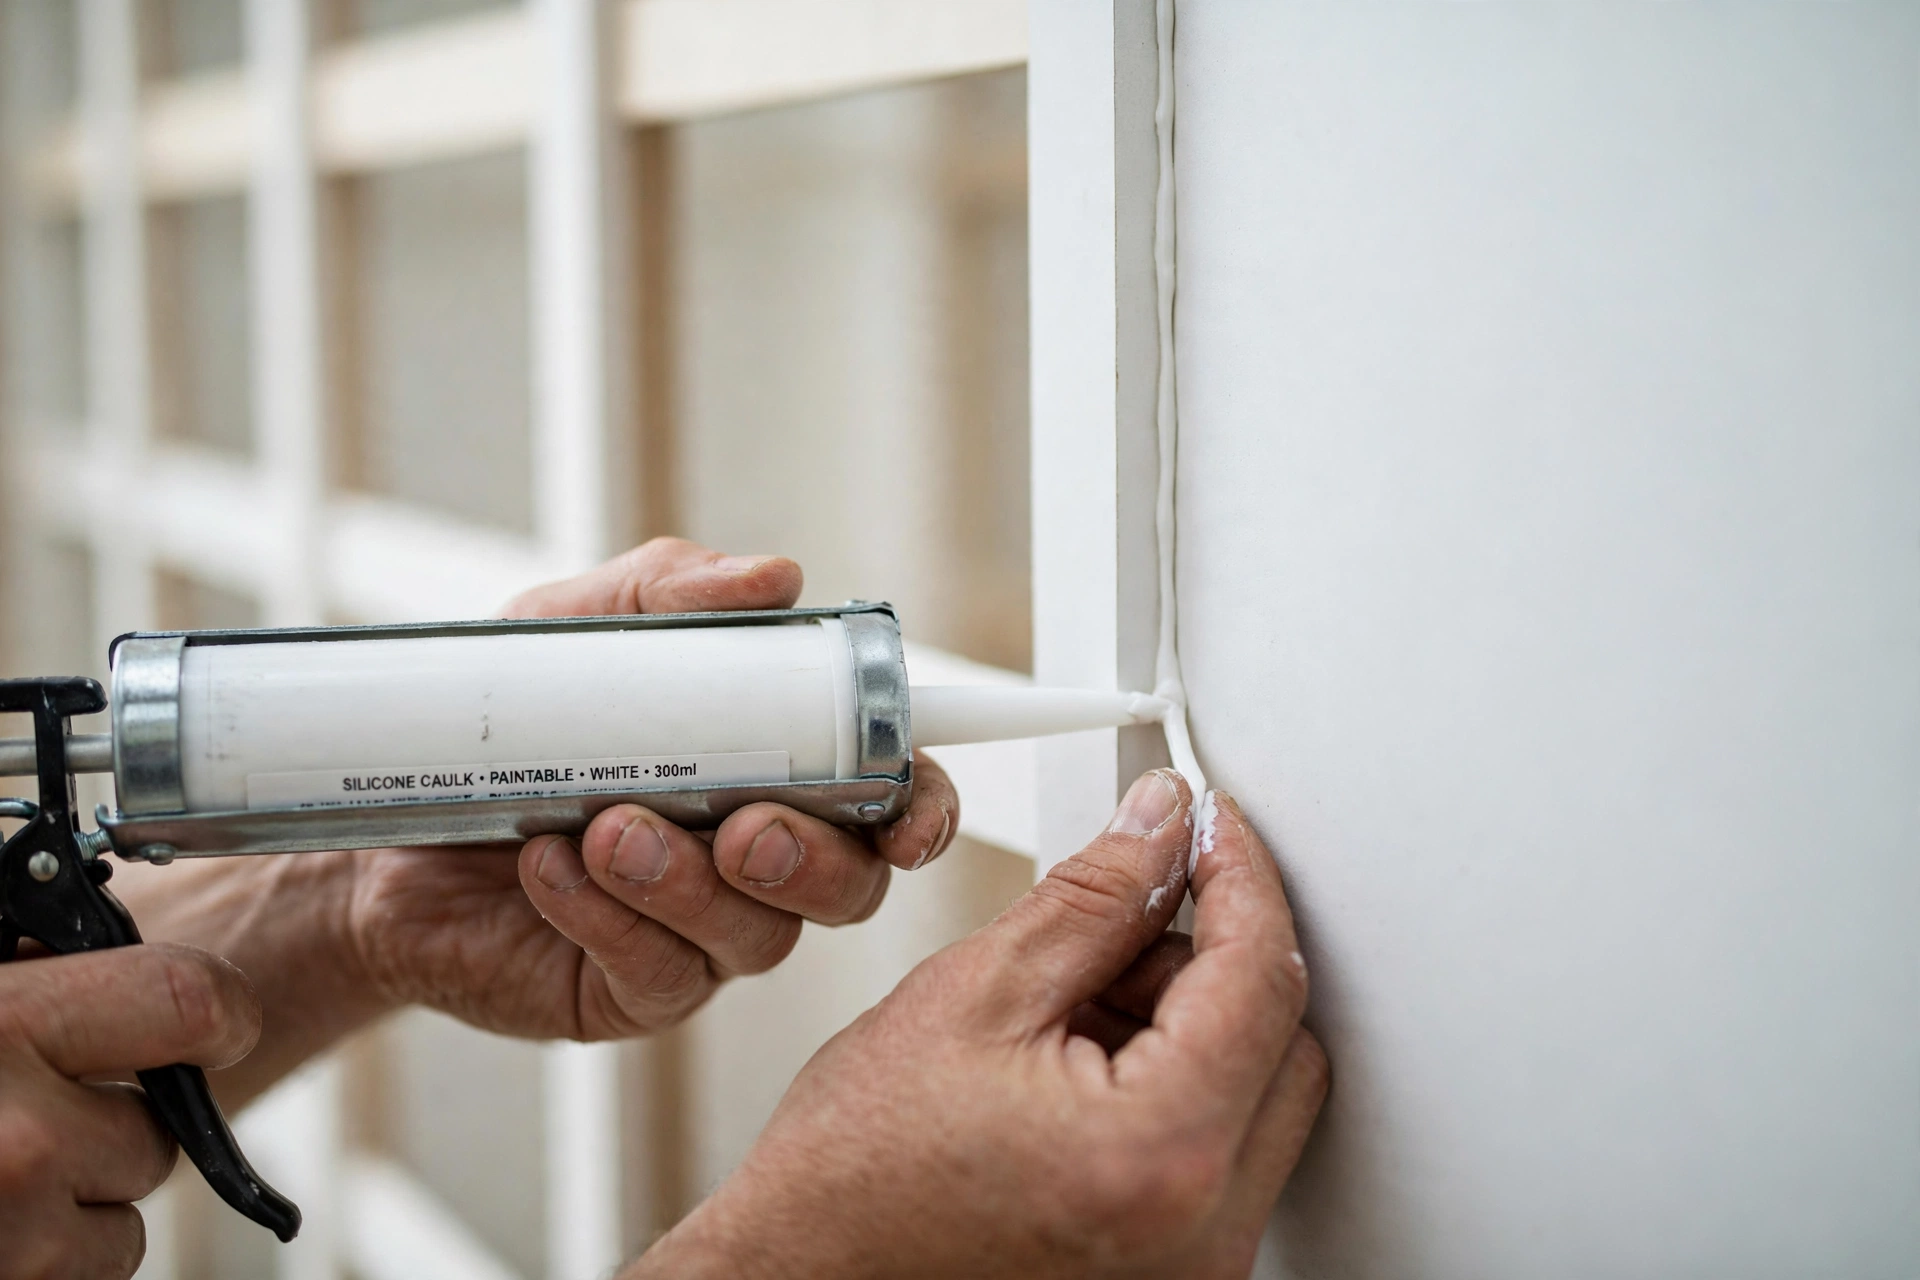
Fill every pin hole and every joint with wood filler, slightly proud of the surface, and let it dry properly before you sand it back. Then comes the step that makes the whole project: caulk. Run a thin bead of decorator's caulk along every seam where a batten meets the wall, and along the inside edges of every joint, then smooth it with a damp finger and wipe the excess away.
Why it matters: without caulk, every batten casts a hairline shadow that tells the truth, that strips were stuck on a wall. With the seams closed, light runs across the grid as one surface and the wall genuinely reads as built joinery. It is an hour of boring, fiddly work and it is worth more than the paint, the colour and the battens combined. If you only take one sentence from this whole post, take that one.
Step 6: Prime like you mean it, then two coats
MDF has a split personality. The flat faces are smooth and easy, but the cut edges are raw, thirsty fibre that will drink your paint and stay dull and fuzzy through three coats if you let them. So prime everything, and give every edge a second pass of primer while you are there. When it dries, sand lightly with 180-grit, edges included, and wipe the dust off with a slightly damp cloth.
Then paint the whole wall, panels and battens together, in your topcoat. Two coats, a small roller for the flat panels and a brush worked into the corners of each box. Painting the inside of the boxes the same colour and finish as the battens is what keeps the illusion whole. The moment the wall inside a box is a different sheen to the grid around it, the trick falls apart.
Two safety notes before you start: run that cable and pipe detector over the wall before the first pin goes in, not after, and wear a proper dust mask for every cut and every sanding pass on MDF. The project is beginner-friendly; those two habits keep it that way.
Colour and height: the two choices that change everything
For a calm, architectural look, paint the grid the same colour as the rest of the room and let the shadows do the talking. This is the version that suits bedrooms and hallways, and it is forgiving if your filling is not flawless. For drama, do what I did in the dining room: one deep colour over the whole feature wall, grid and all. Ink blues, deep greens and near-blacks all hold the shadows of the grid beautifully, and the wall becomes the room.
Height is the other fork in the road. Full height is the modern look and the one in my photos. The two-thirds version, grid up to about picture-rail height with a chunky ledge or capping rail on top and plain wall above, is the classic one: it is a little less work, it keeps high ceilings feeling human, and the ledge becomes a home for leaning prints and small plants. Both are honest choices. The only one I would talk you out of is stopping the grid at a random height with no capping, because an unfinished top edge reads as a project that ran out of weekend.
An honest word for renters
I get asked this a lot, so plainly: this is a committed project. The battens are glued and pinned, which means a wall full of holes and adhesive marks if they ever come off, and making that good again is a full fill, sand and repaint of the wall. If you rent, this is one to save for a landlord who says yes in writing, or for the home that is actually yours. There are good renter-friendly wall ideas on this blog, and I will not pretend this is one of them.
The mistakes I made so you do not have to
Guessing the spacing by eye. My first hallway attempt, years ago, had boxes sized by optimism. By the last box the grid had quietly shrunk 9 cm, and my eye found it every single time I walked past. Do the maths, cut a spacer, trust neither.
Skipping the caulk on one short section because the tube ran out and the shop was closed. That section announced itself every morning in raking light for a year. Caulk is the project. Buy the extra tube.
Fixing battens over a wavy wall without dealing with the wave. A batten is straight and the wall is not, so you get crescent gaps behind it. Thick gaps take two passes of caulk, and a really wavy stretch needs the batten packed out or gently scribed to the wall's shape. Ten minutes with a pencil line saves an hour of caulking.
Painting before the filler was finished. Unfilled pin holes do not hide under paint; paint outlines them. Every hole, filled and sanded, before the primer comes out. No exceptions and no "the paint will cover it", because it will not.
Questions I get asked about board and batten
What does one wall actually cost?
Less than you would guess, because MDF strips are about the cheapest trim in the shop. On my 3.6 m dining wall the battens cost less than the paint and primer that covered them, and the filler and caulk were small change on top. The real budget line is your time: one weekend, most of it drying time.
Can I do board and batten on a textured wall?
Yes, with the board part switched back on. Fix a thin sheet of MDF over the texture first, then batten onto that. Battens alone over a heavy texture look wavy, because every bump telegraphs through the grid, and no amount of caulk fully rescues it.
MDF or real pine battens?
MDF is cheaper, dead flat and has no knots, which is why I reach for it, but its edges need that thorough priming and its dust needs a mask. Pine costs more, can warp if you pick boards carelessly in the shop, but the edges paint up beautifully and cutting it is pleasanter. Either makes a good wall; buy the straightest boards on the rack whatever you choose.
How long does it really take?
A clear weekend for one wall. Saturday: plan, tape, cut and fix the grid, then fill. Sunday: sand, caulk, prime and two coats with drying breaks in between. The wall is dry to live with by Monday; give the paint a week before you lean anything heavy against it.
One wall, one weekend, and a room that suddenly looks like somebody thought about it. If you build one, tell me in the comments which wall you picked and what colour you landed on. The dining room votes in this house are currently tied between deep green for the hallway next, and leaving well alone.
Lisa Ben
Lisa paints, builds, thrifts and rearranges her way through one very patient house, then writes down everything she learns here on Wazala. Wall panelling is her favourite weekend argument. New projects land every Tuesday, Thursday and Saturday, and the Sunday Letter rounds them up once a week.
You might also like
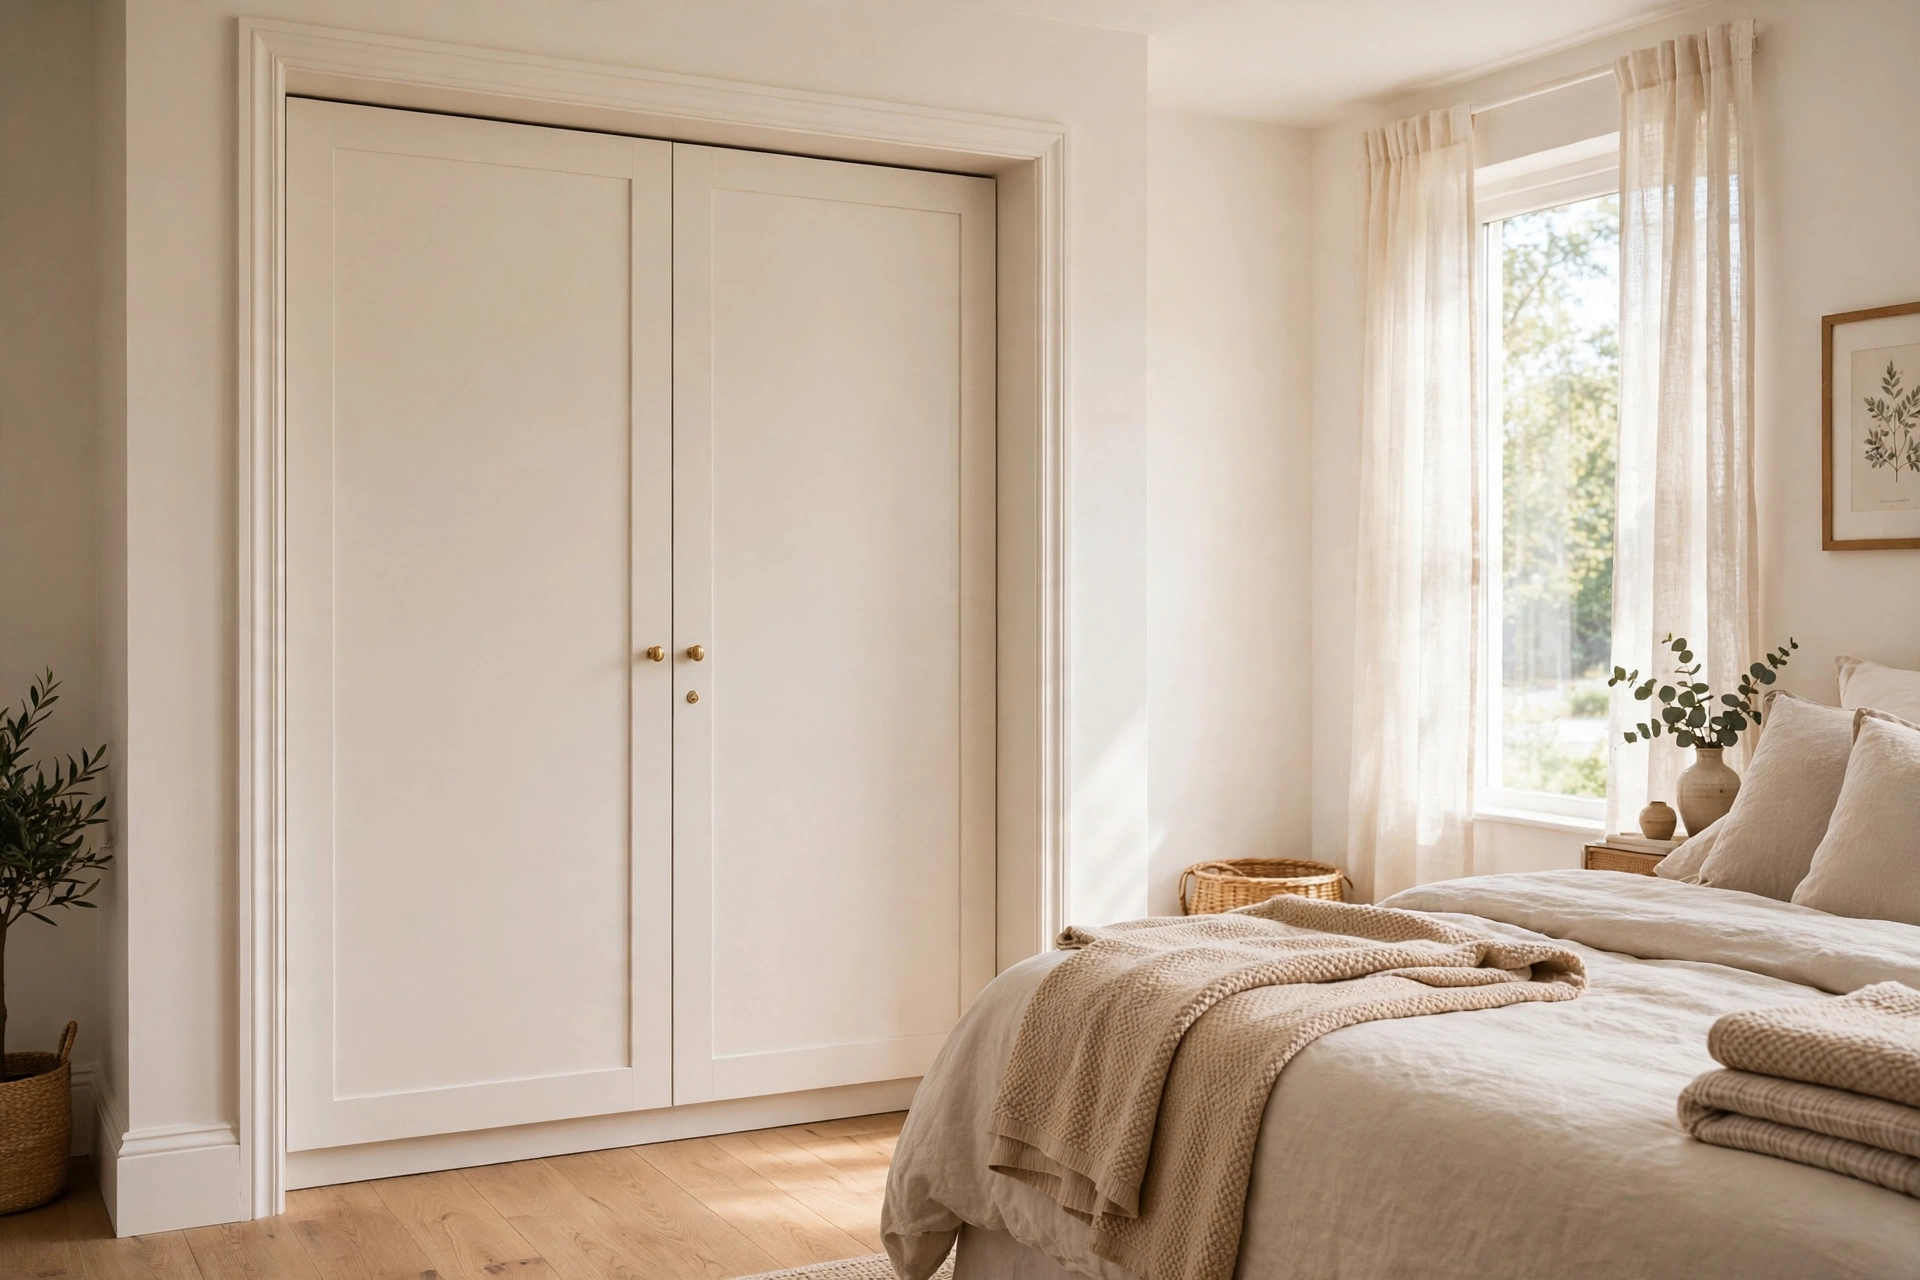
How I Made A Flat-Pack Wardrobe Look Built-In
The other project where trim, filler and paint convince everyone a joiner was involved.
Read more →
How To Paint Kitchen Cabinets And Have The Finish Last
The full cabinet process: degreasing, priming, and the drying times nobody tells you.
Read more →
The 12 Best White Paint Colours For Every Light Direction
Twelve whites that actually work, sorted by the light your room gets.
Read more →